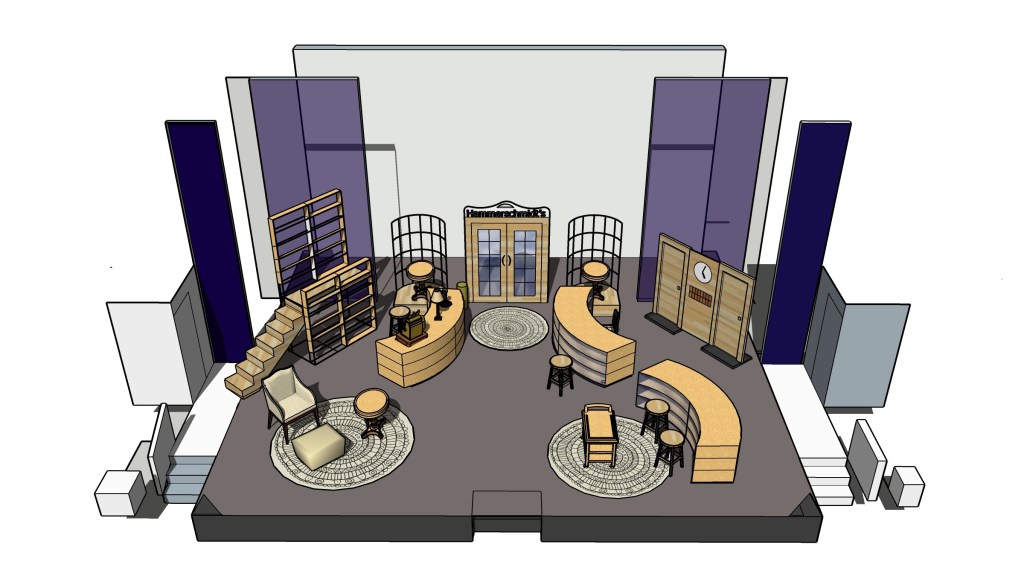
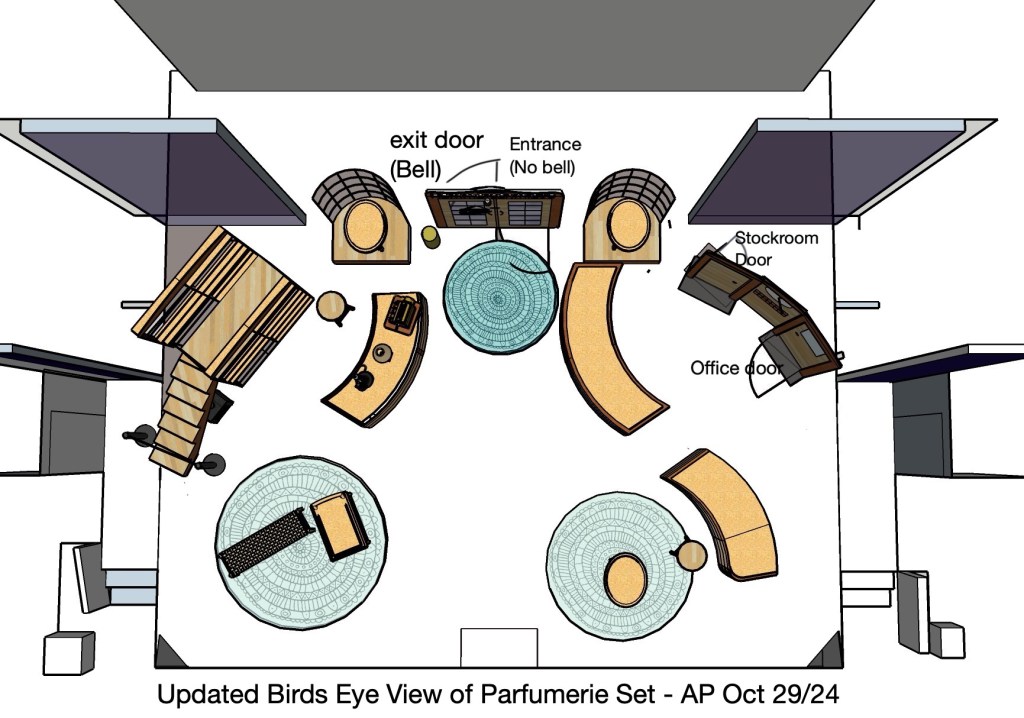
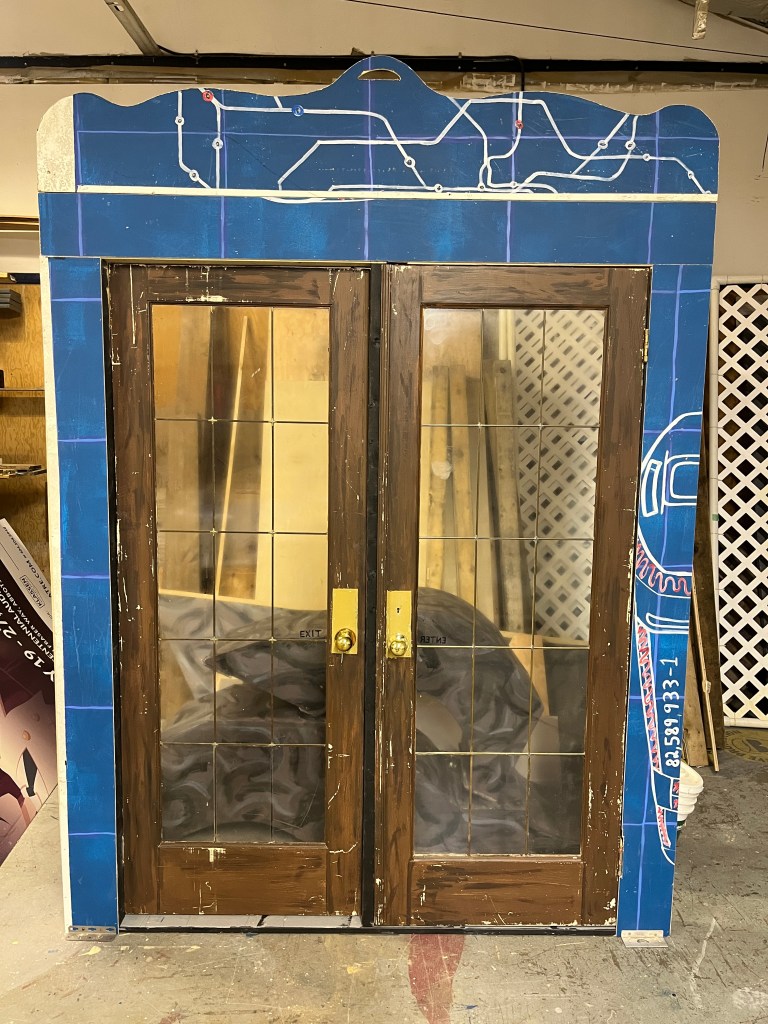
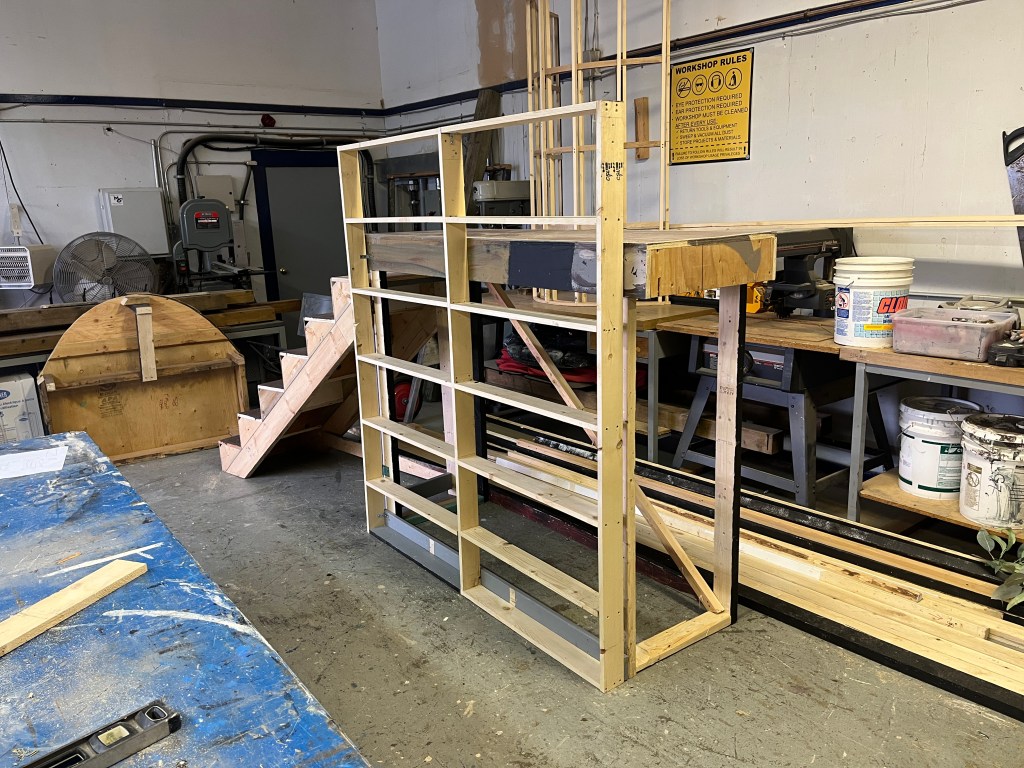
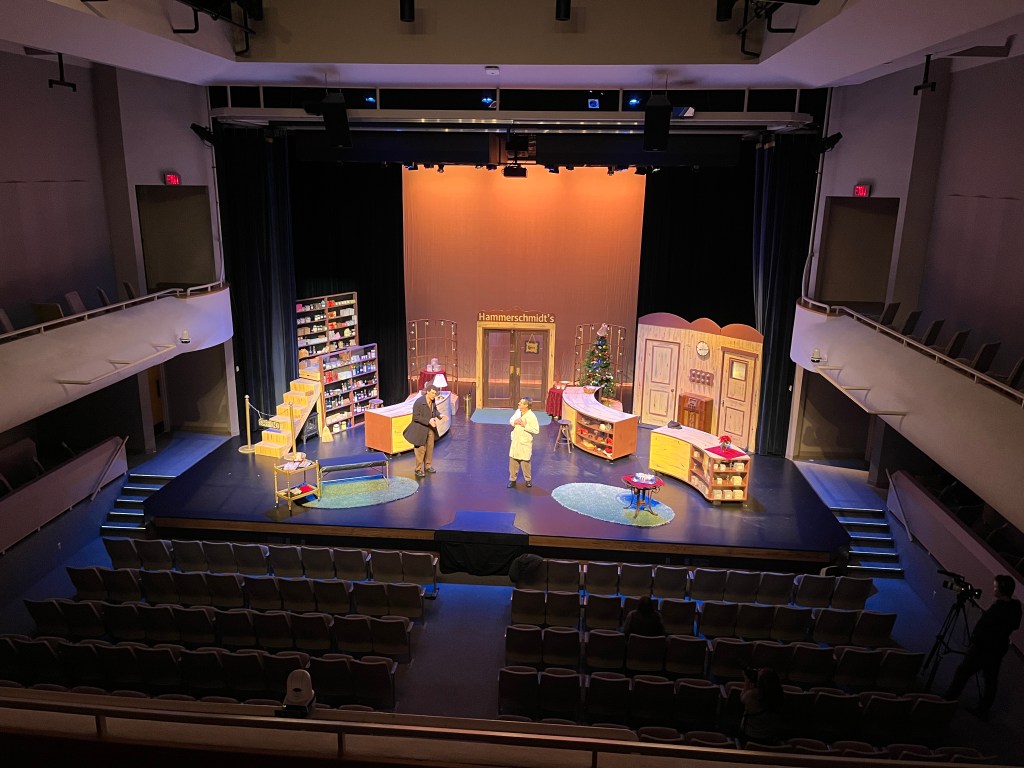
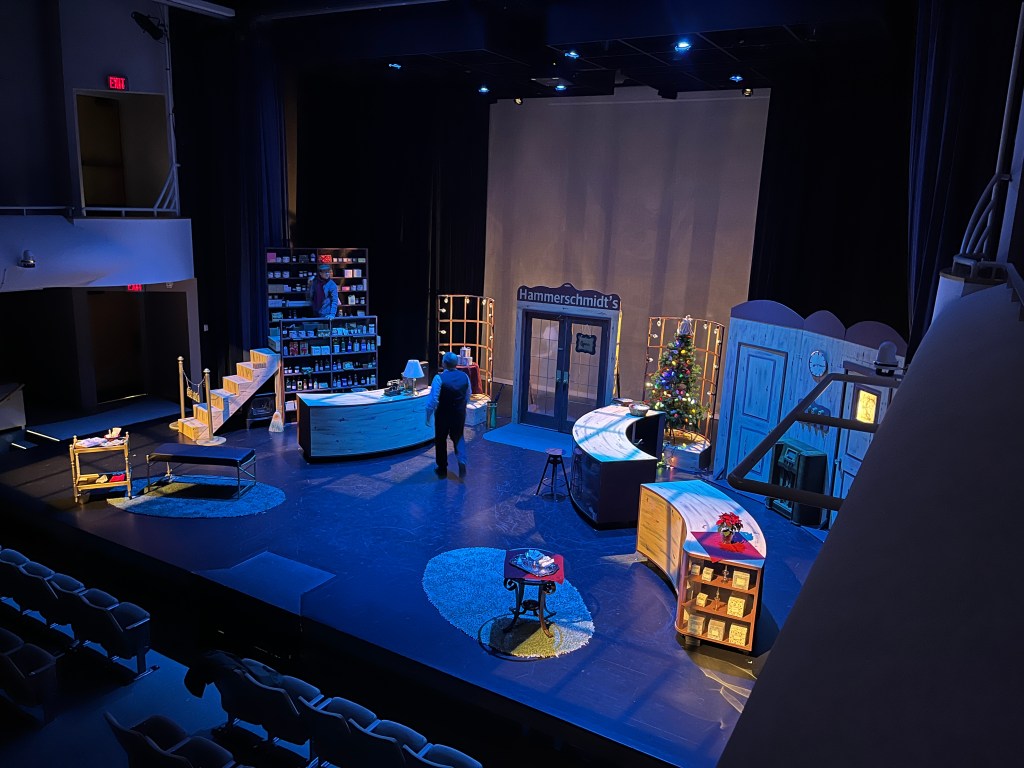
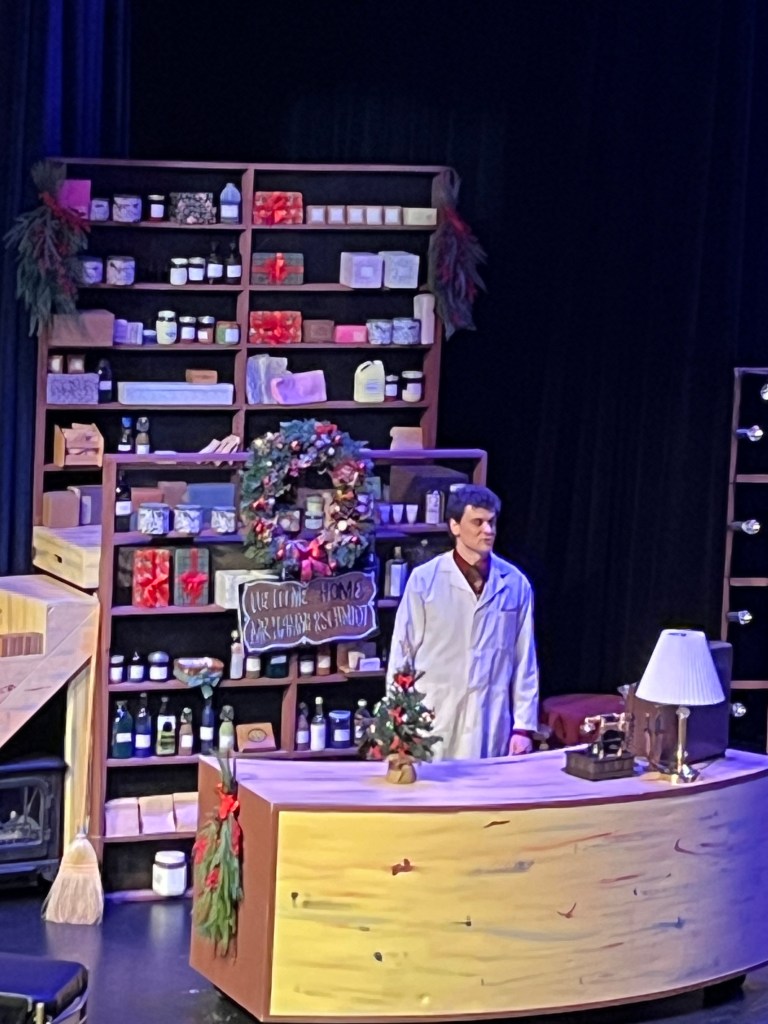
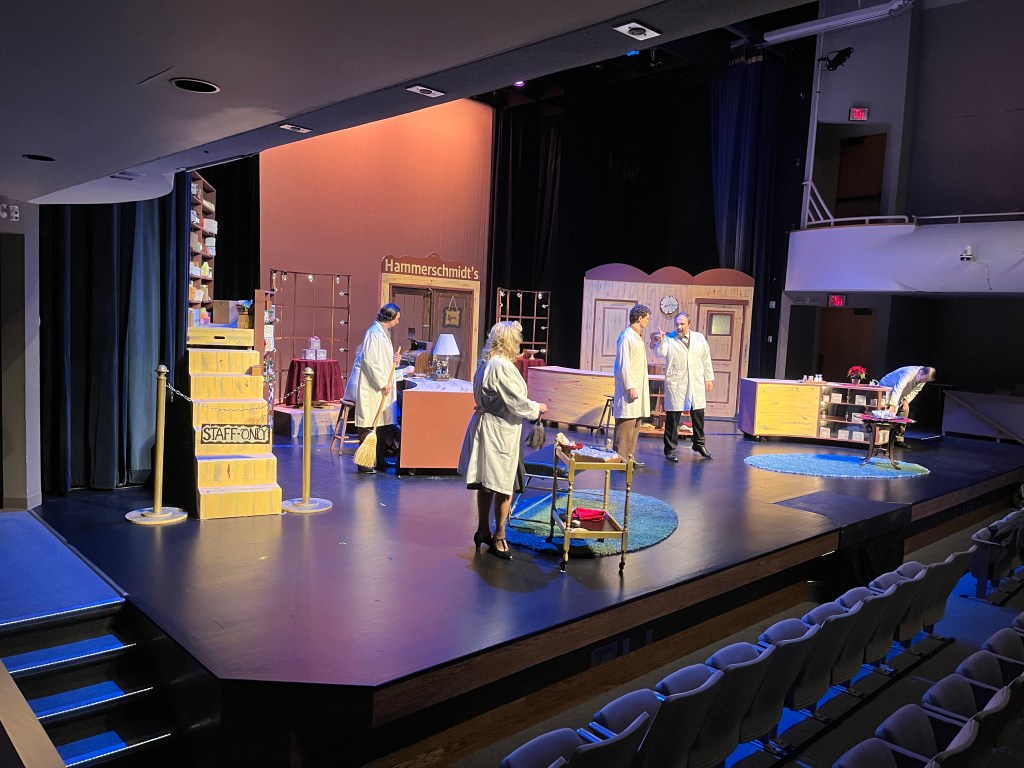
Parfumerie is playing at MCA (Gallery 7) until the end of this week. Here are some design, build, and set shots.
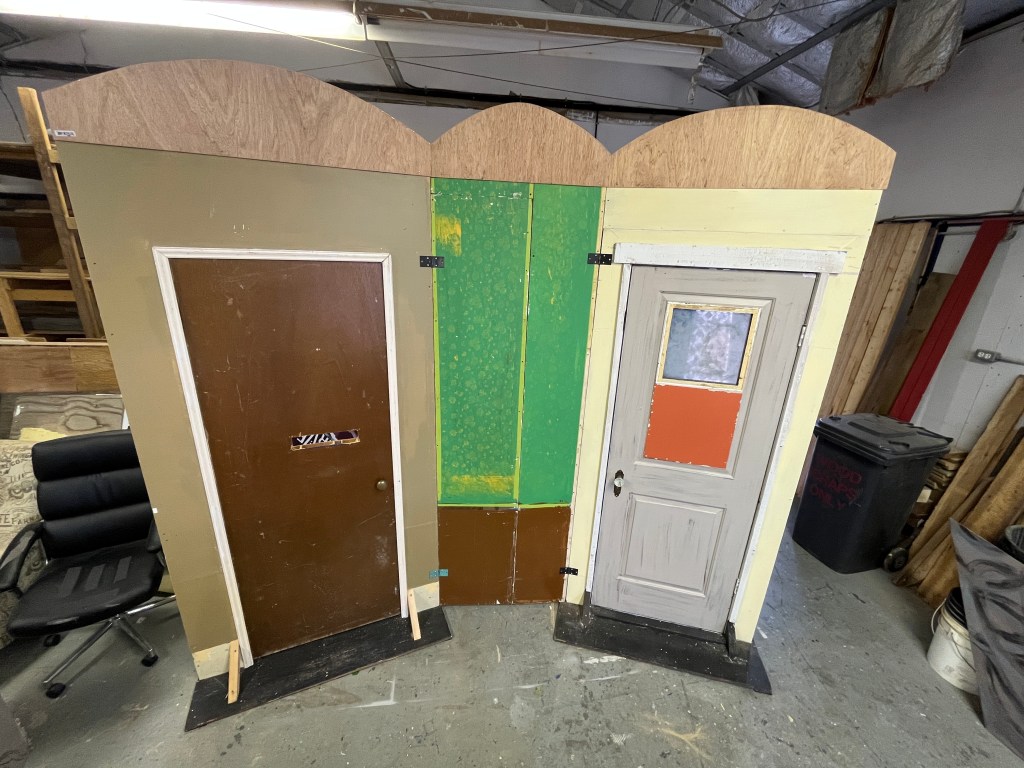
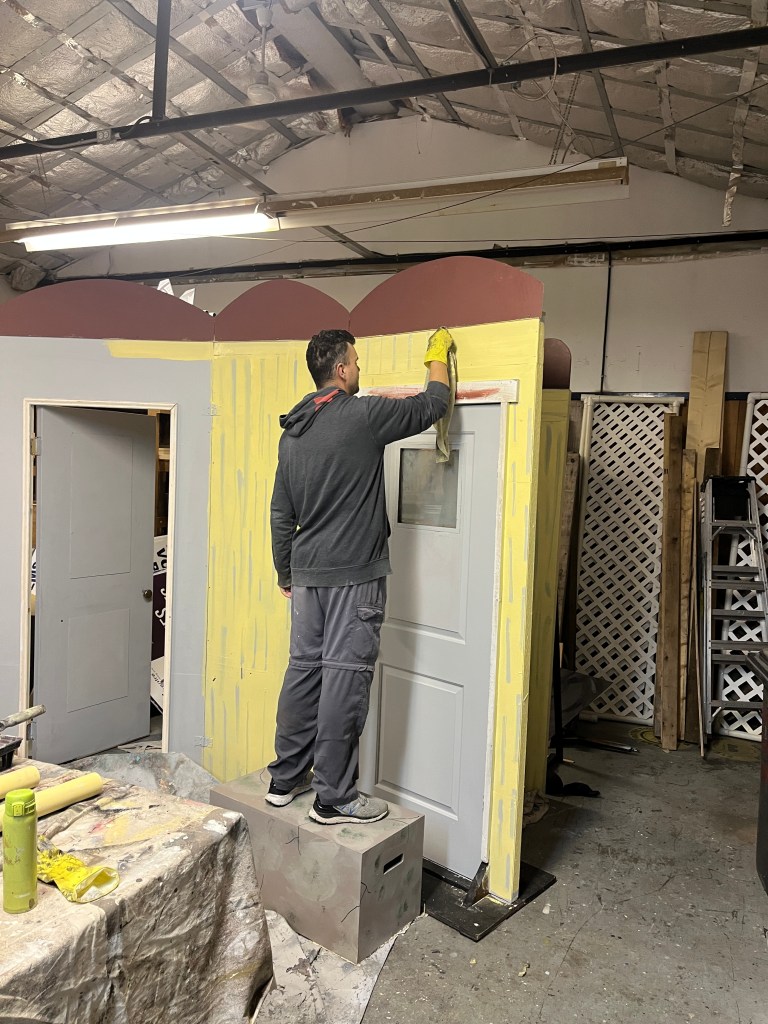
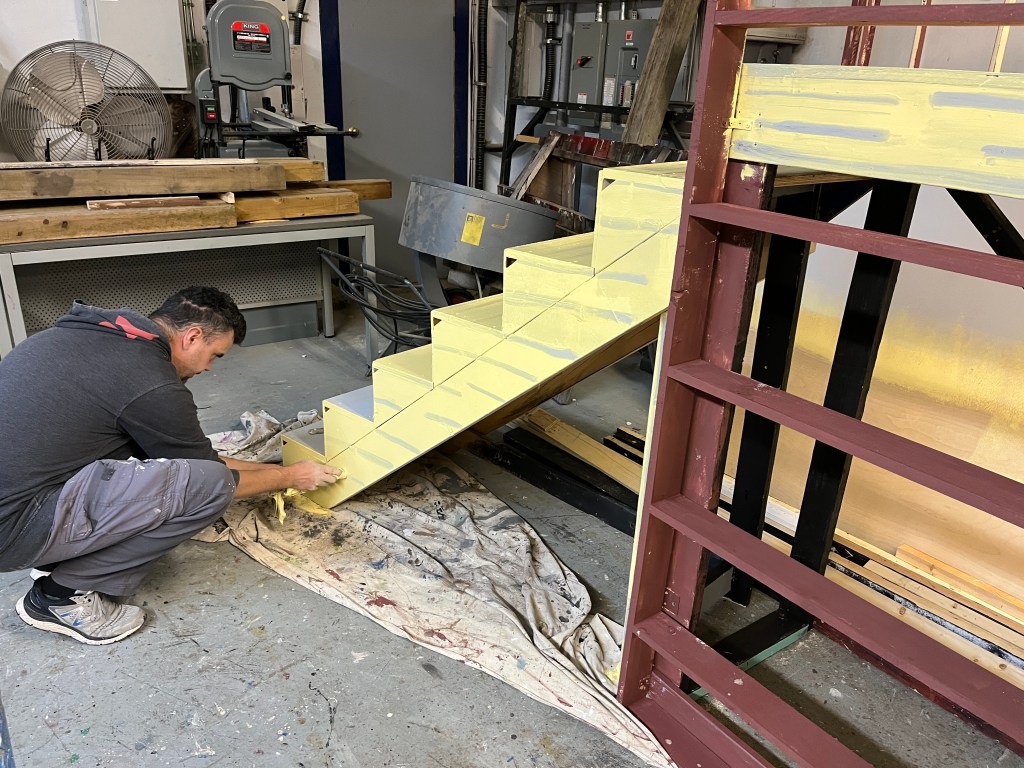
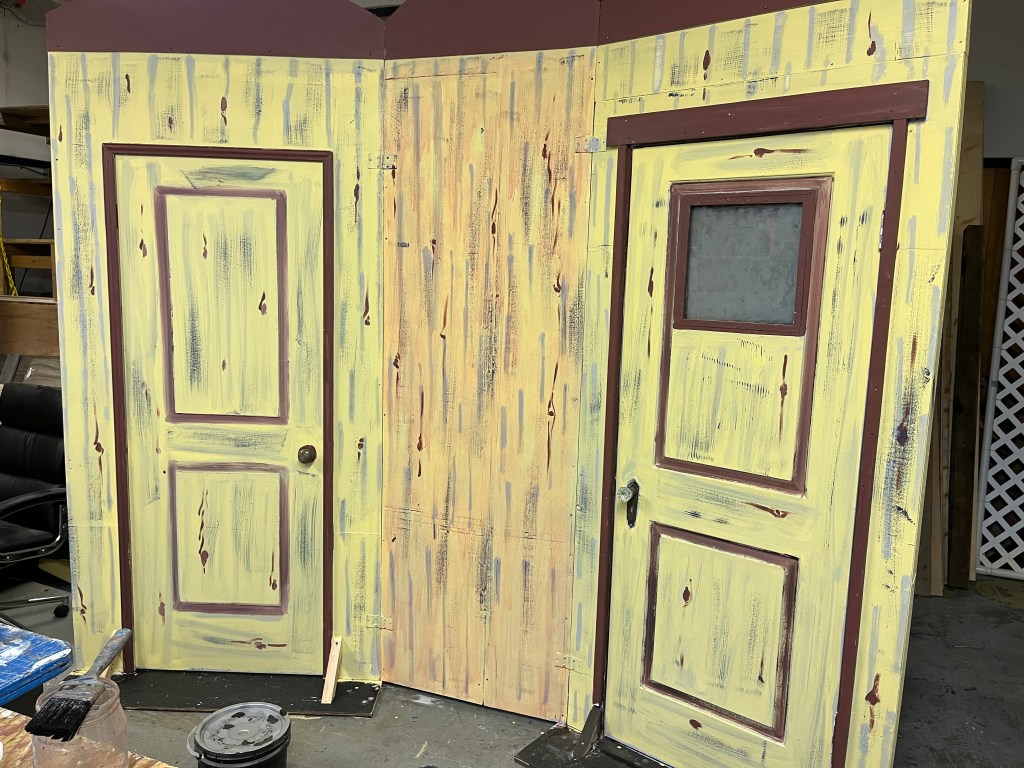
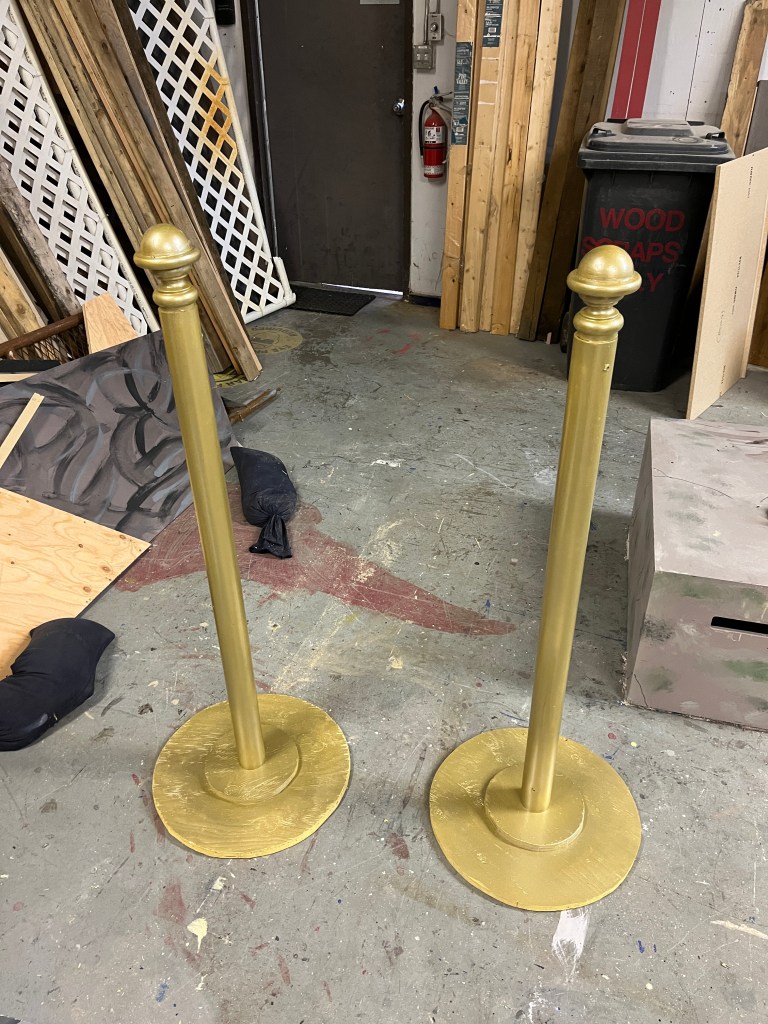
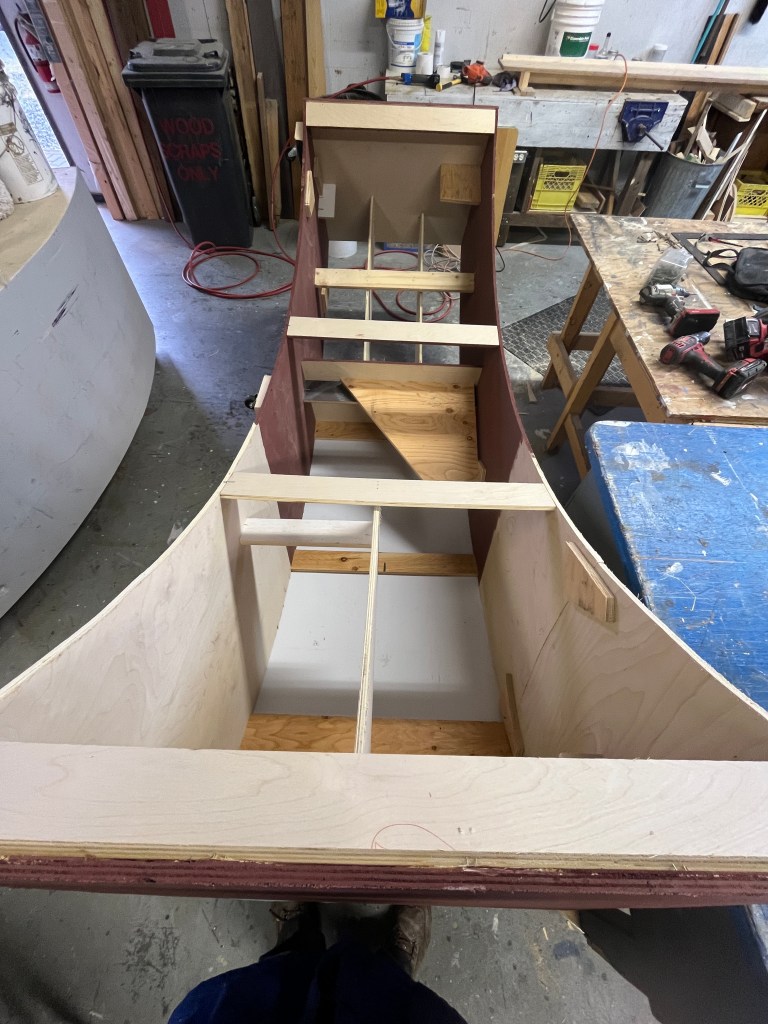
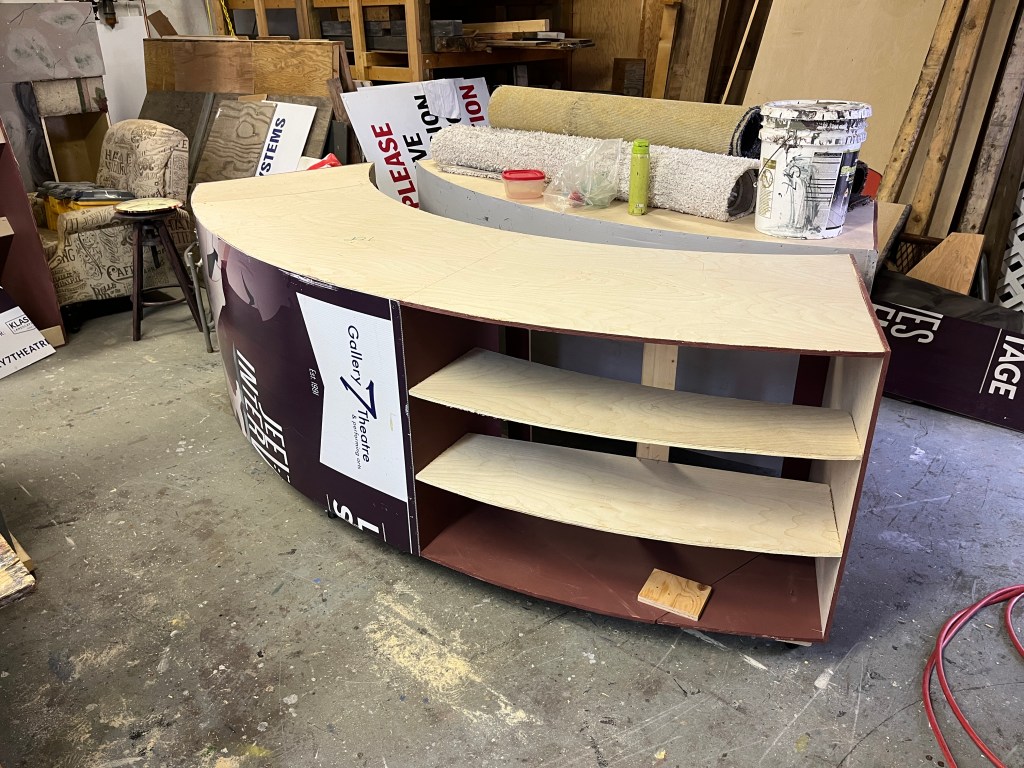
Set was made to be quite modular as it had to be struck twice during our rehearsal/run.
(Directed by Sarah Green, Lighting by Gabe Kirkley, Props by Madison Willoughby, Costumes by Des Hale)
Design
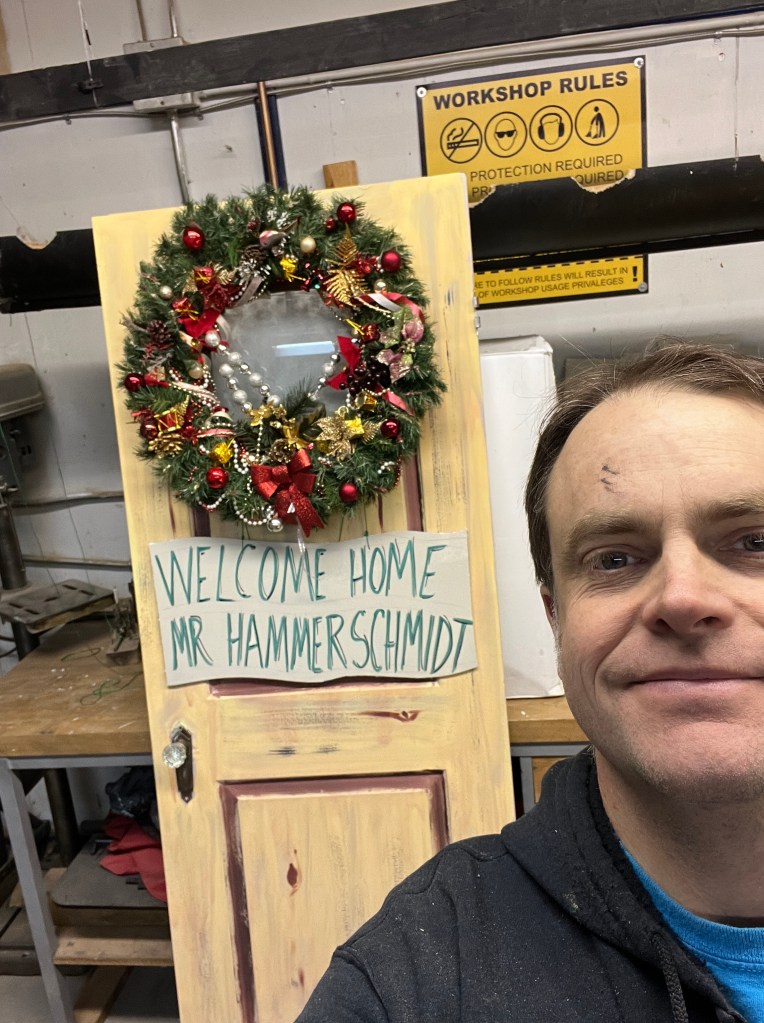
Feels like a Hallmark movie…
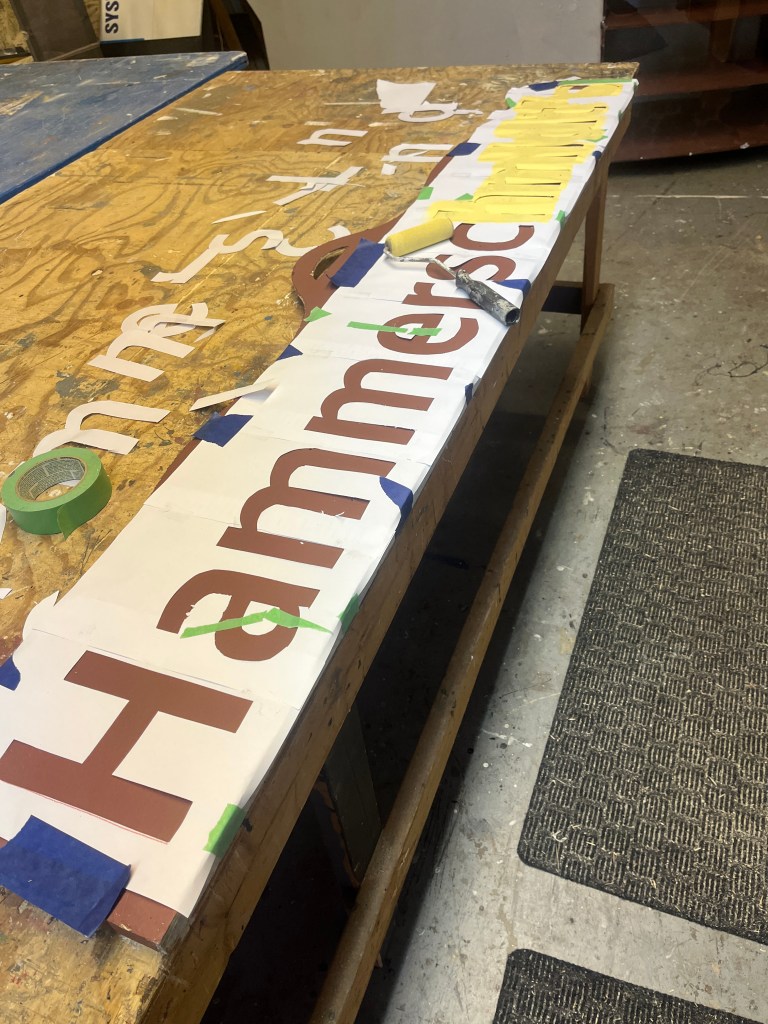
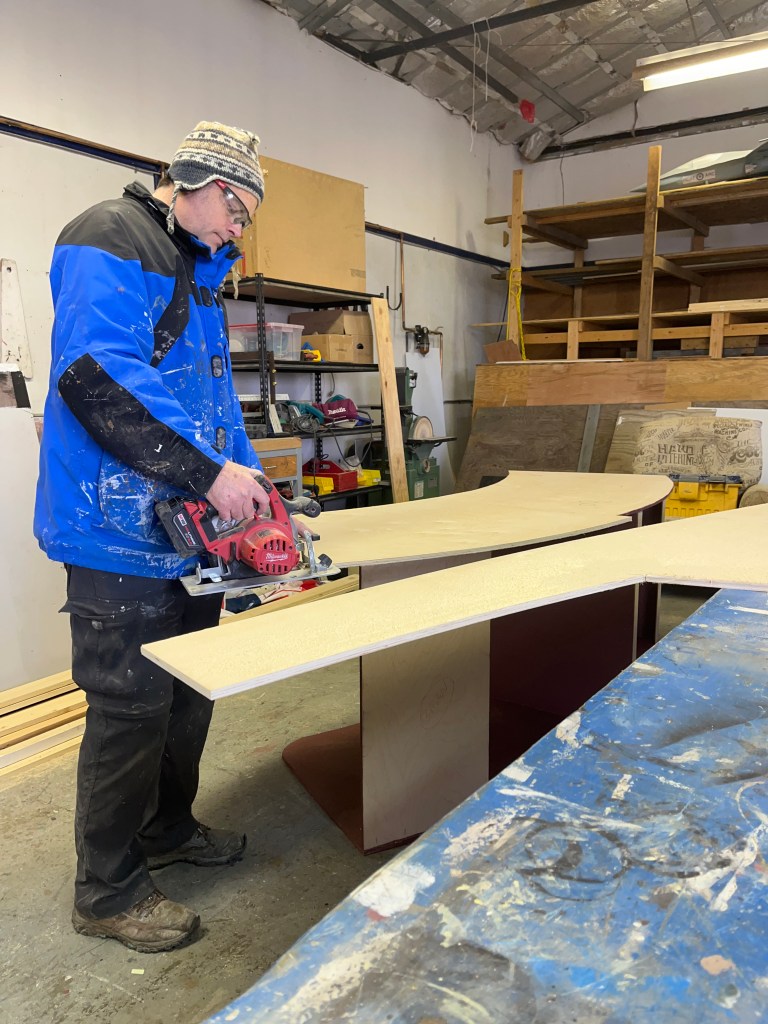
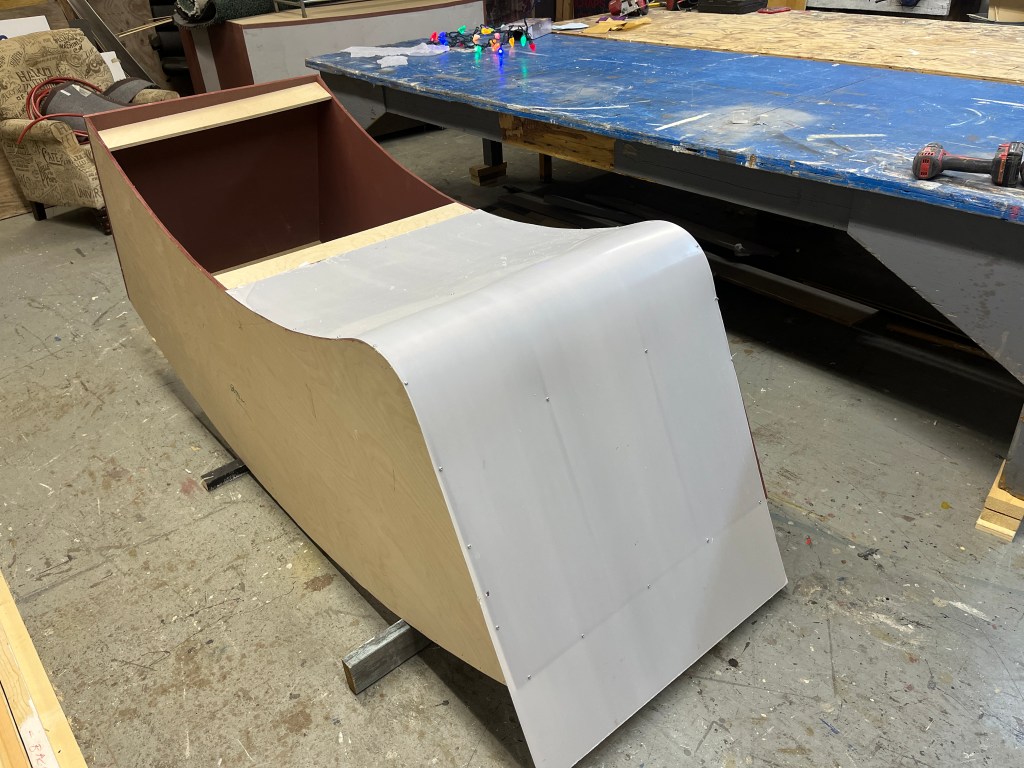
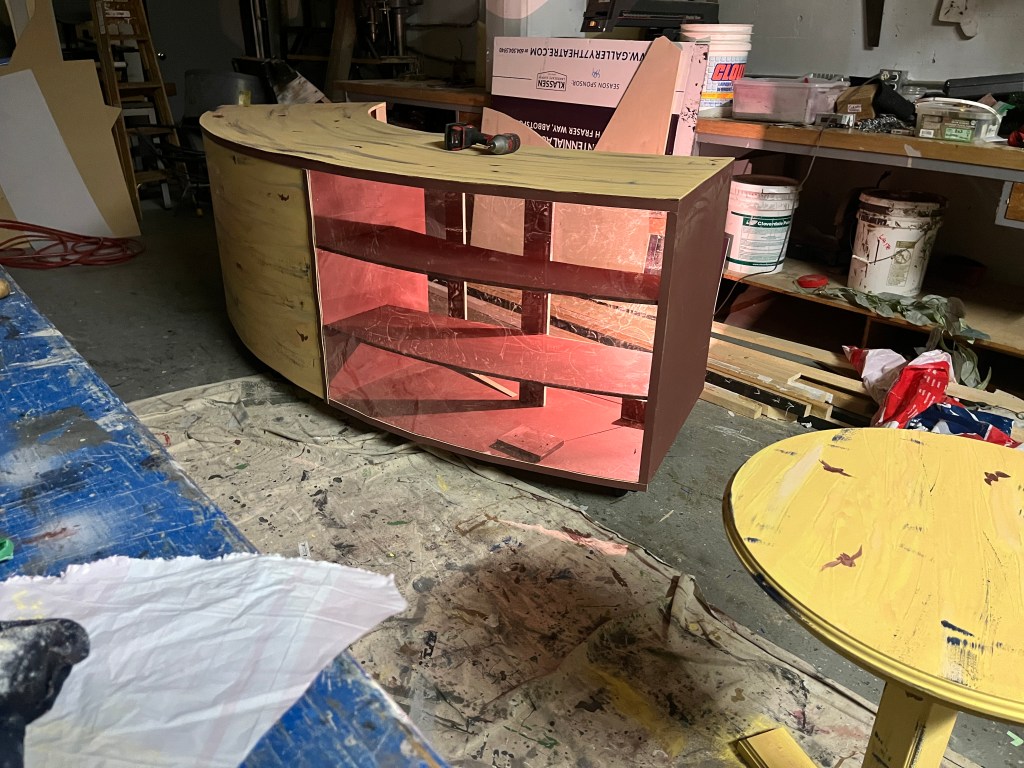
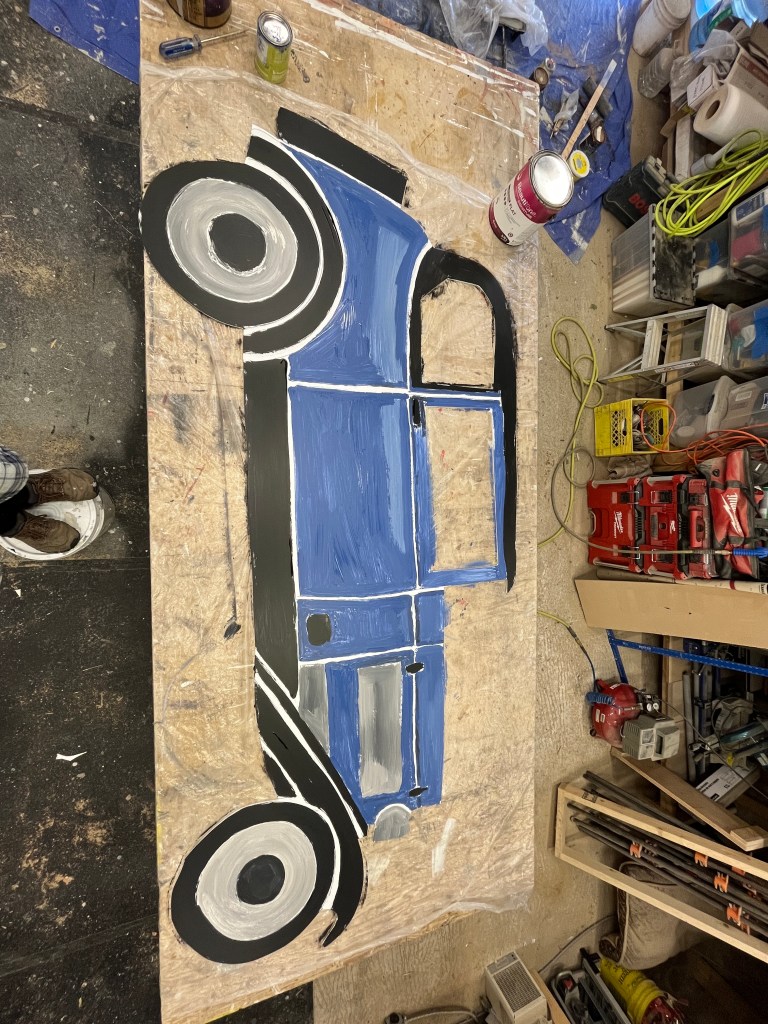
Build. Quite a custom piece with a few stock parts. Had quite a bit of help from several volunteers.
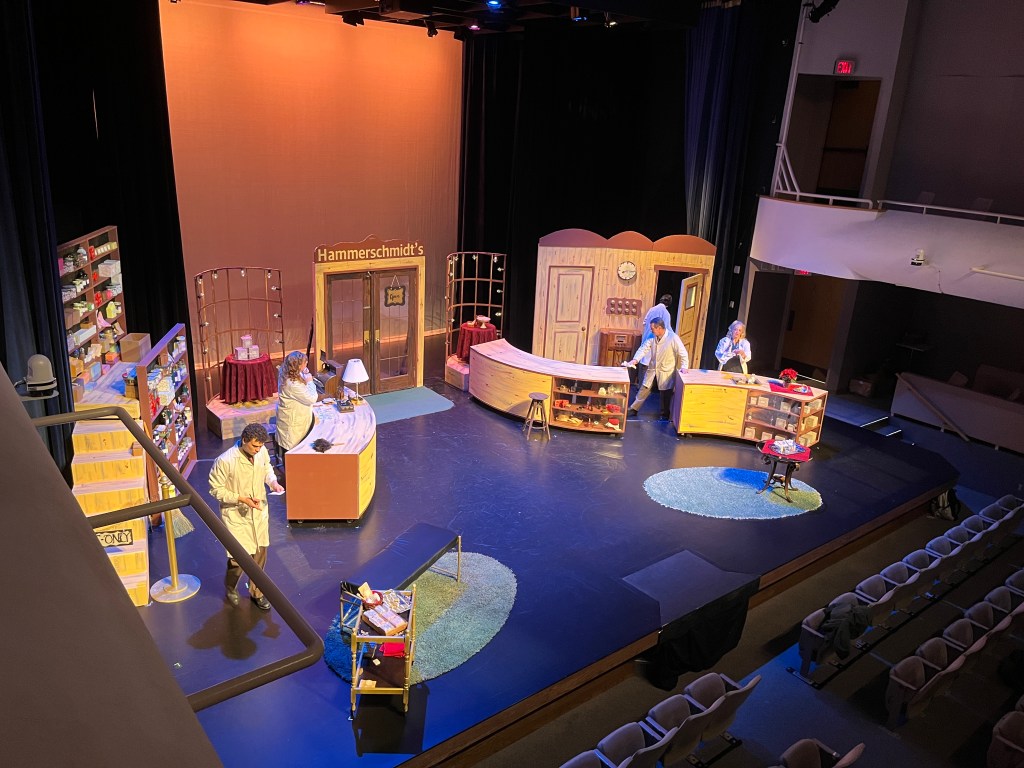
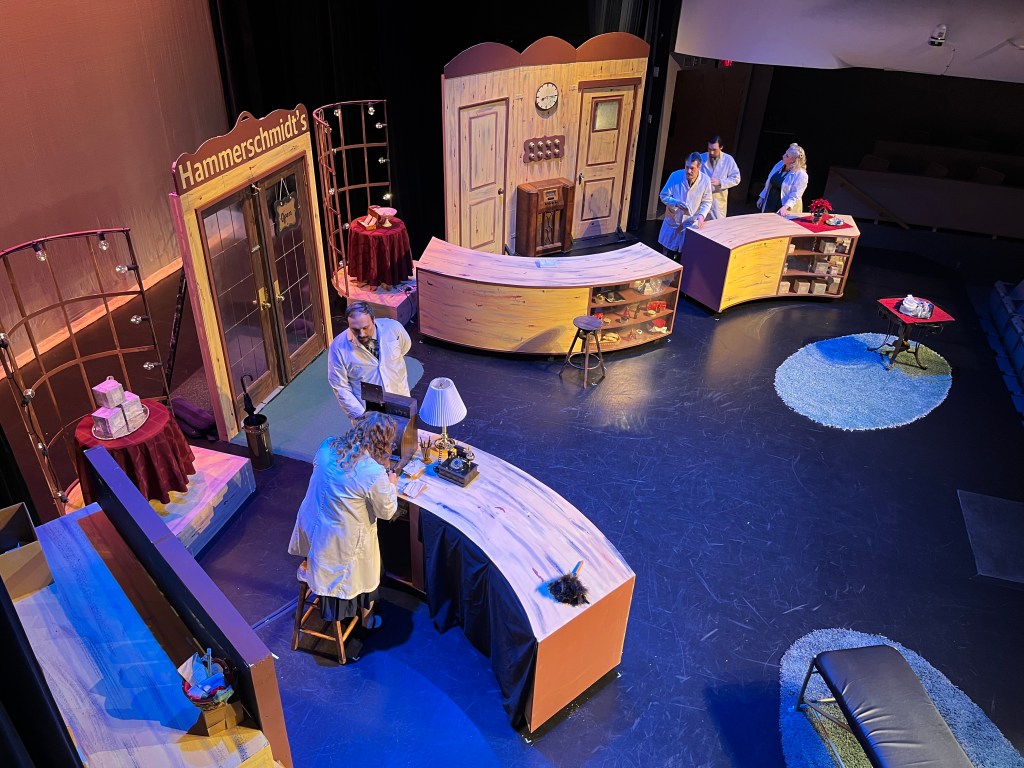
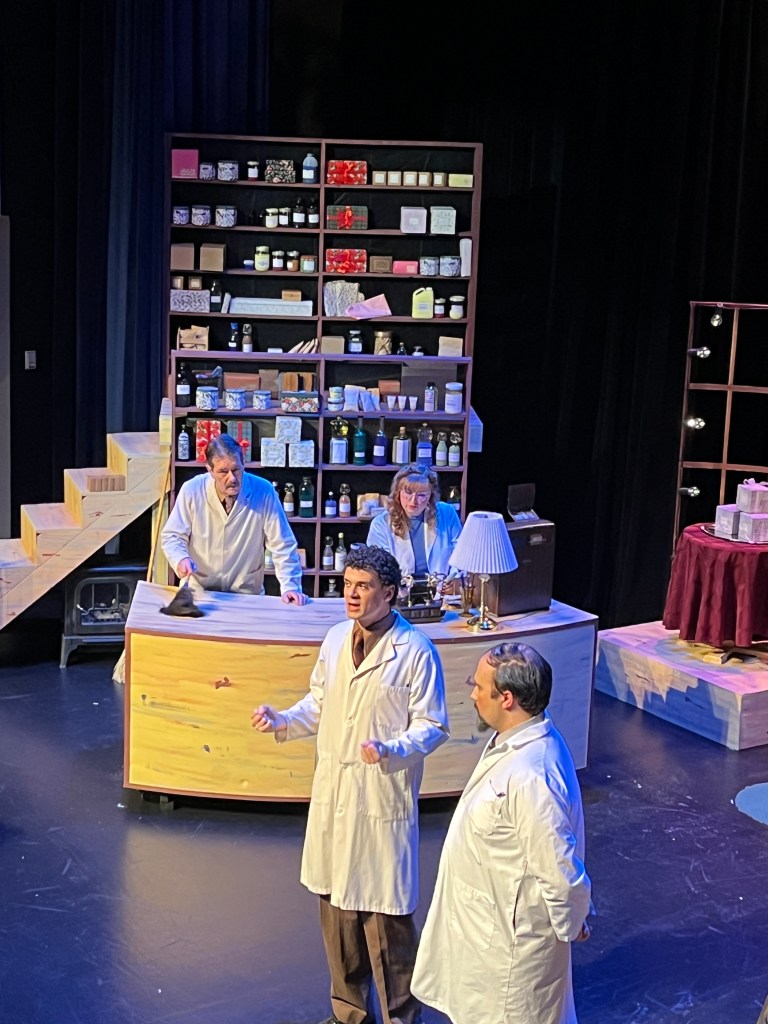
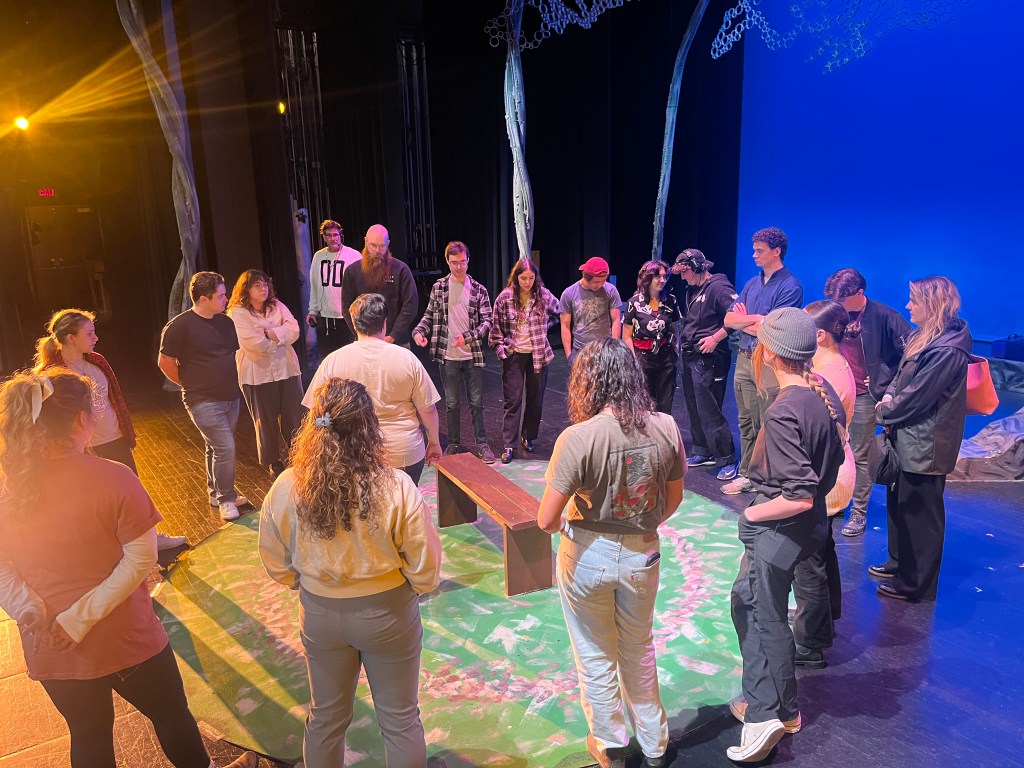
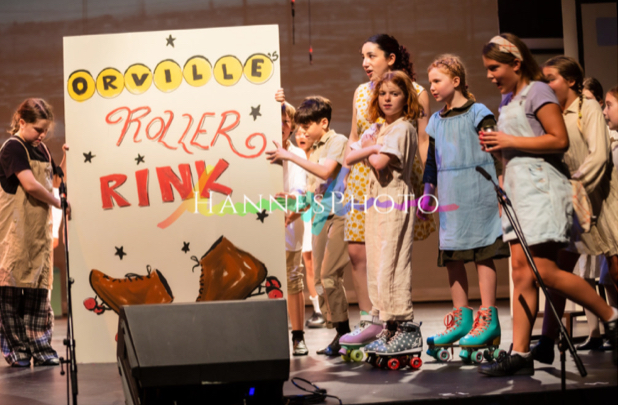
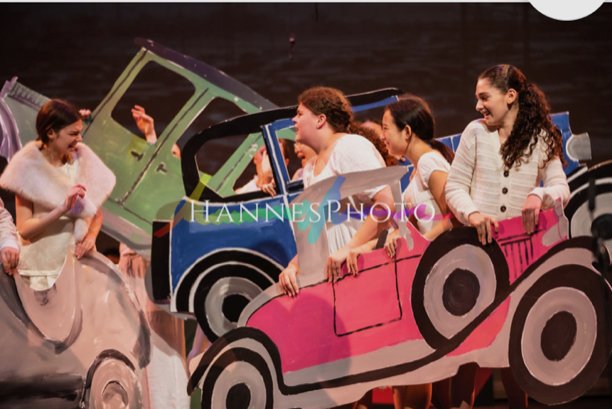
Set photos (during rehearsal). Such a fun little show with a lot of depth to the story. This script inspired the movie You’ve Got Mail. Definitely a team effort to pull off the set!
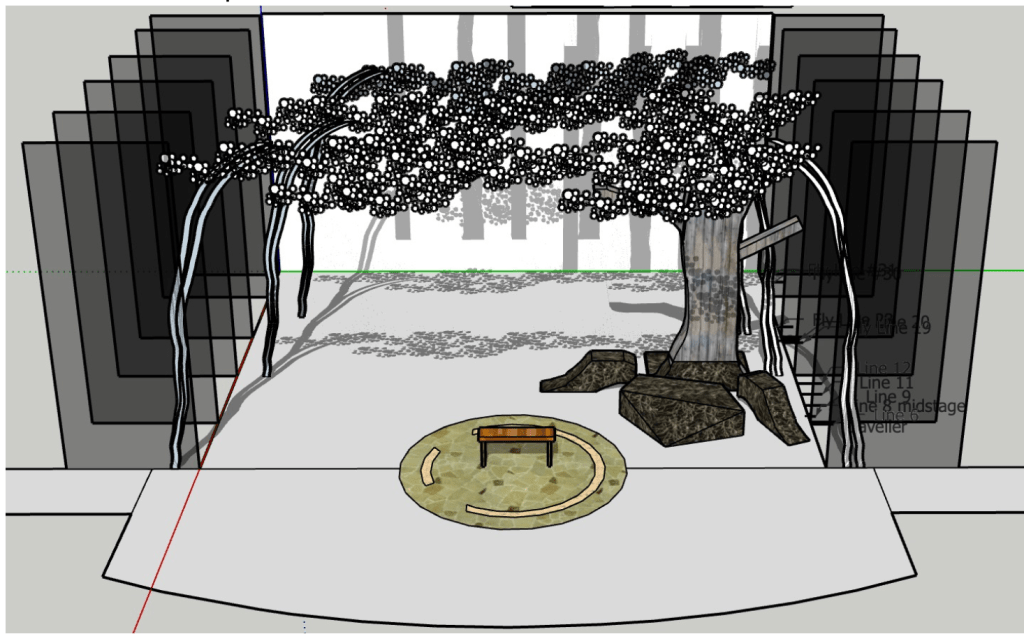
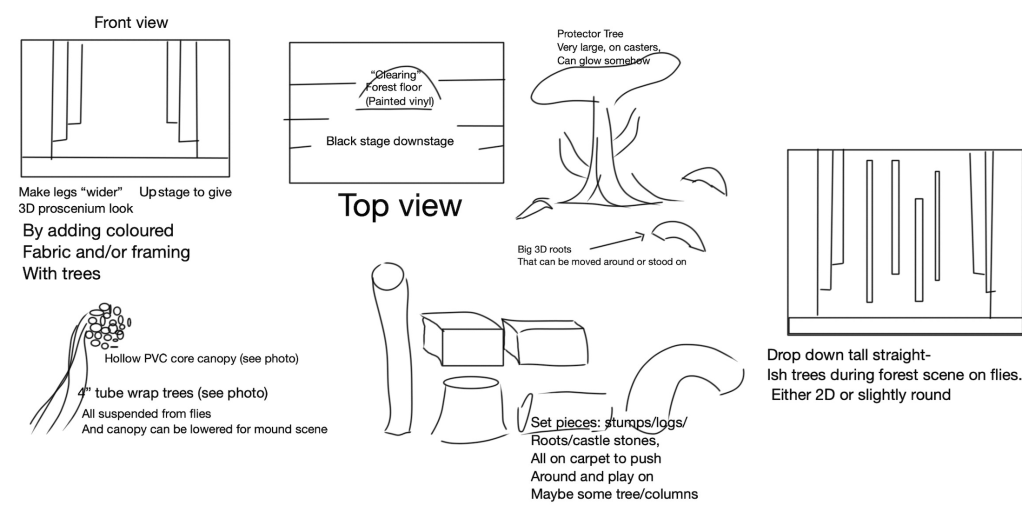
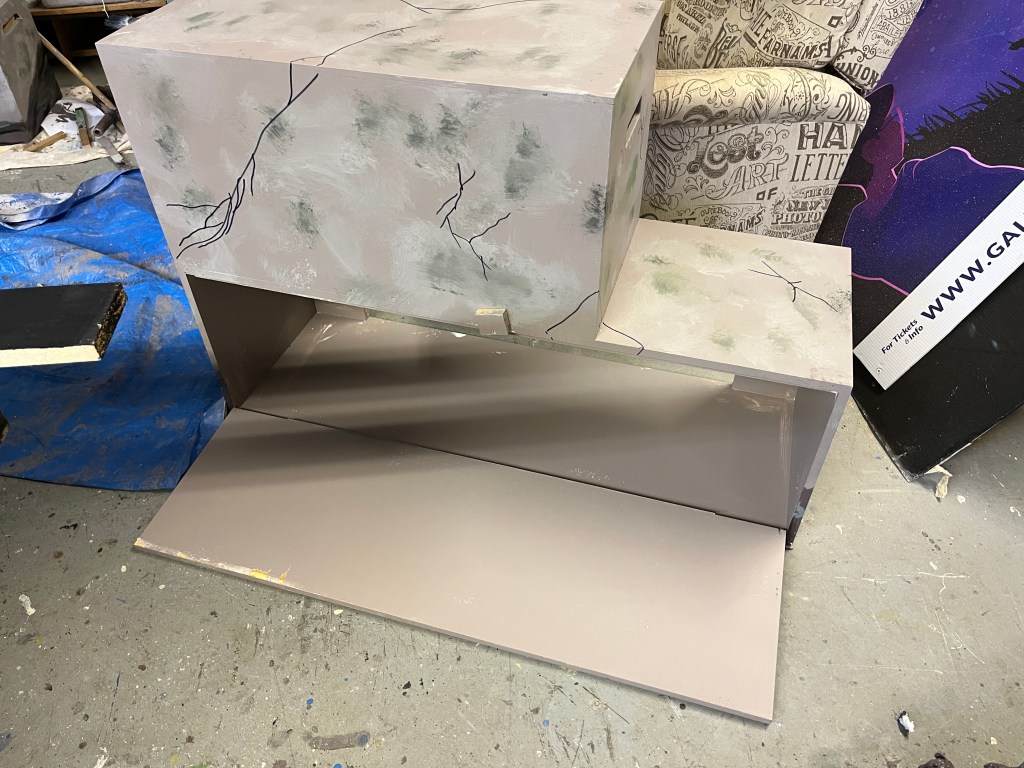
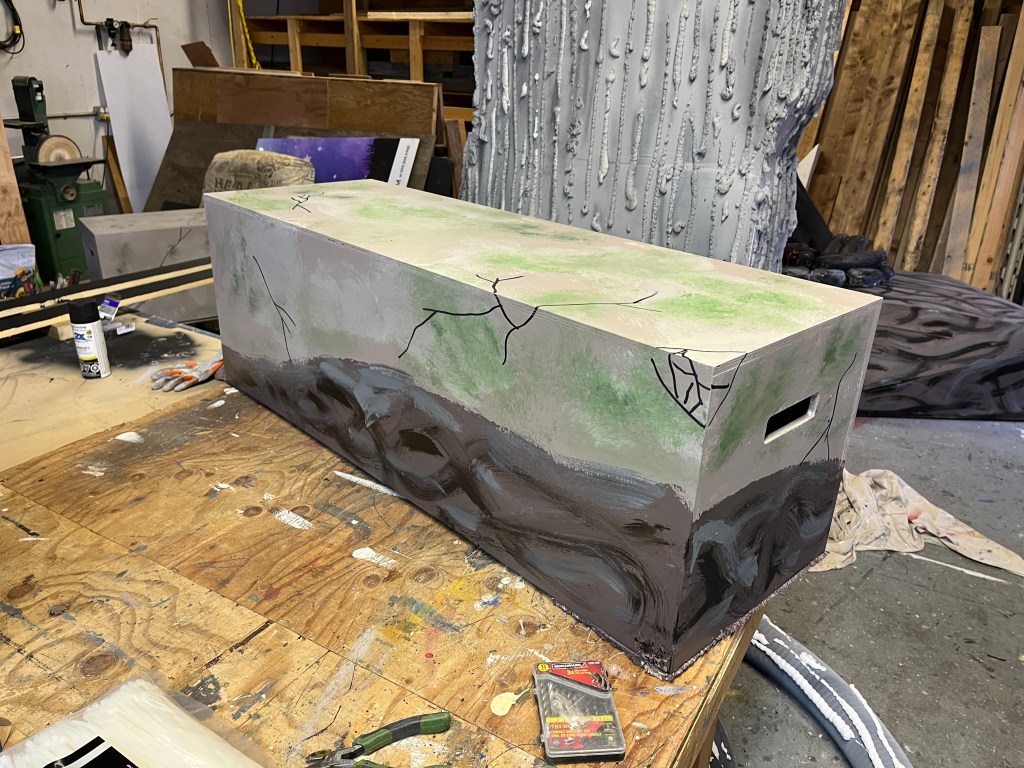
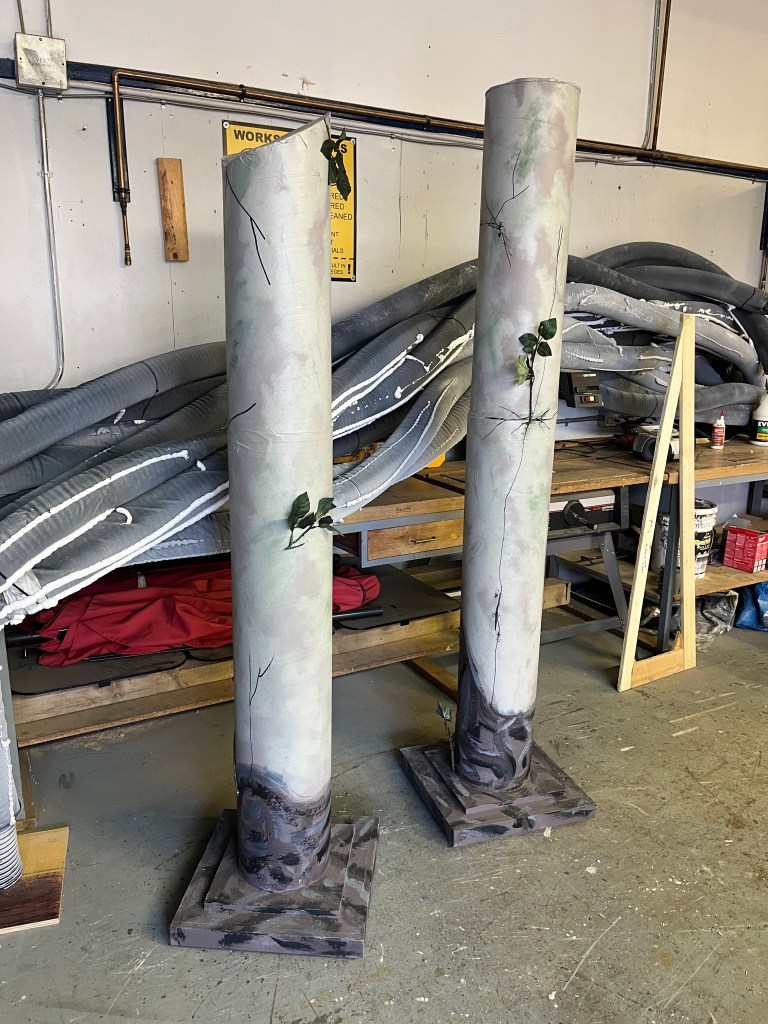
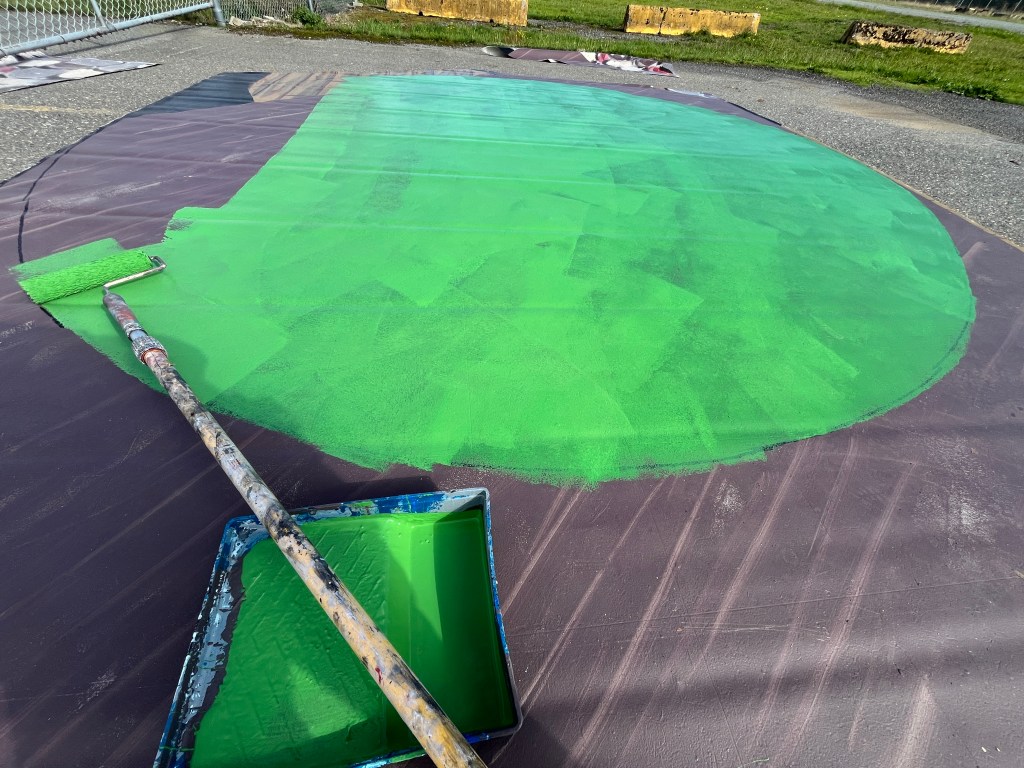
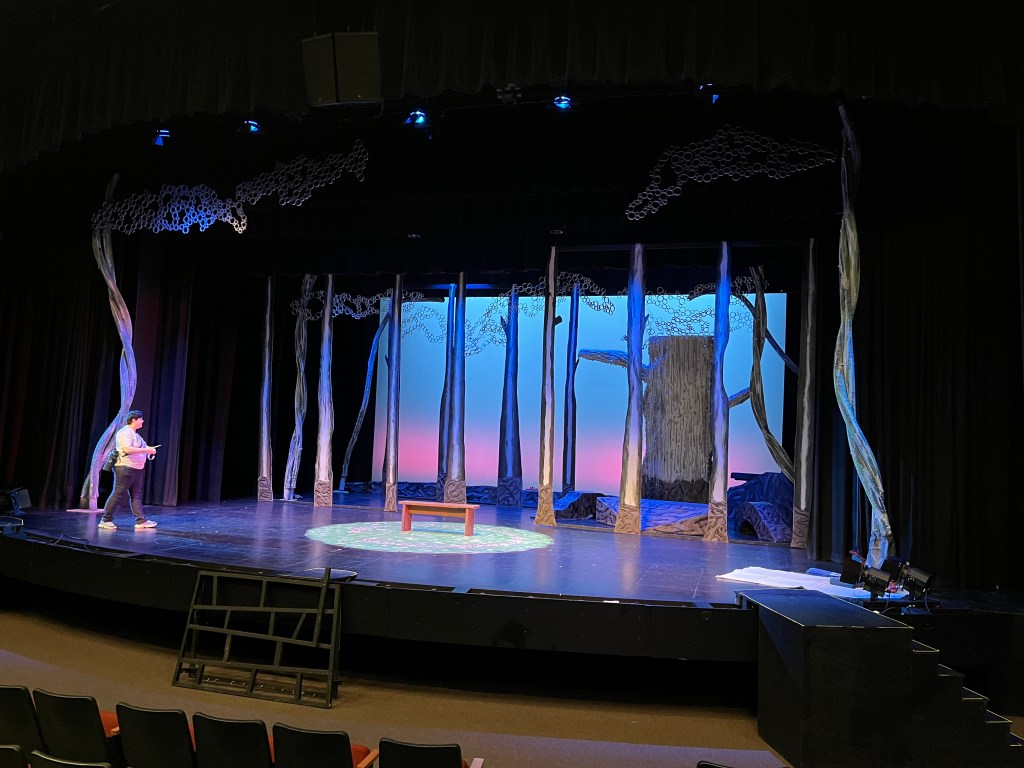
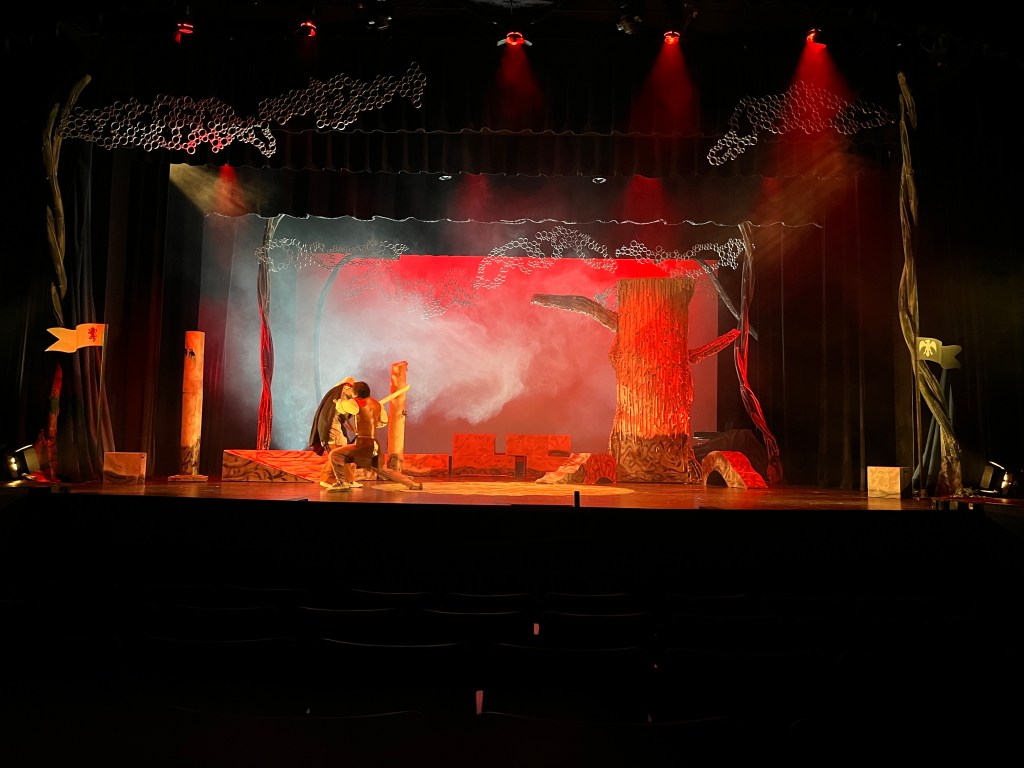
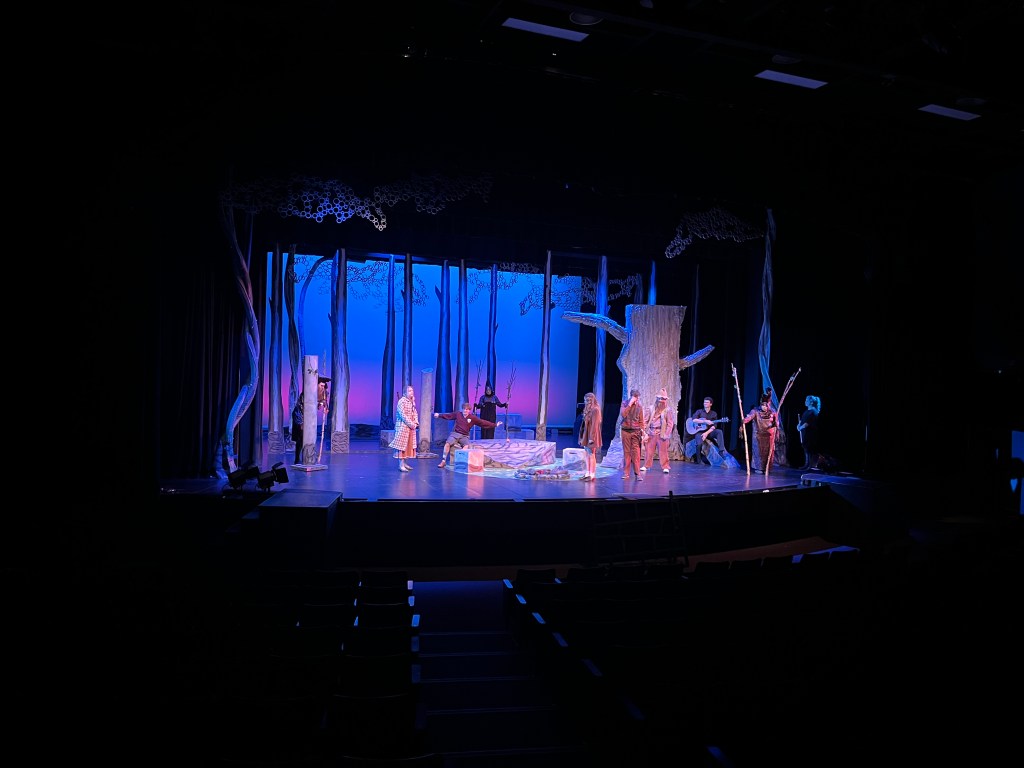
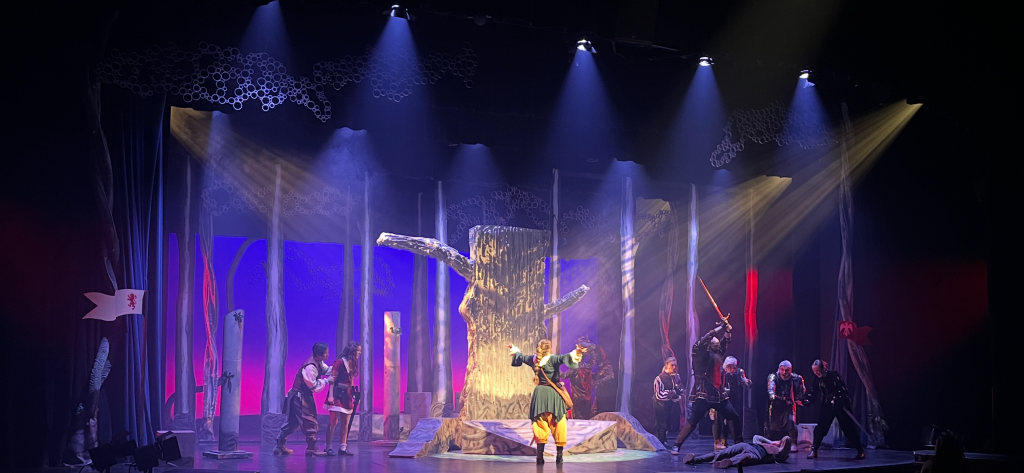
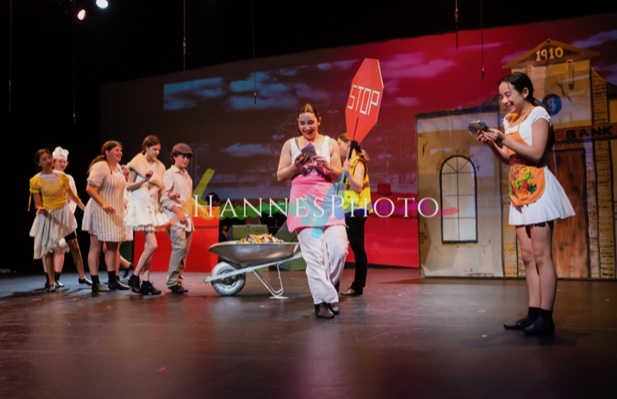
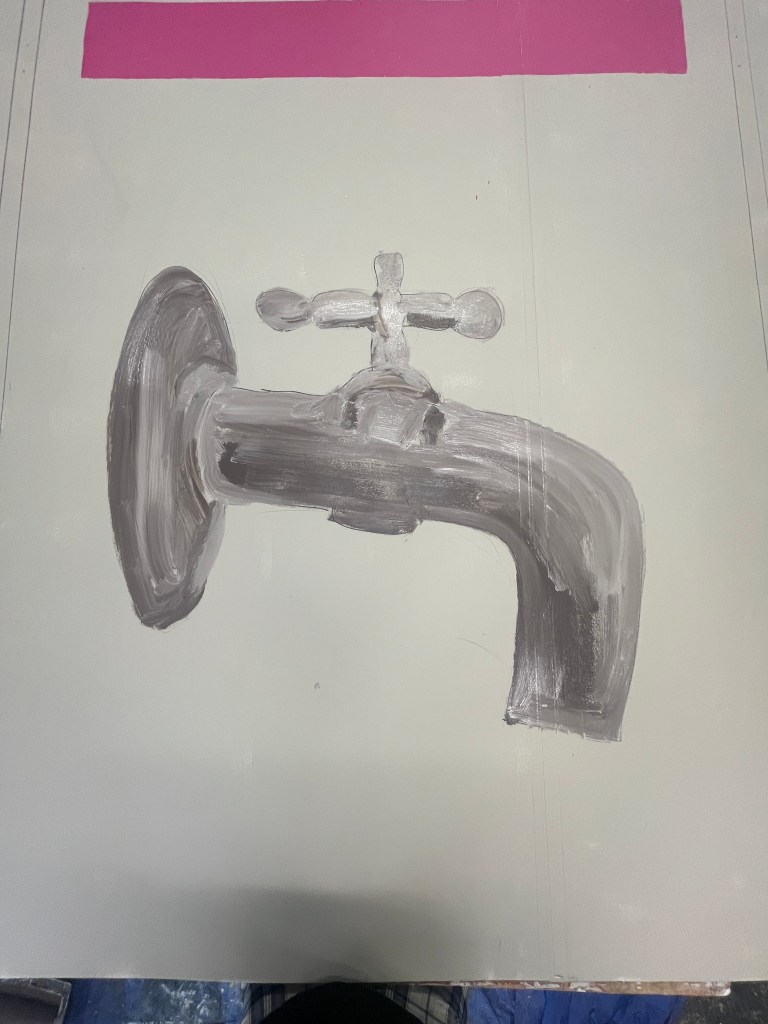
Prince Caspian played at Gallery 7 Theatre recently. Here are a few pictures of the set design and build process.
It started with a meeting with the director and other designers, reading the script, and coming up with some sketches and ideas which eventually formed the set design.
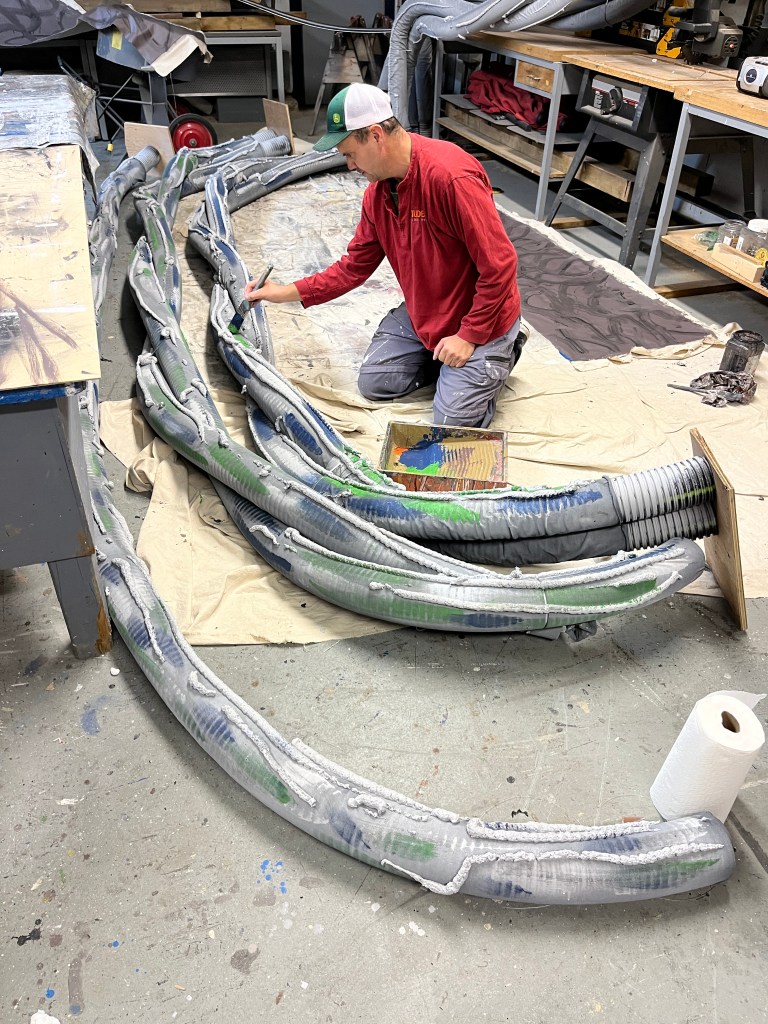
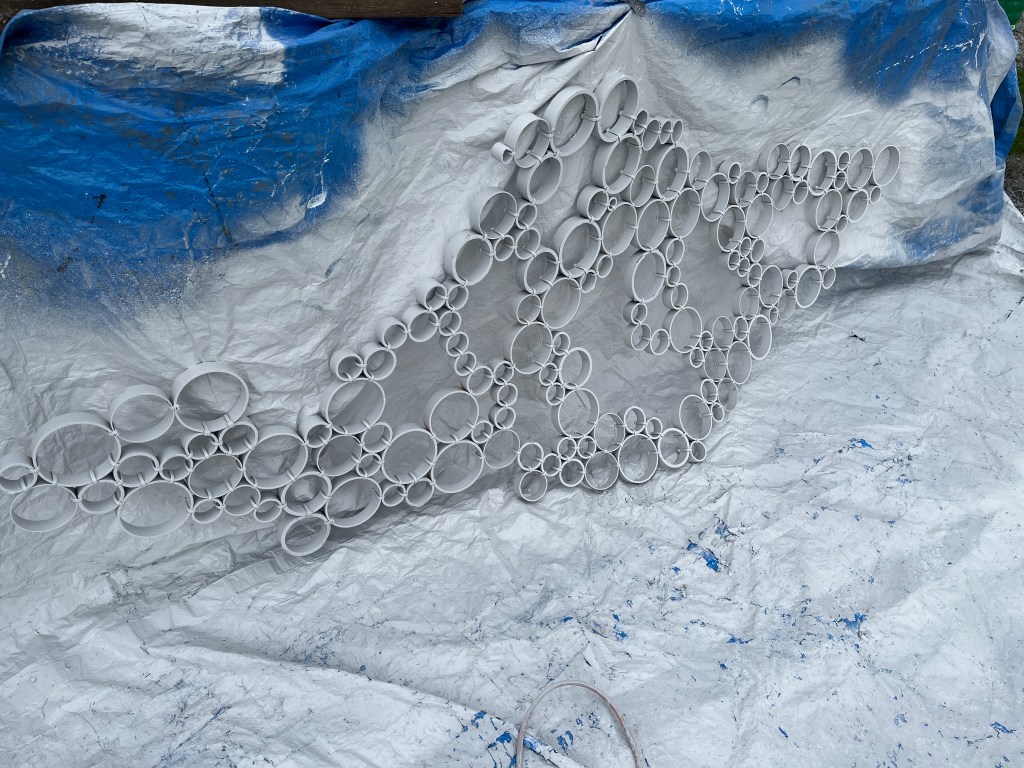
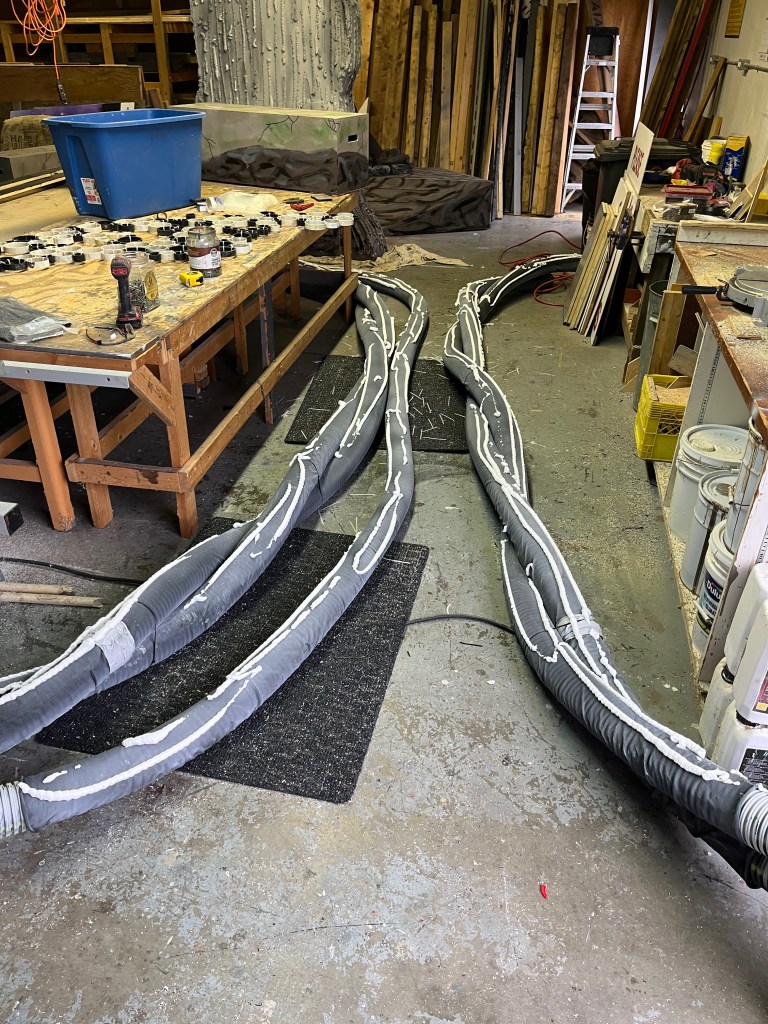
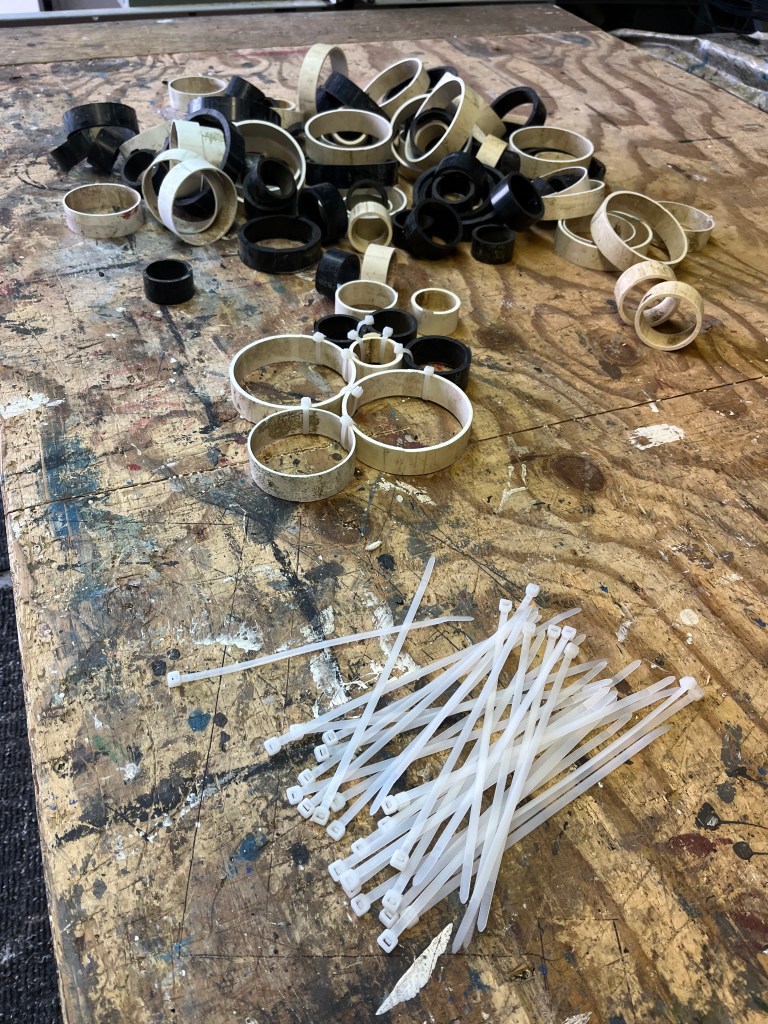
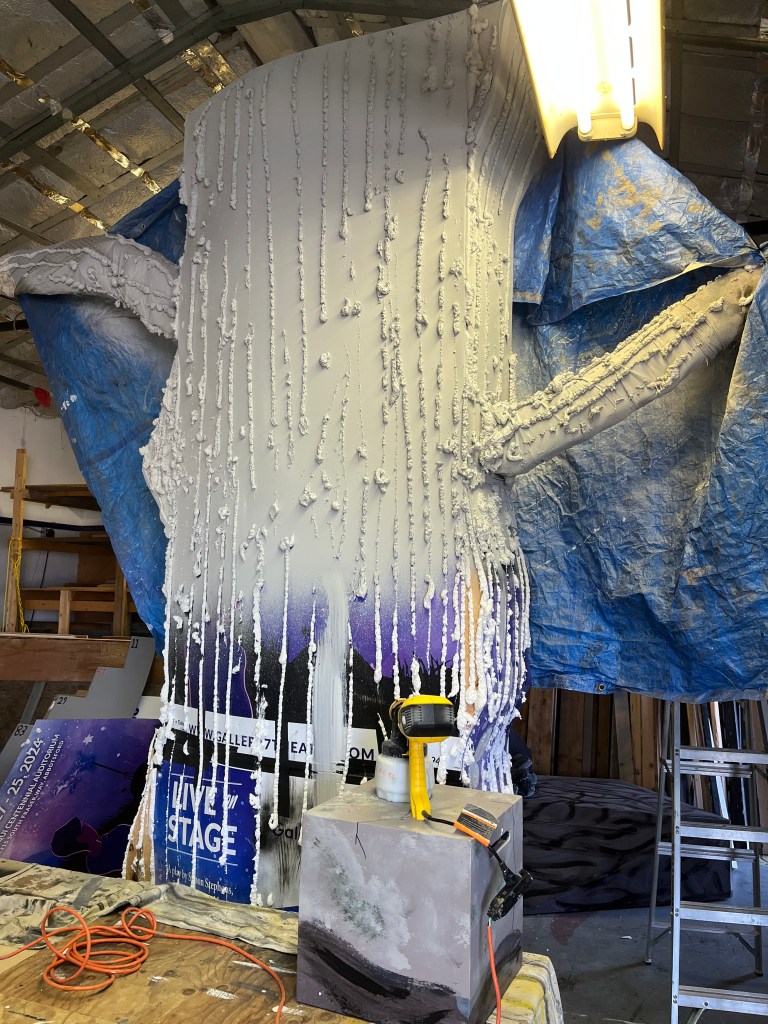
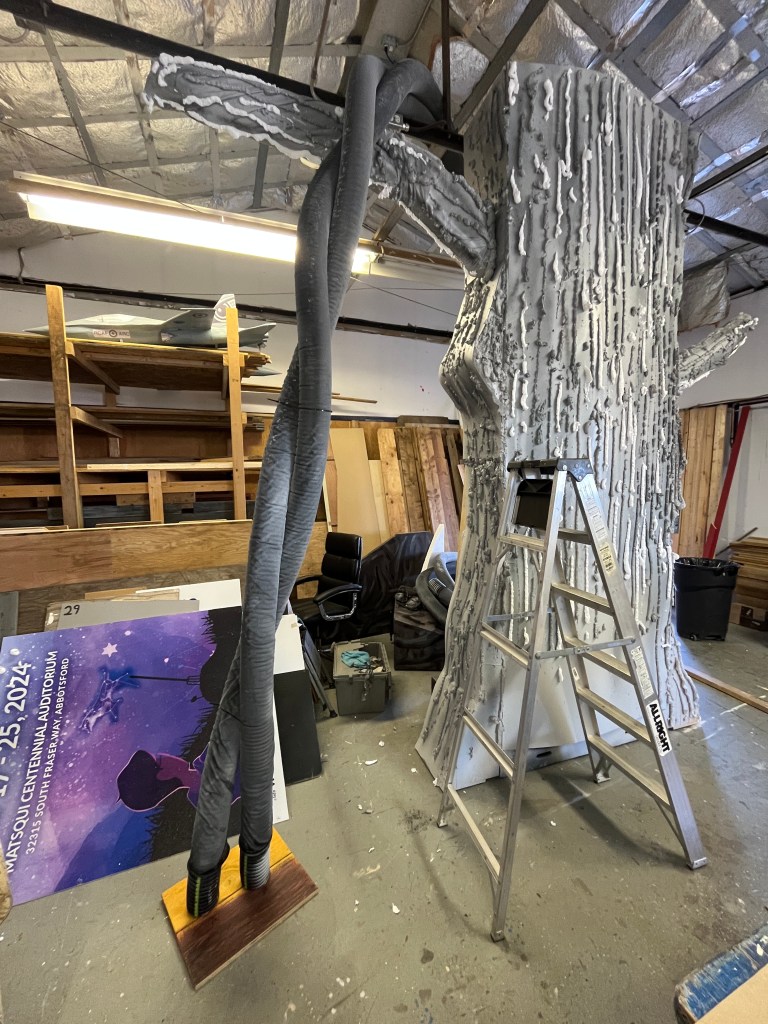
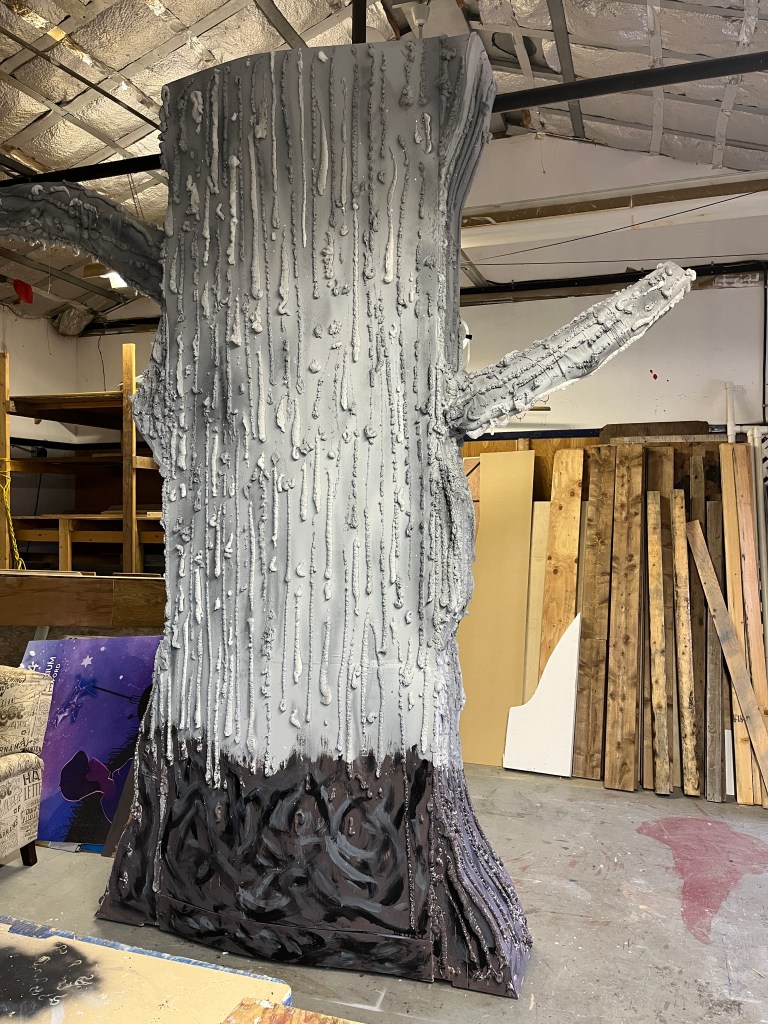
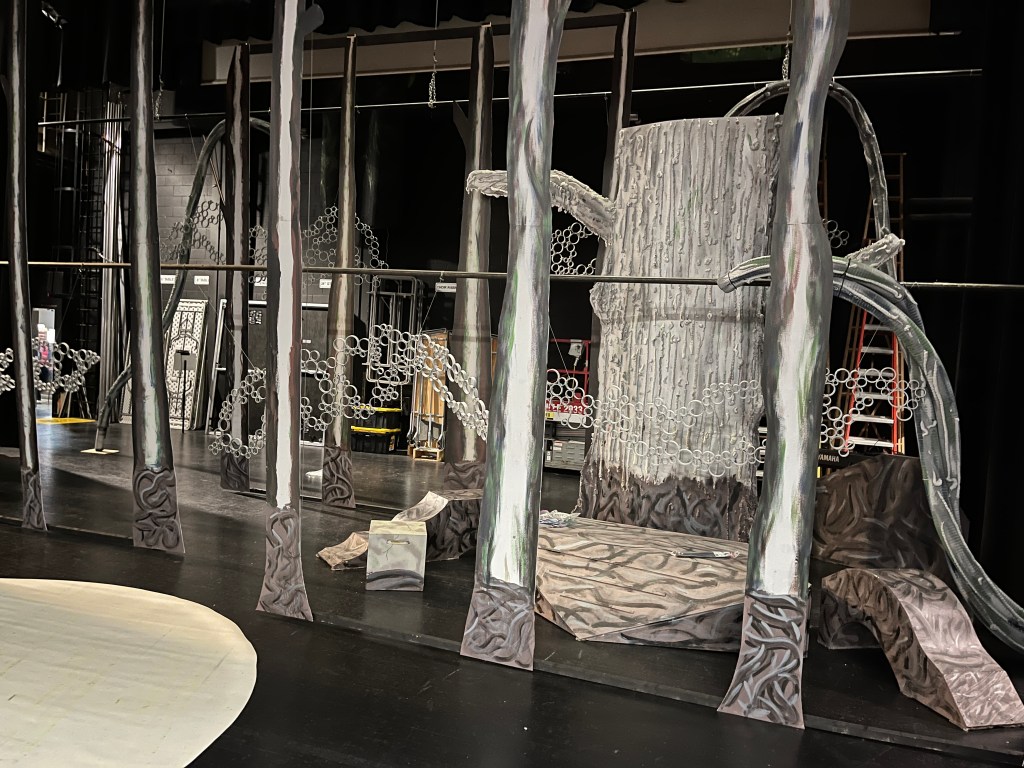
The forest was built with several different kinds of trees (including by the actors themselves, which were creativily portrayed by the costume designer). I borrowed an idea from Youtube about making the tree canopy out of PVC pipe. I had some scrap ABS pipe and scrounged some other pipes elsewhere; the biggest cost was the 3000 zip ties. The flexible trunks were made of flexible drainage pipe and the big moveable tree was a regular set piece on a riser.
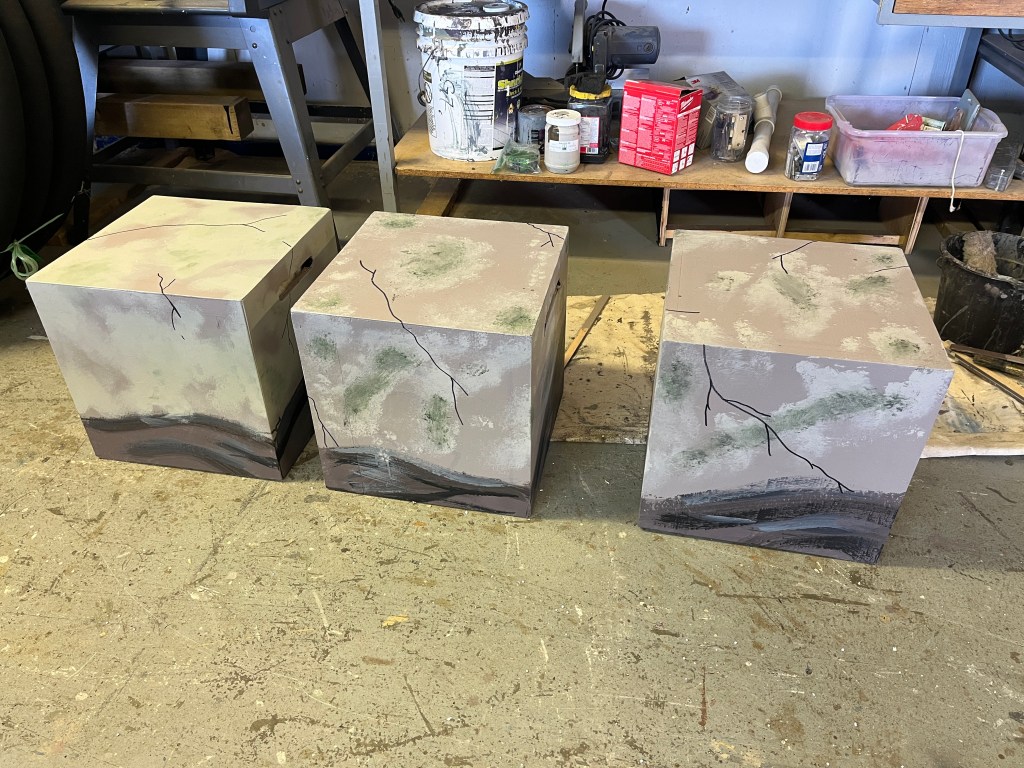
painting by Chris M.
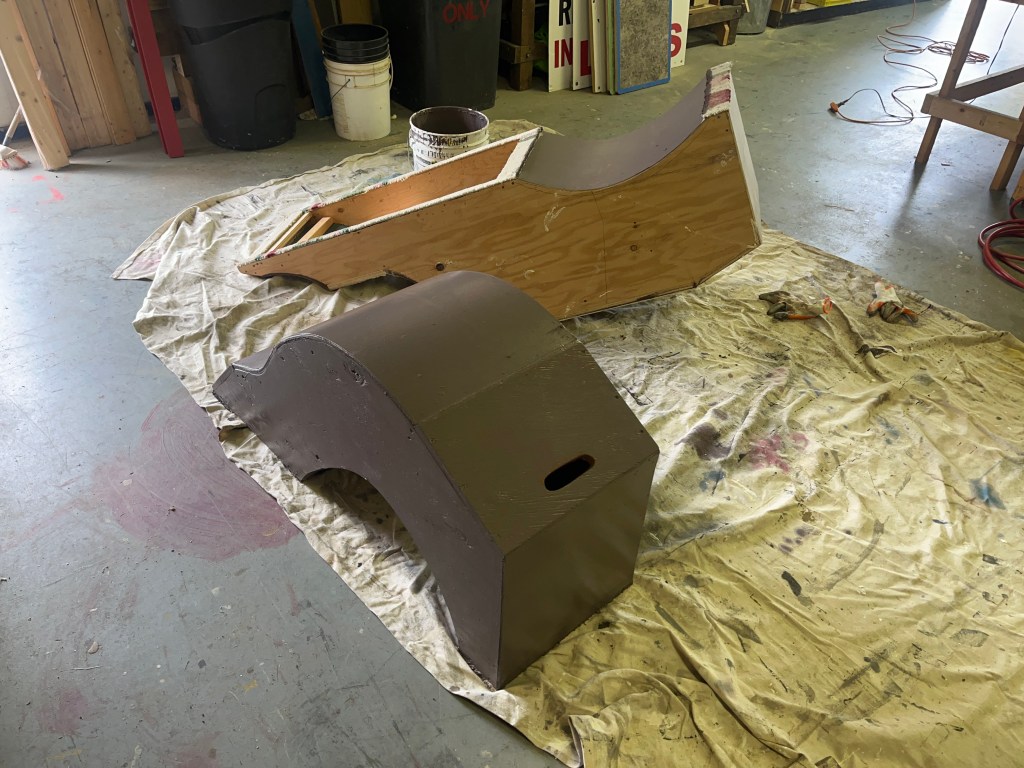
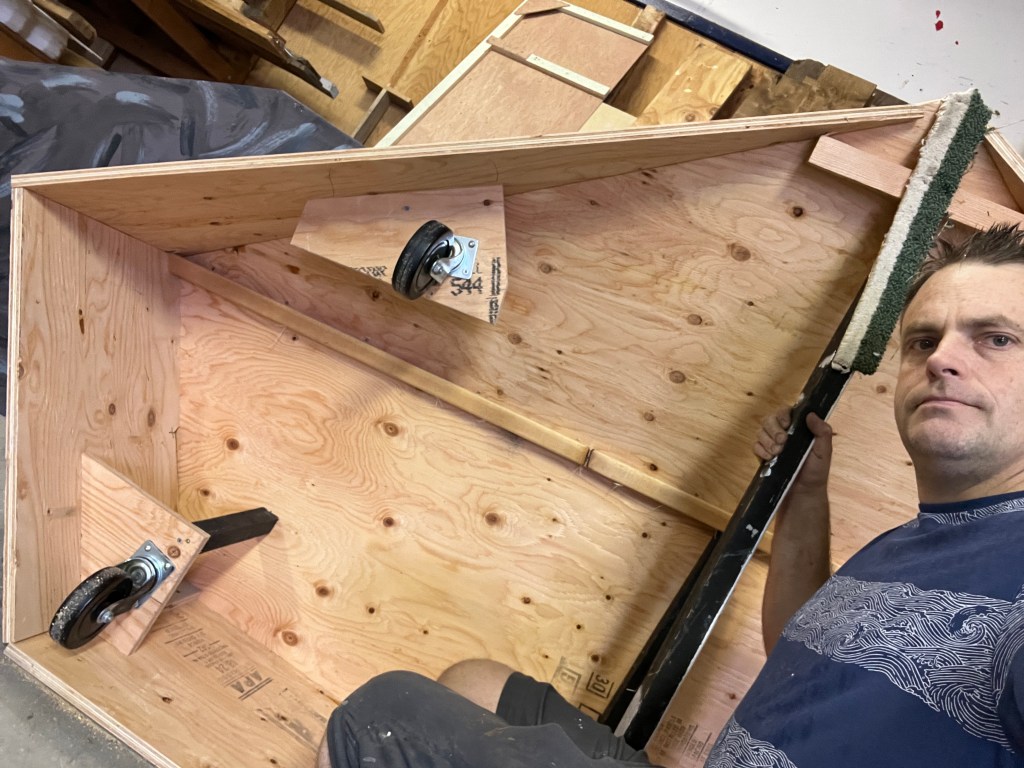
There were also the usual set piece suspects – boxes and furniture…
Several boxes were made by Steve D.sheet vinyl flooring painted and clear coatedcoroplast trees hung on 16′ 1×4 framesTree fly painting by Aaren
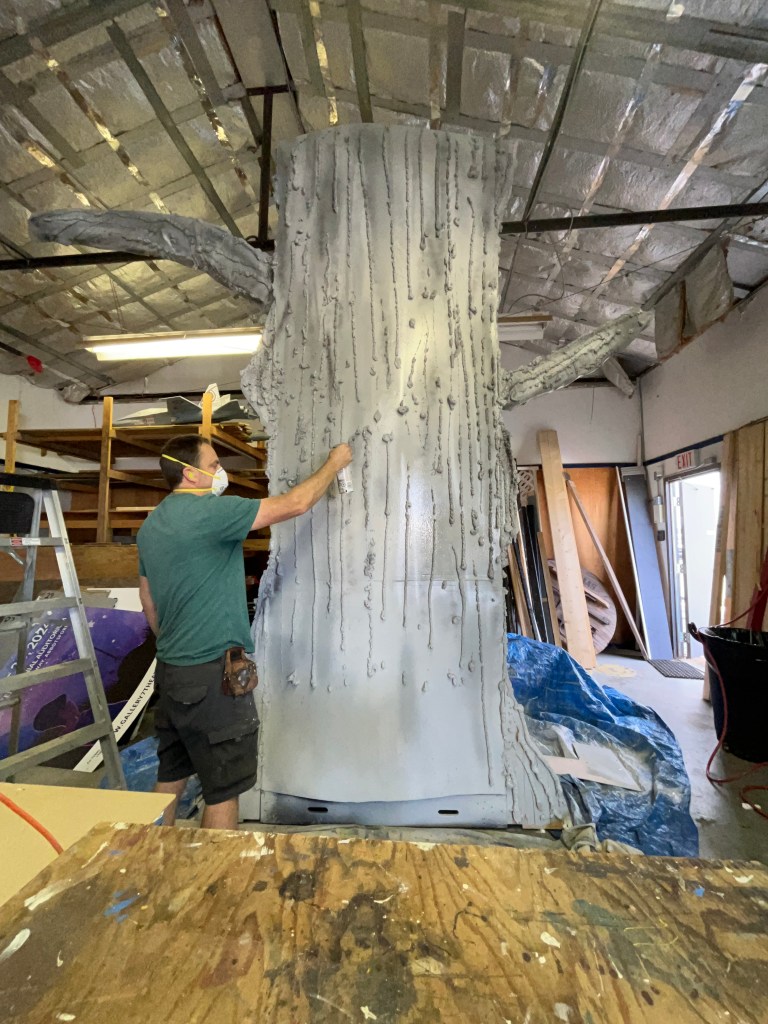
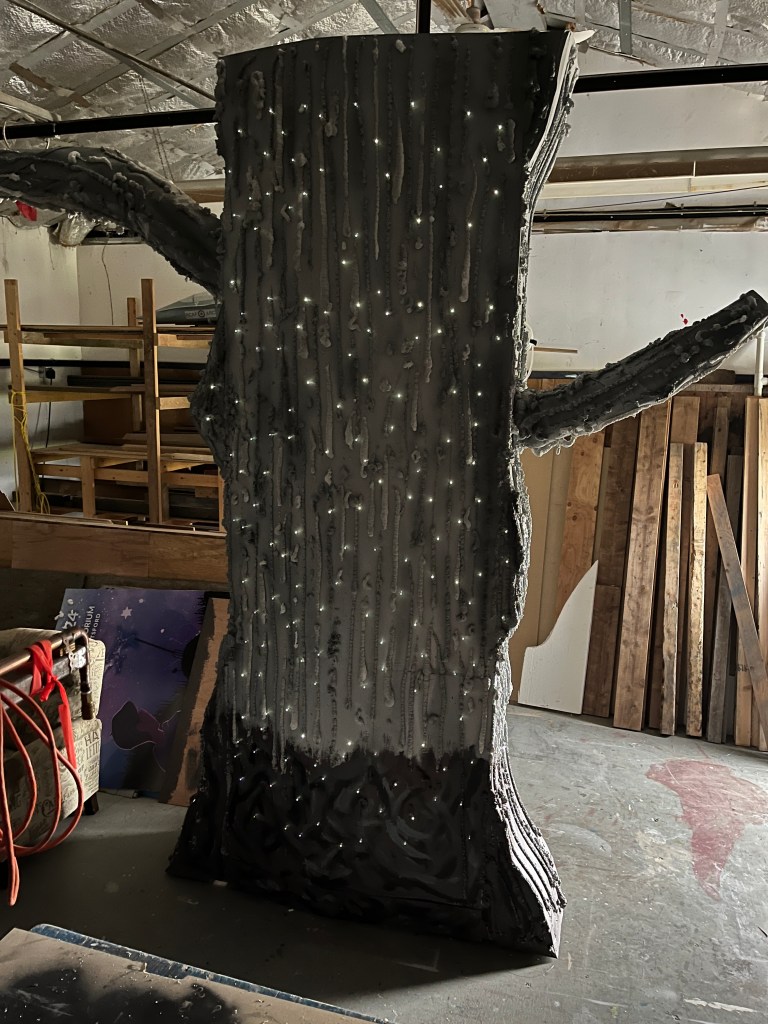
The big tree was a big undertaking. My dad framed it and I covered it with coroplast and spray foam and a few fibreoptic lights.
Construction by Chris P.a flashlight provided the light for the fibreoptics here
Load in took awhile, mostly to hang everything from the fly system at Abby Arts. The techs were great.
Actors and crew hanging out on set
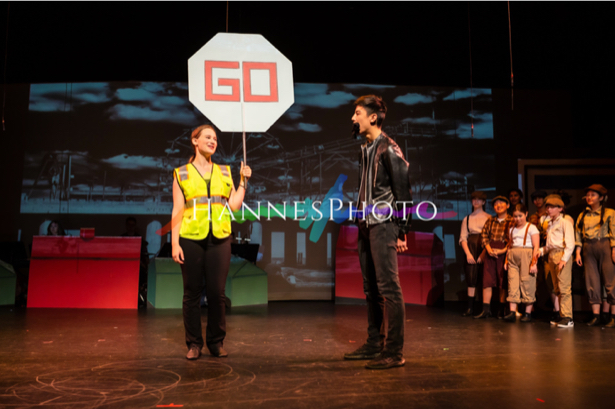
And then the lighting designer got to work his magic!
Set by Andrew Potts, Lighting by Ken Hildebrandt, Directed by Gabe Kirkley, Costumes by Kelsey Cleave, Props by Dianna Lewis. For Gallery7Theatre.com.
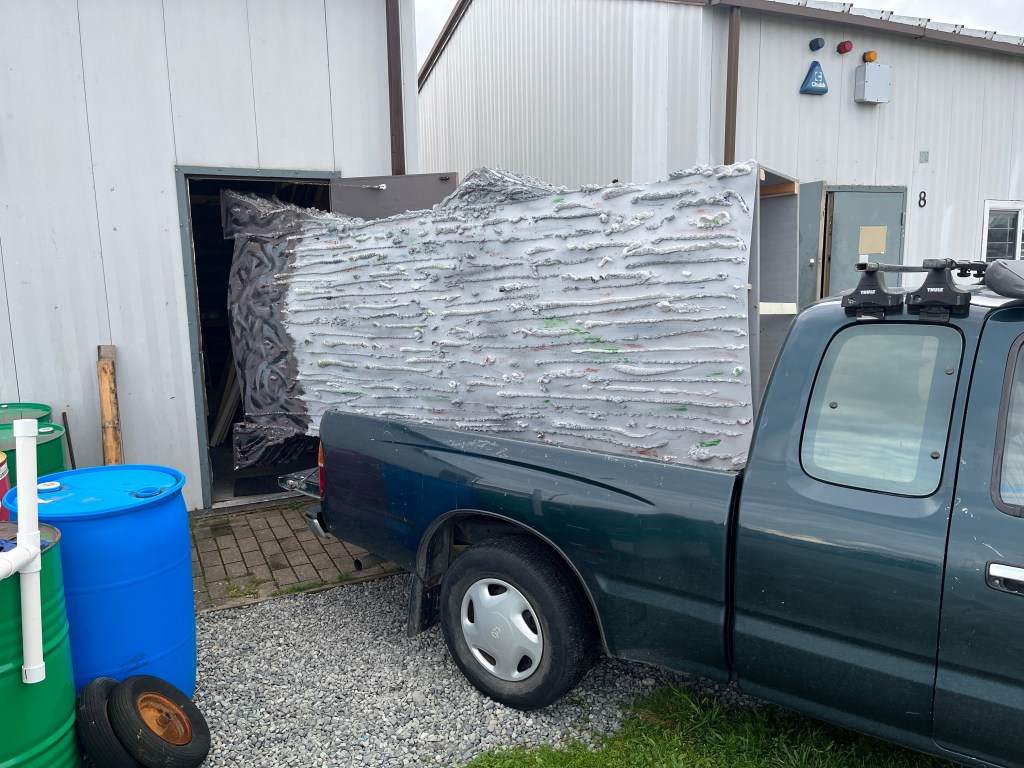
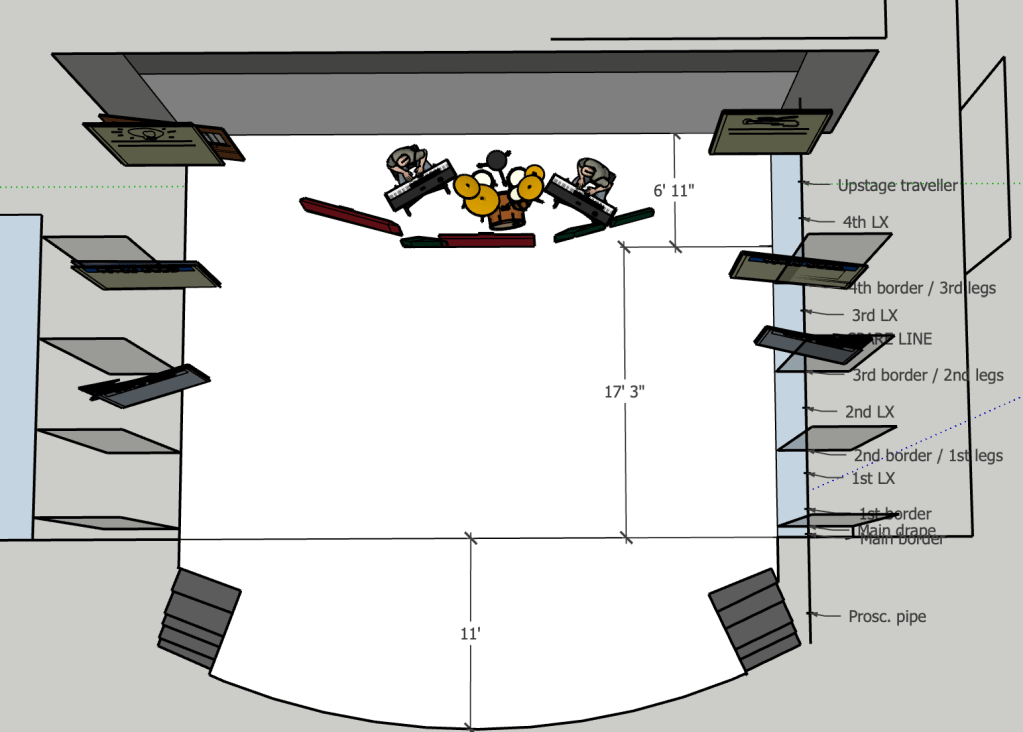
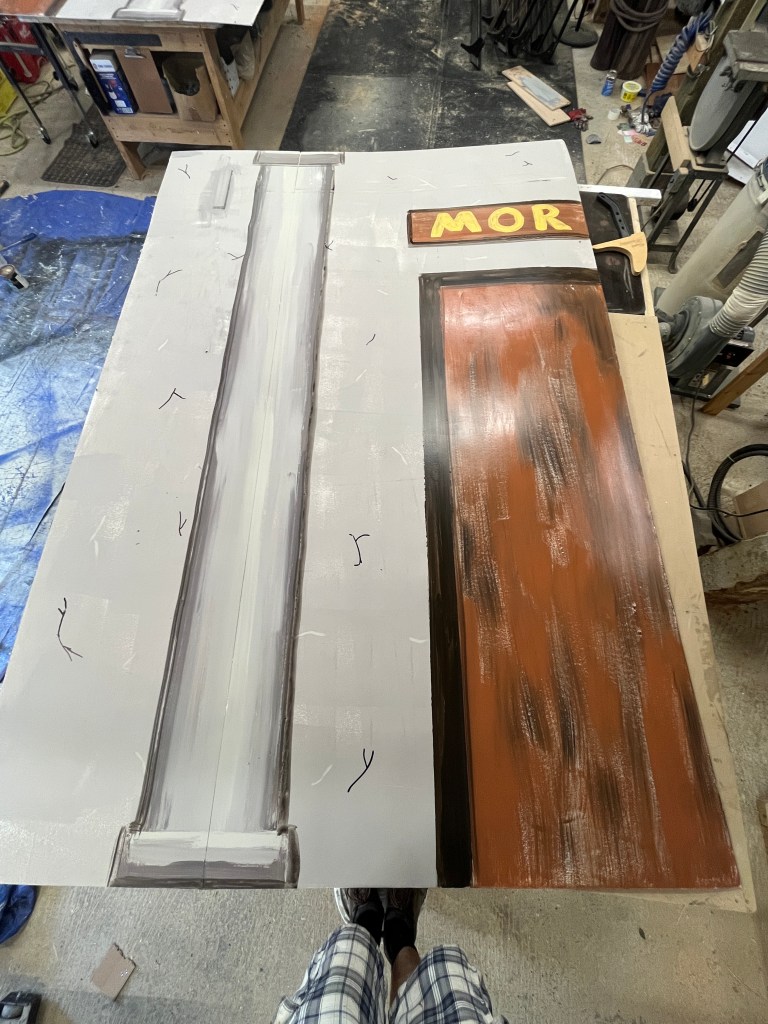
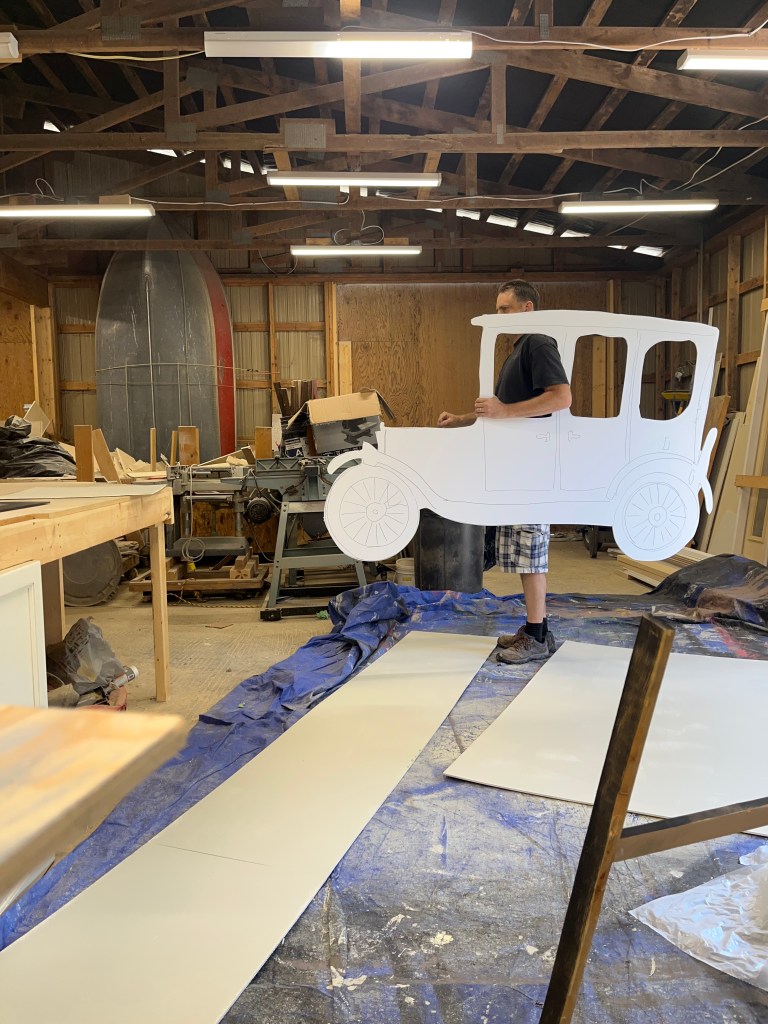
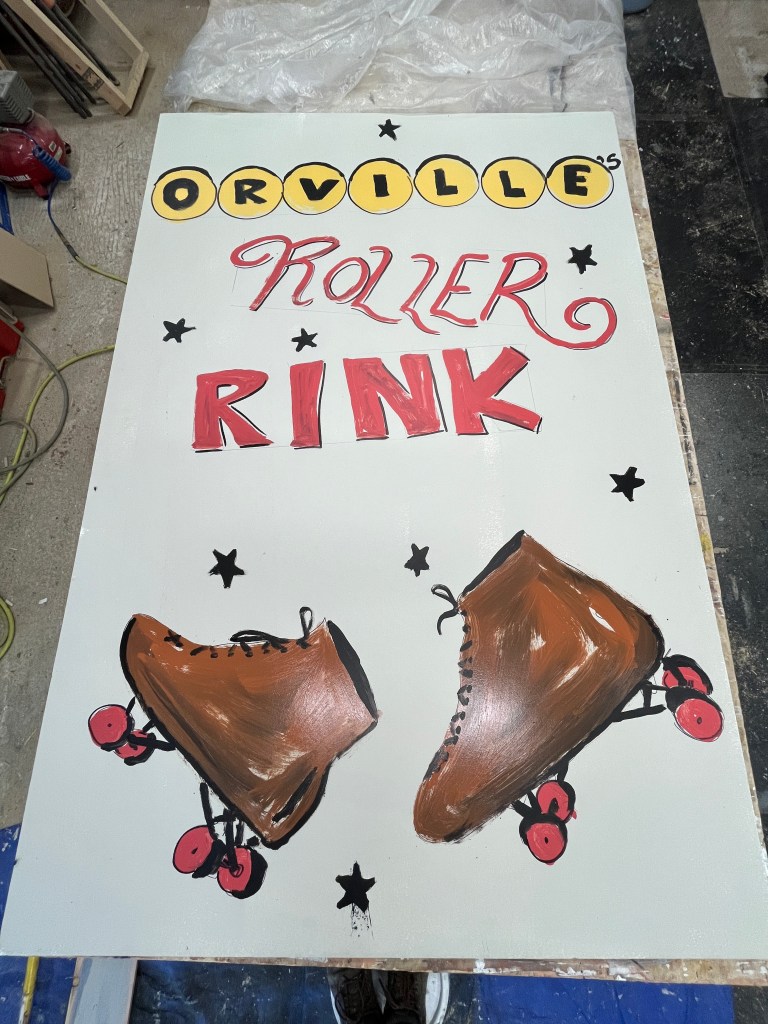
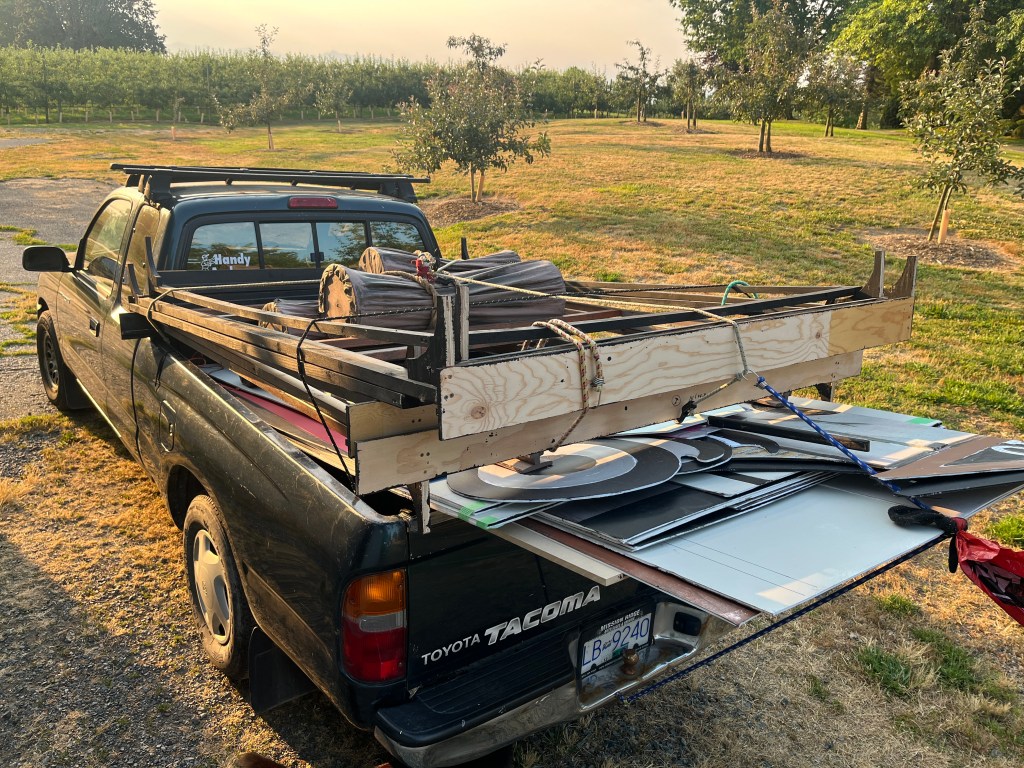
Back in the summer I designed and built a lightweight set for Gotta Sing! Gotta Dance!, a theatre camp held in Vancouver. They put on an impressive musical twice, once for each group of students, after just a few days of rehearsing.
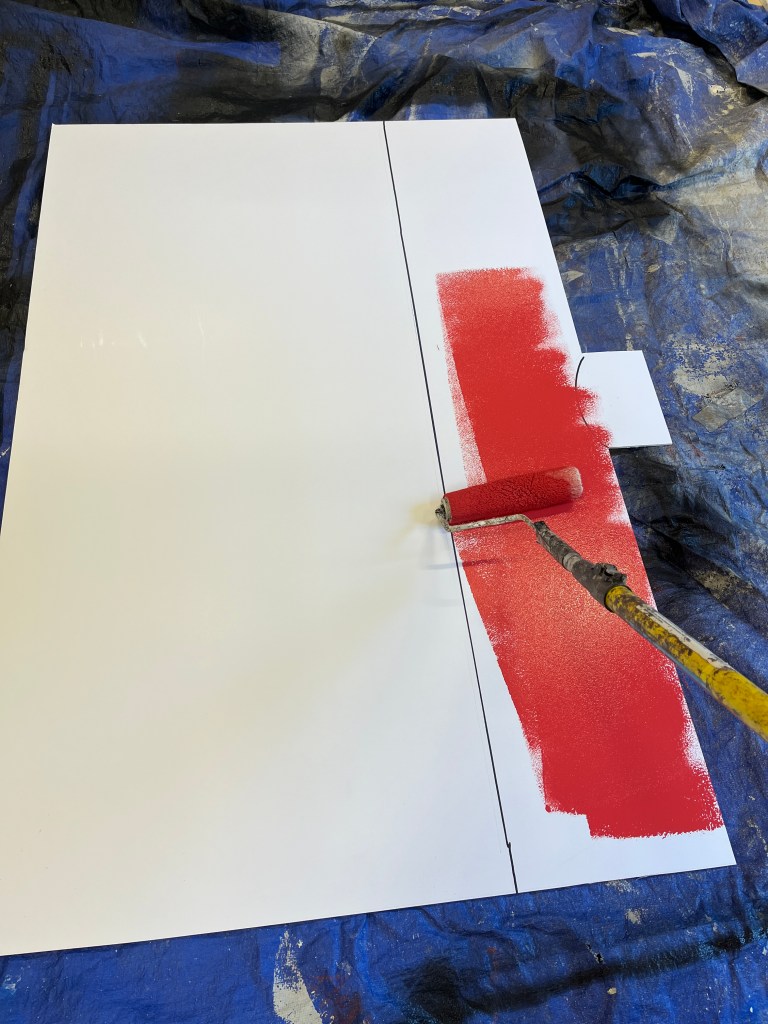
This set had to be stored in an upstairs room between camps, so it had to be simple and lightweight. I was introduced to 3/16″ foamcore and used it as the main material. I was able to fit the entire set into the back of my pickup truck (not including items like the desk and chairs which the director sourced).
Produced by Perry Elhrich; Directed by Meghan Anderssen; Lighting Design by Victoria Bell, Set Design by Andrew Potts; Projections by Meghan Anderssen
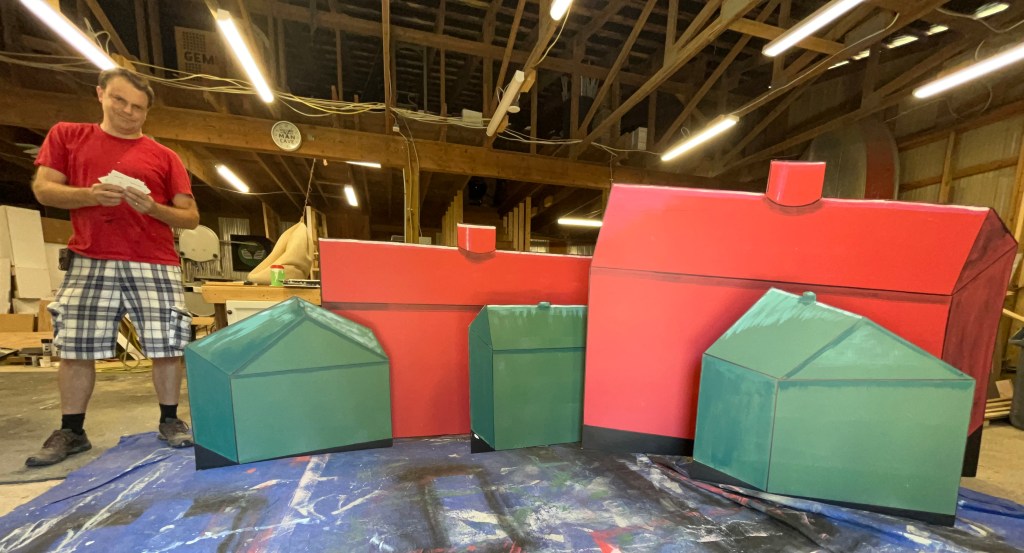
The play Dollars and Nonsense has many references to a certain popular board game. My design capitalized on this and the play is set in Atlantic City so there are some hints of the boardwalk etc. as well.
Foamcore is fairly rigid but it wasn’t quite enough to just sort of stand up by itself. Also I learned that both sides have to be painted, or there will be a lot of bowing.
The venue was the Norman Rothstein Theatre at the Jewish Community Center in Vancouver. This was the third time I had worked in this space.
It was a good experience, and I enjoyed watching the end result of the talented staff and students–colourful, musical, professional, and fun!
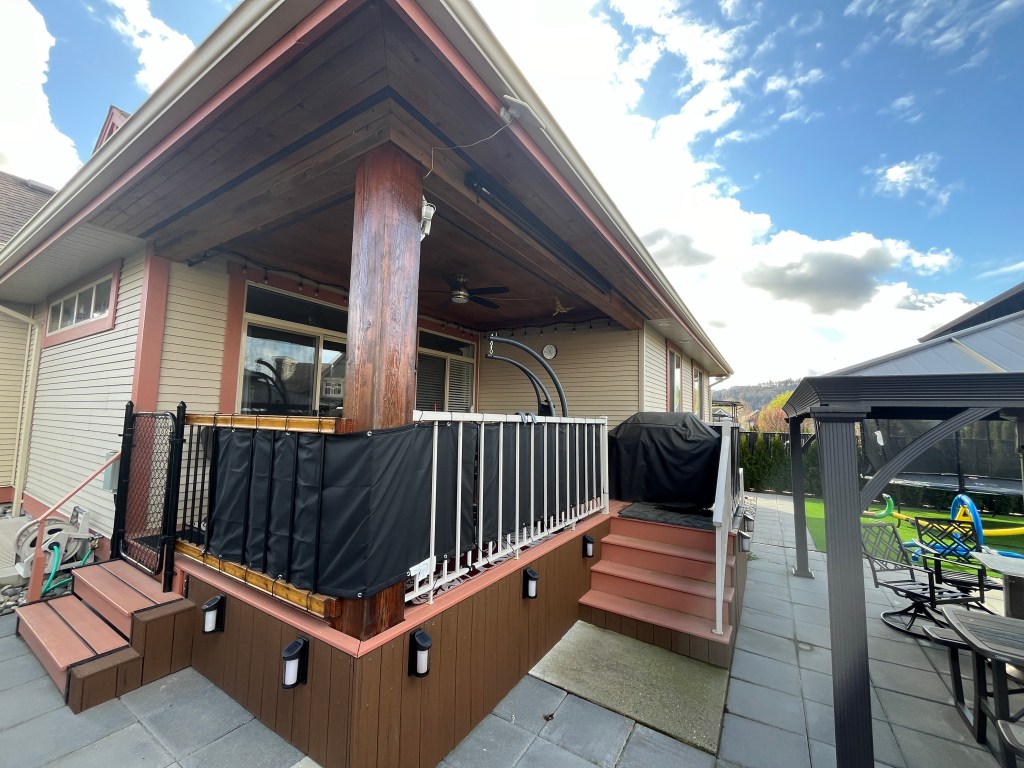
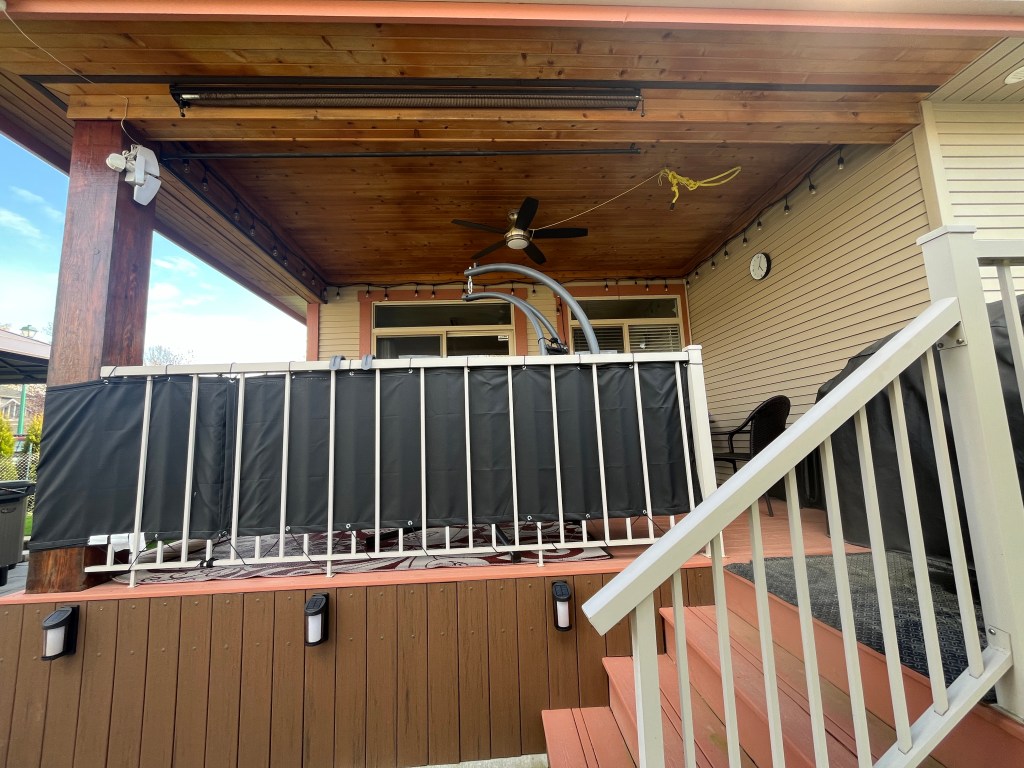
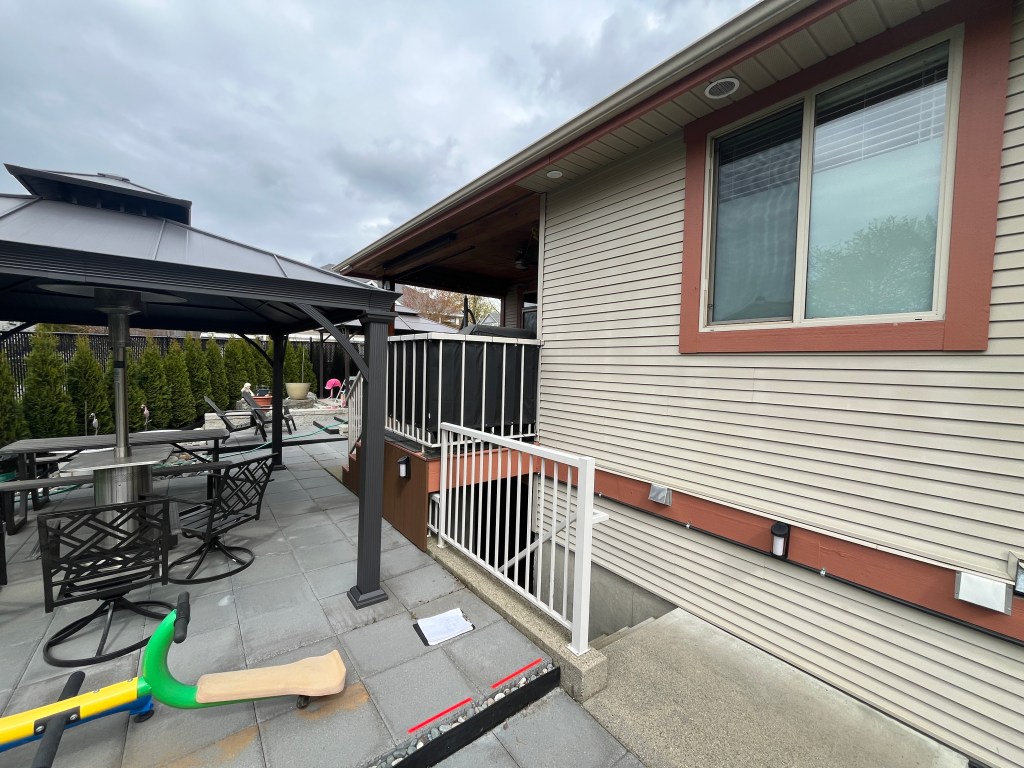
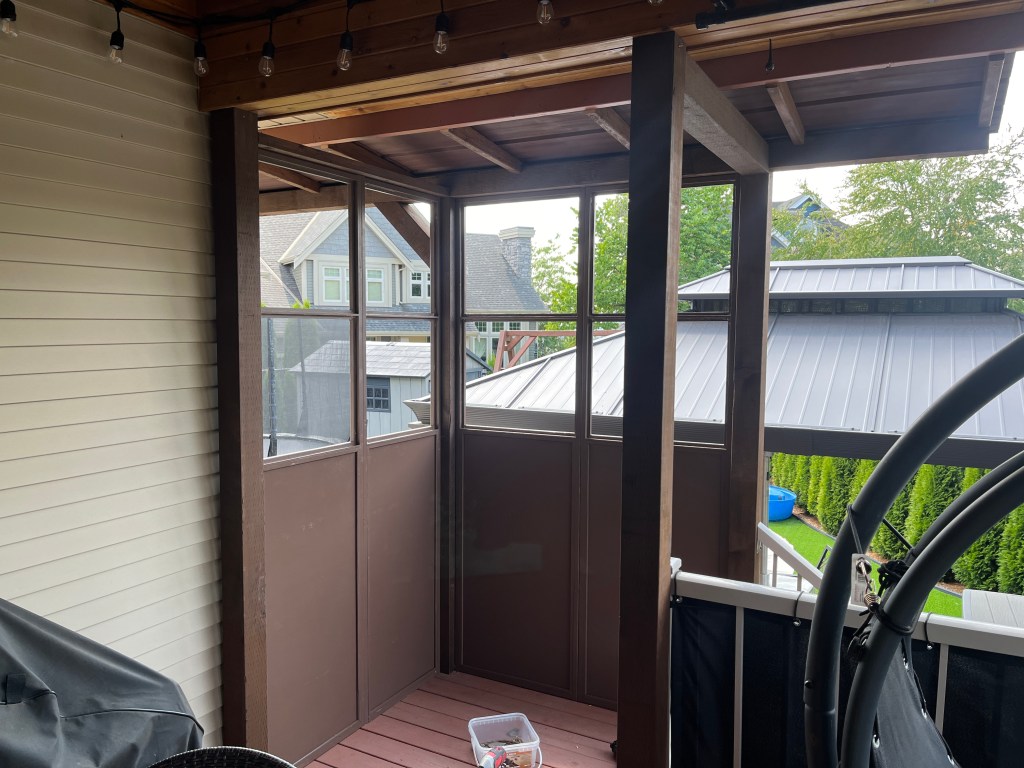
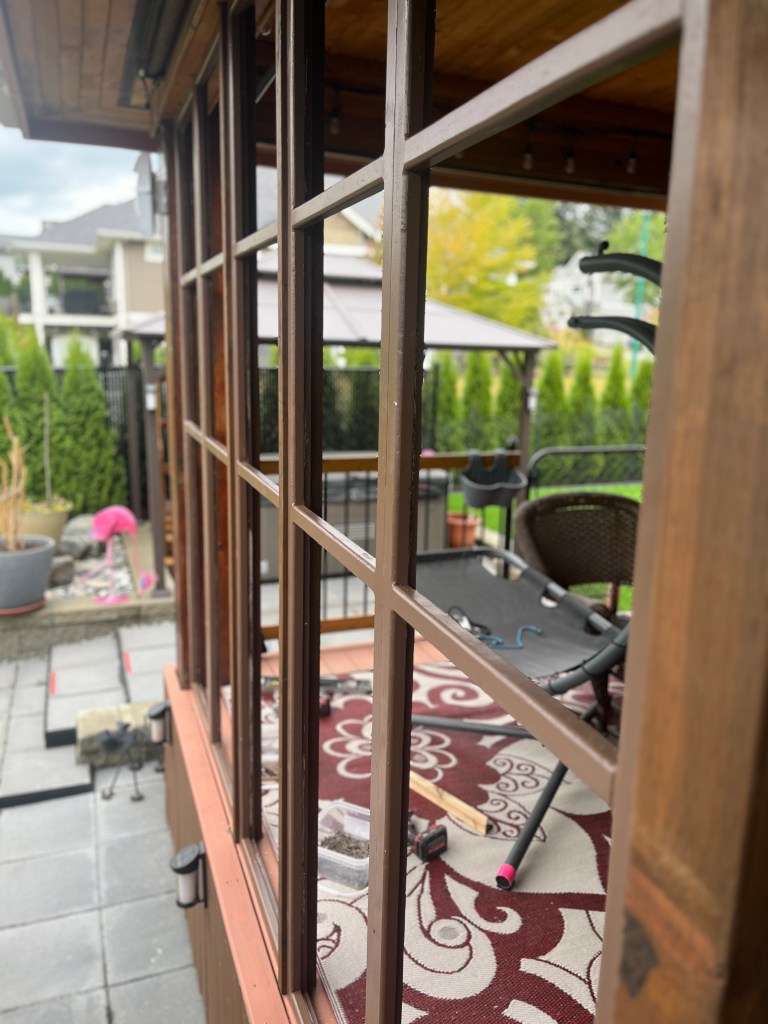
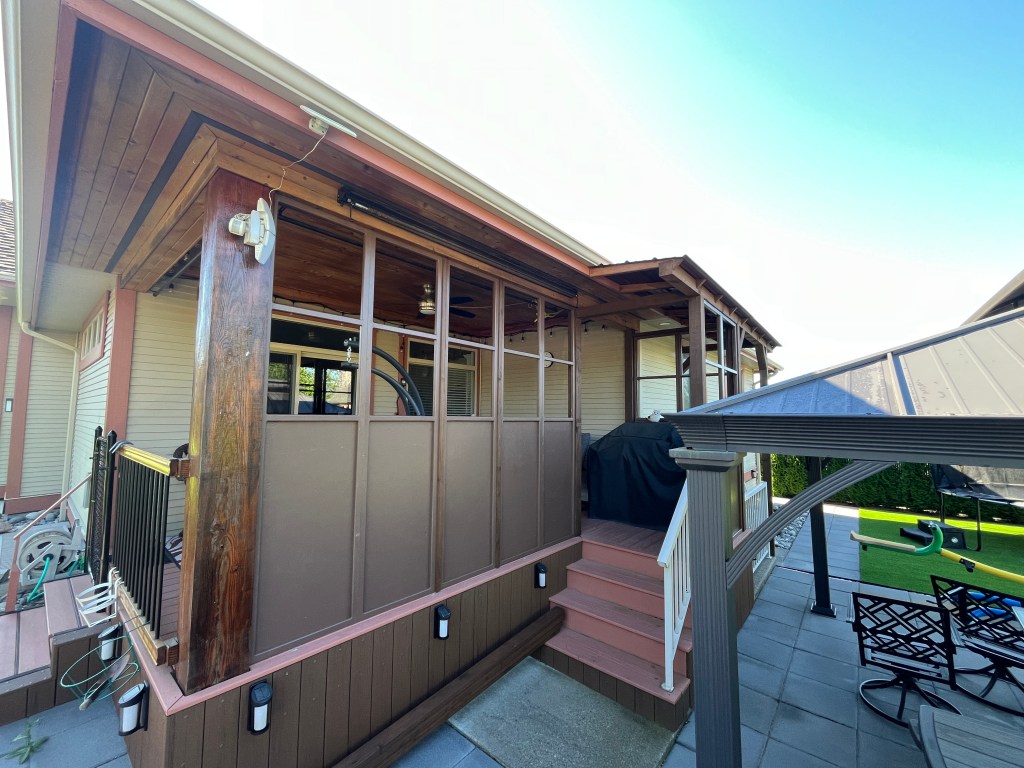
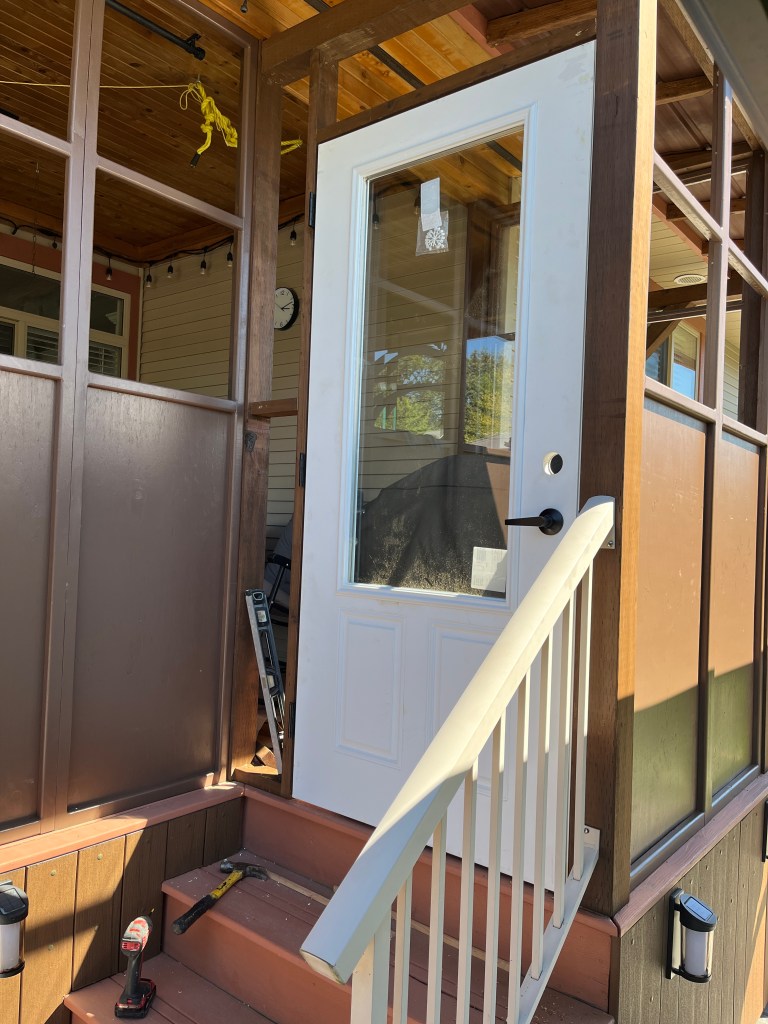
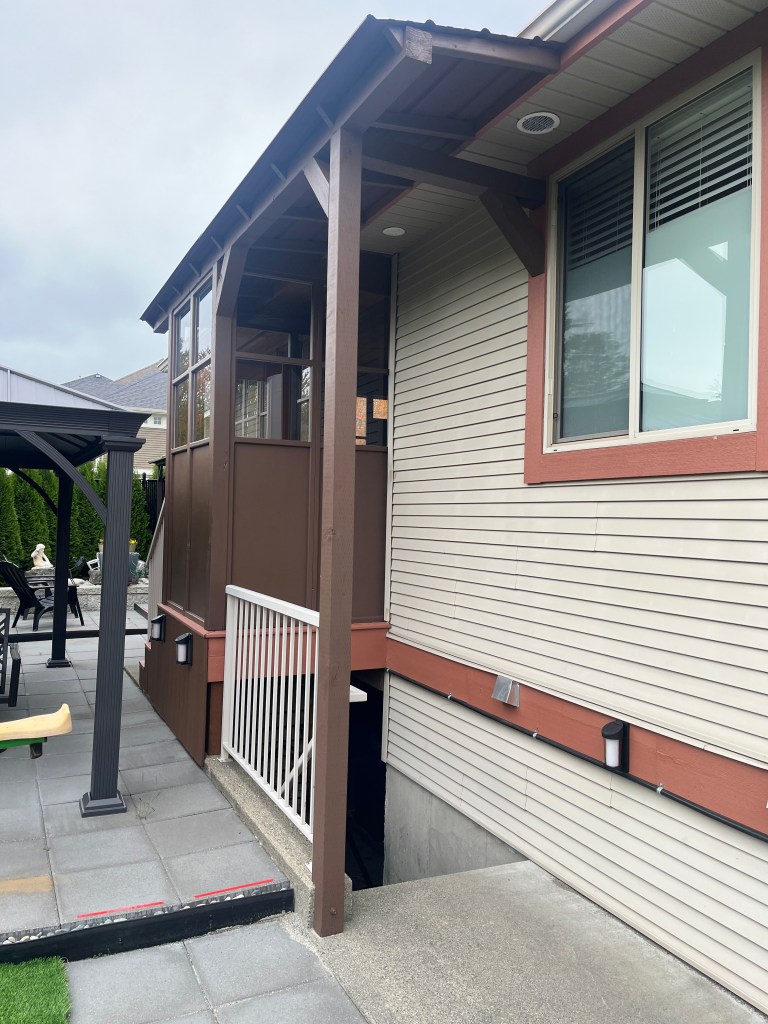
Sandee had been talking for a few years about enclosing her porch. Other projects came first; and then she got a quote or two but they were quite high. I wasn’t really up to taking on a large project like this so I didn’t, until one day I said OK, I’ll draw something up… and the rest is history. The price was really a fraction of what others were quoting… surely not as professional, but I thought it worked out pretty well in the end.
Before: The 2 biggest complaints were the wind (it gets very windy in the winter especially) and the afternoon blinding sunlight. Rain and snow were also considerations. Every season, furniture has to be stored out of the weather, etc.
My proposal was to add a little bit of roofing over the open stair area and then enclose all of it with wood and glass panels.
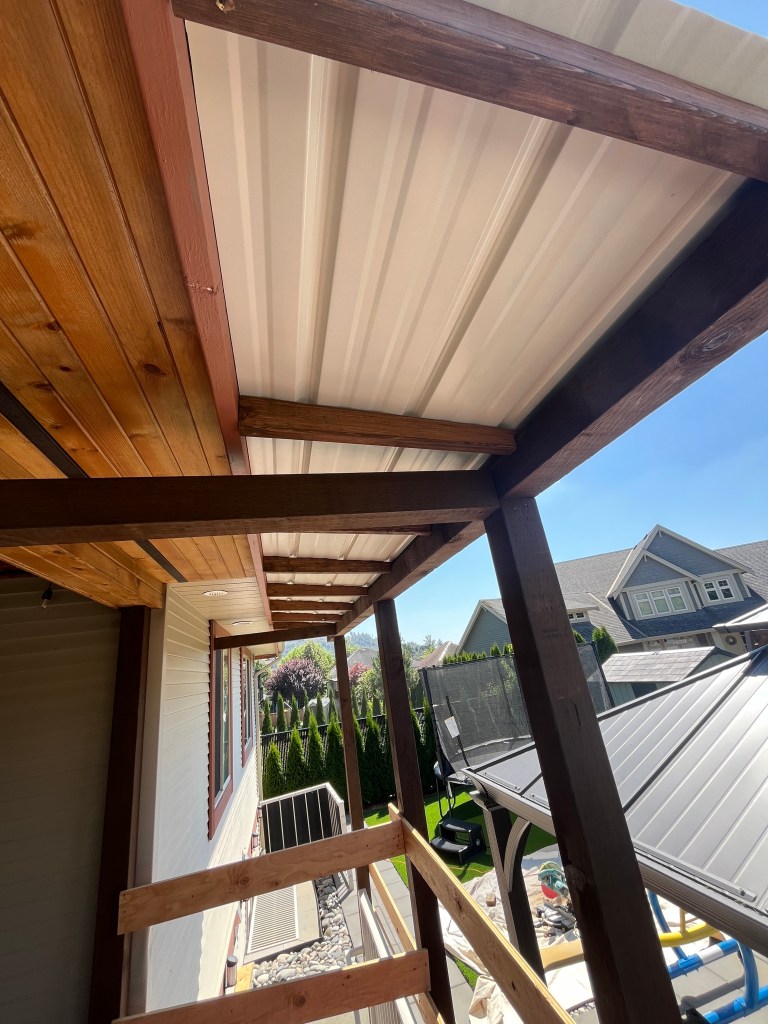
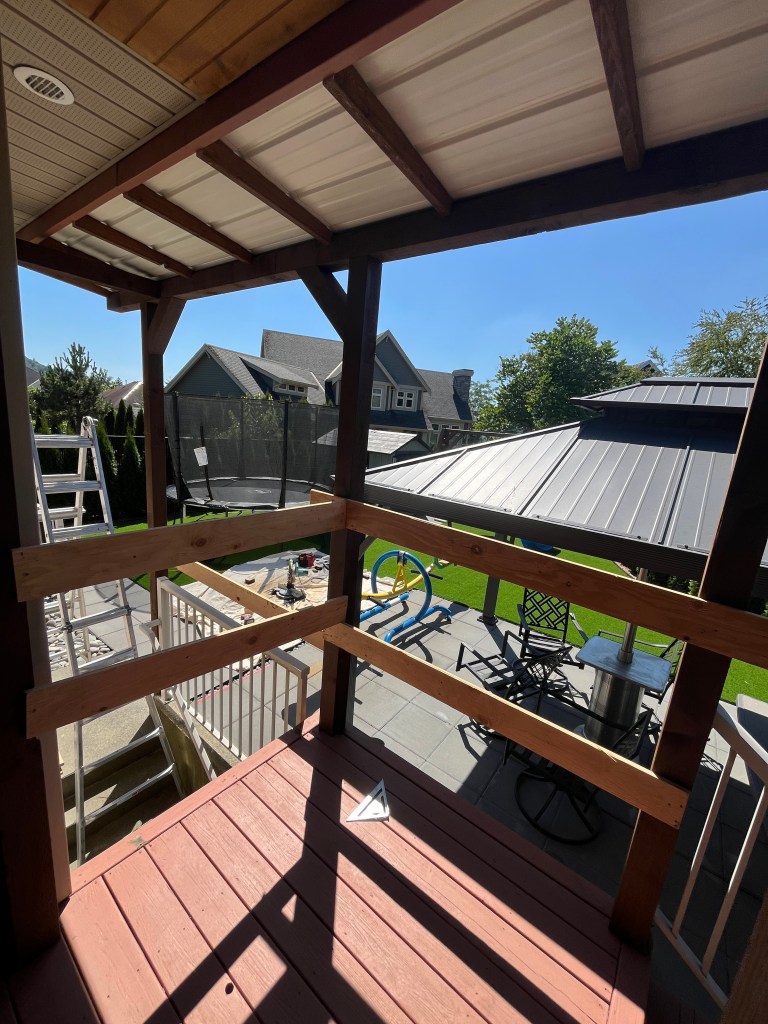
After we ironed out the details, I set to work adding 4×4 posts for roof and doorway framing:
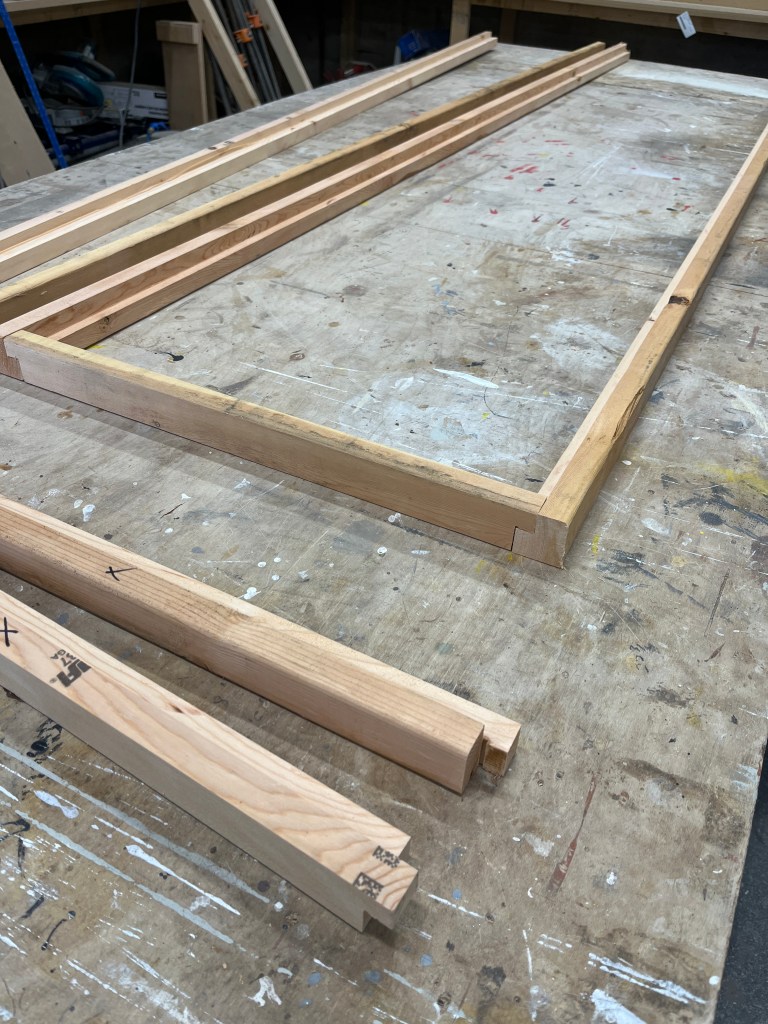
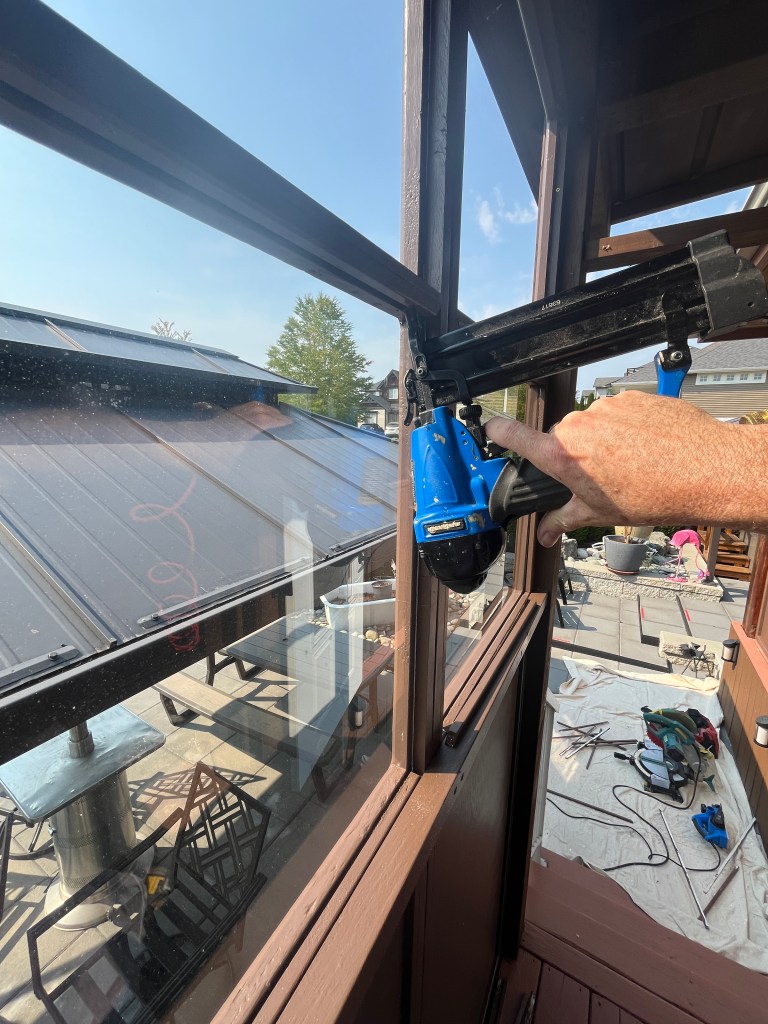
Next I started building frames out of douglas fir 2x2s and 3/8 fir plywood, all primed with primer/sealer, and painted both sides with exterior paint.
It was slow and steady work, custom making each part, filling, sanding, painting and installing it, but I slowly made my way around the perimeter.
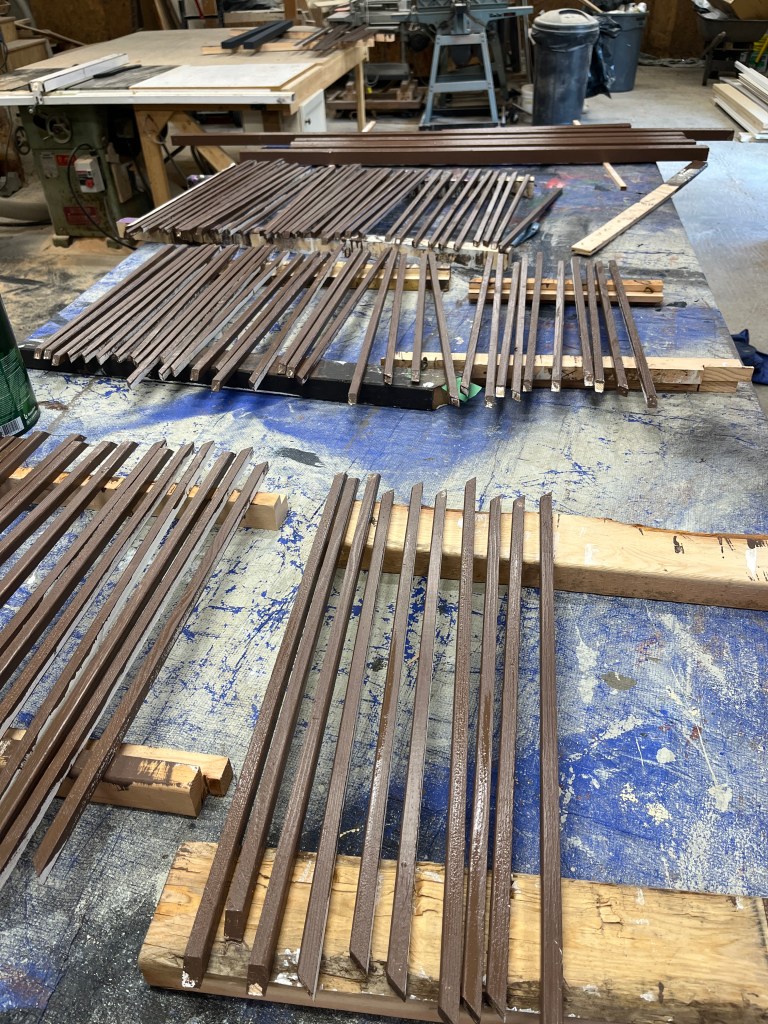
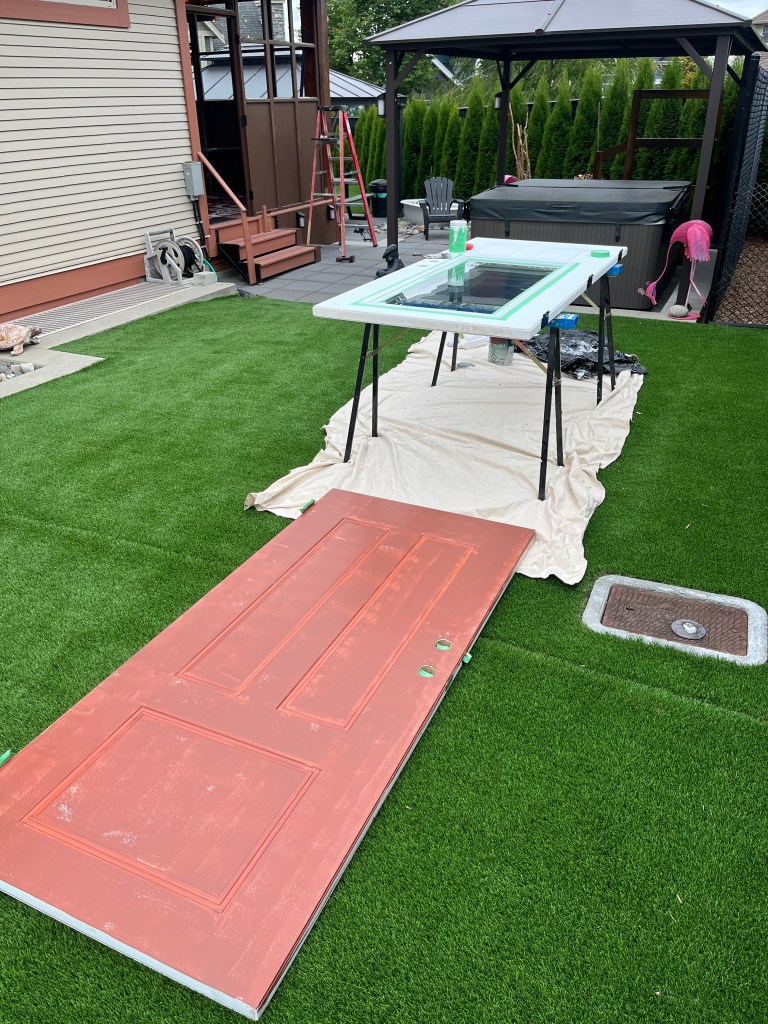
This was followed by exterior doors, glass, and hundred of mitred sticks (framing trim). (Please do not ask me to cut and paint another stick in my lifetime)
Painting took the longest of any part of the job, I think. I’m not super fond of painting but if I have to do it, I do it!
Turned out pretty nice! Took a big chunk of the summer too.
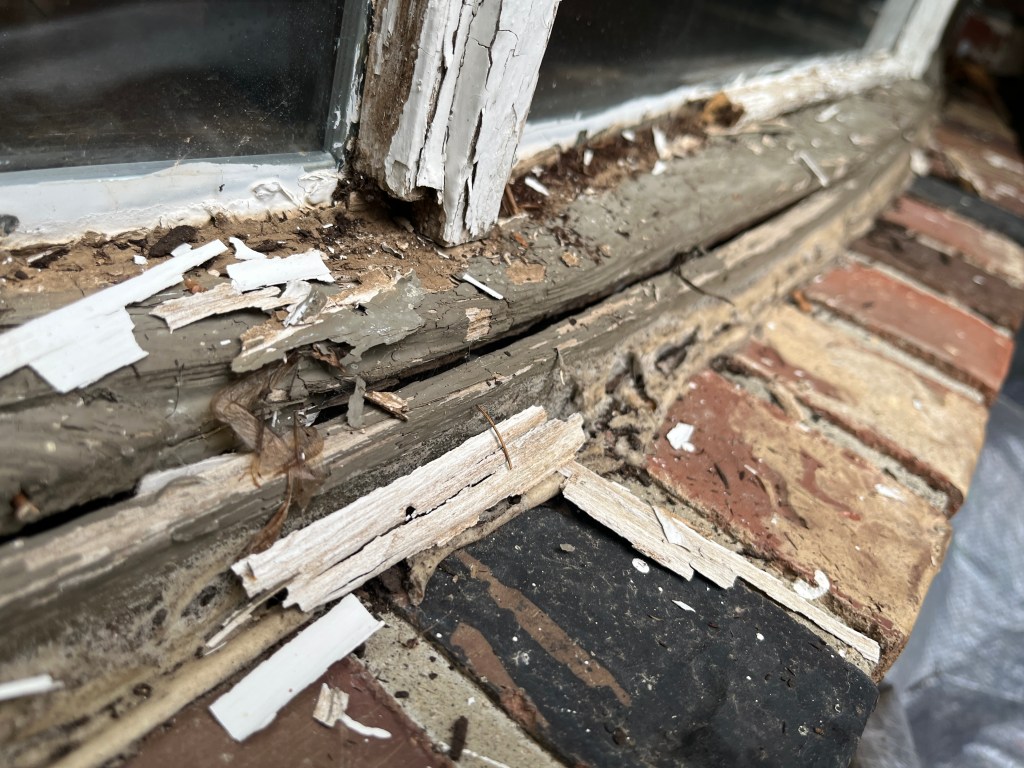
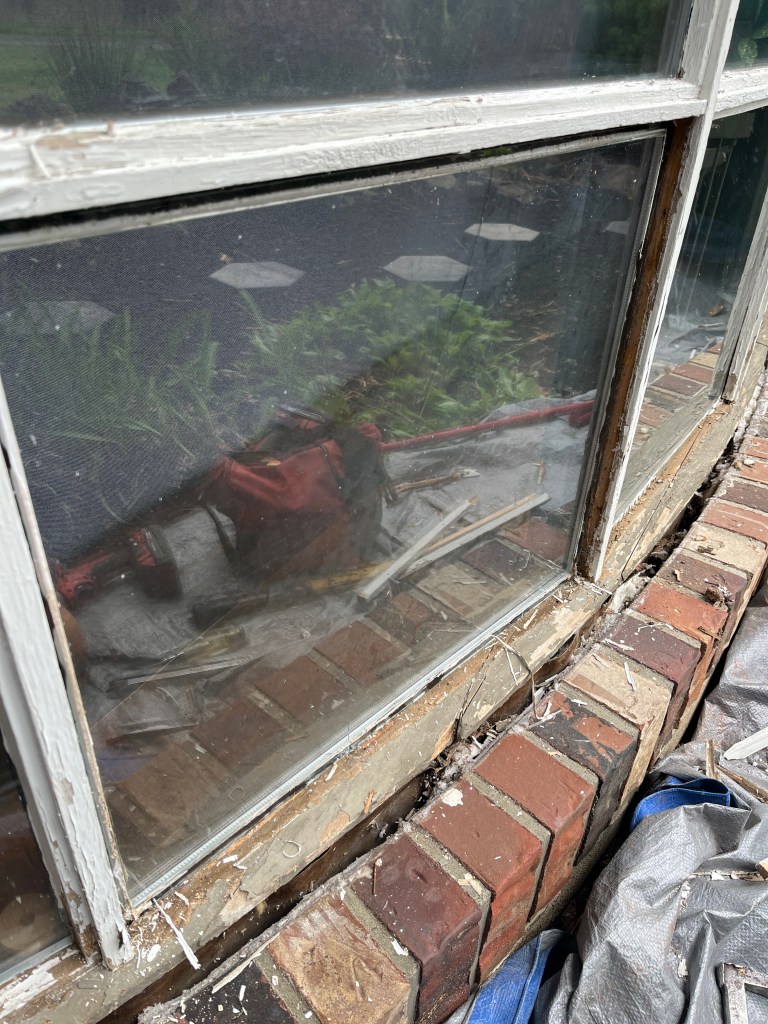
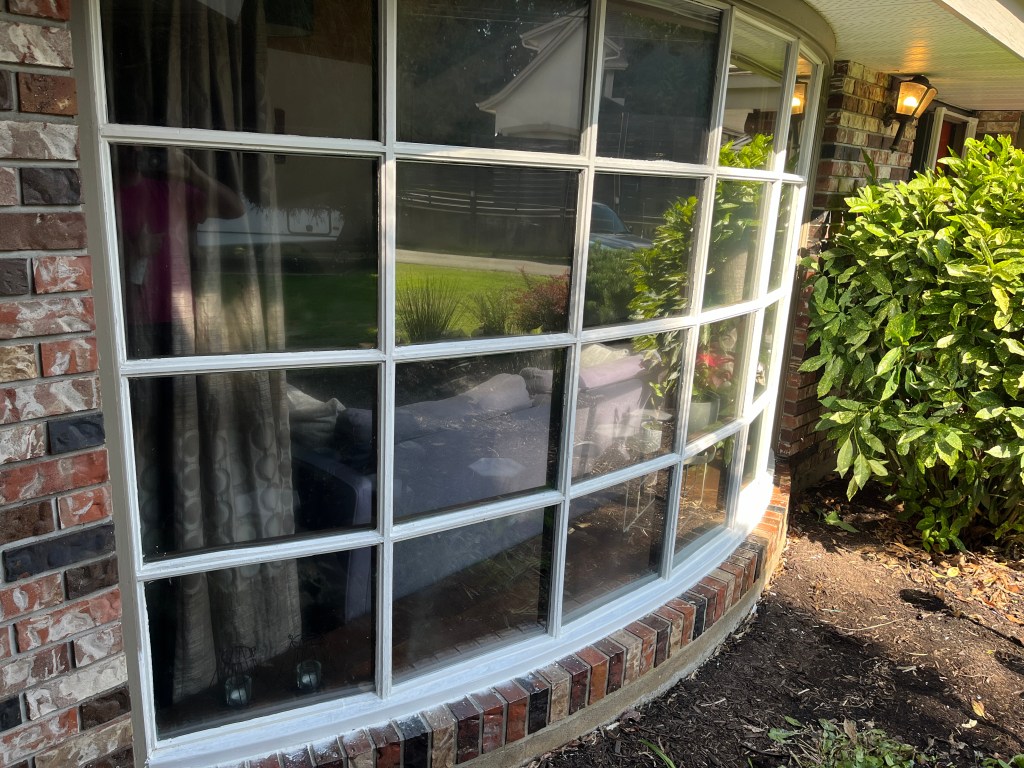
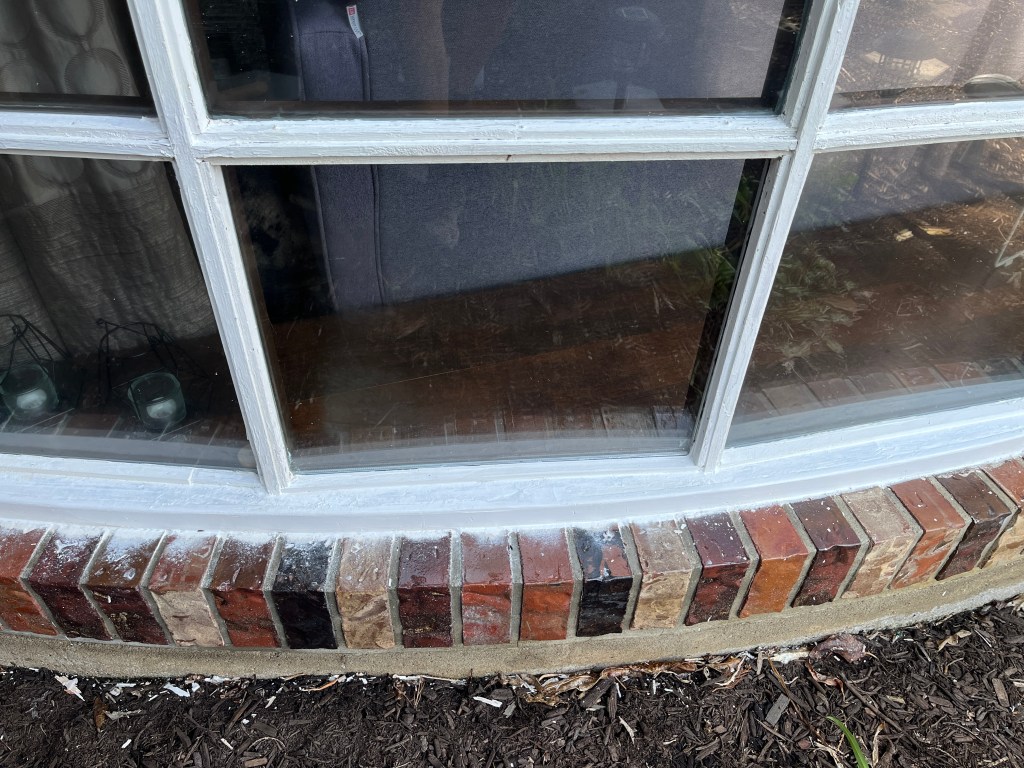
Jake asked me to fix up a front bay window that had weathered for many years. There were some large gaps due to rotting wood, plus it just looked bad in a few areas.
While I was chiseling off some of the wooden trim, I cracked a pane. That sucked, but it wasn’t too hard to replace, and luckily Abby Glass was able to cut a new piece for me that day. I was told that it might fog up in the future, but as several other panes were already fogging, I wasn’t too concerned.
I filled gaps with spray foam and cut a new curved shelf and otherwise fixed things up as best as I know how.
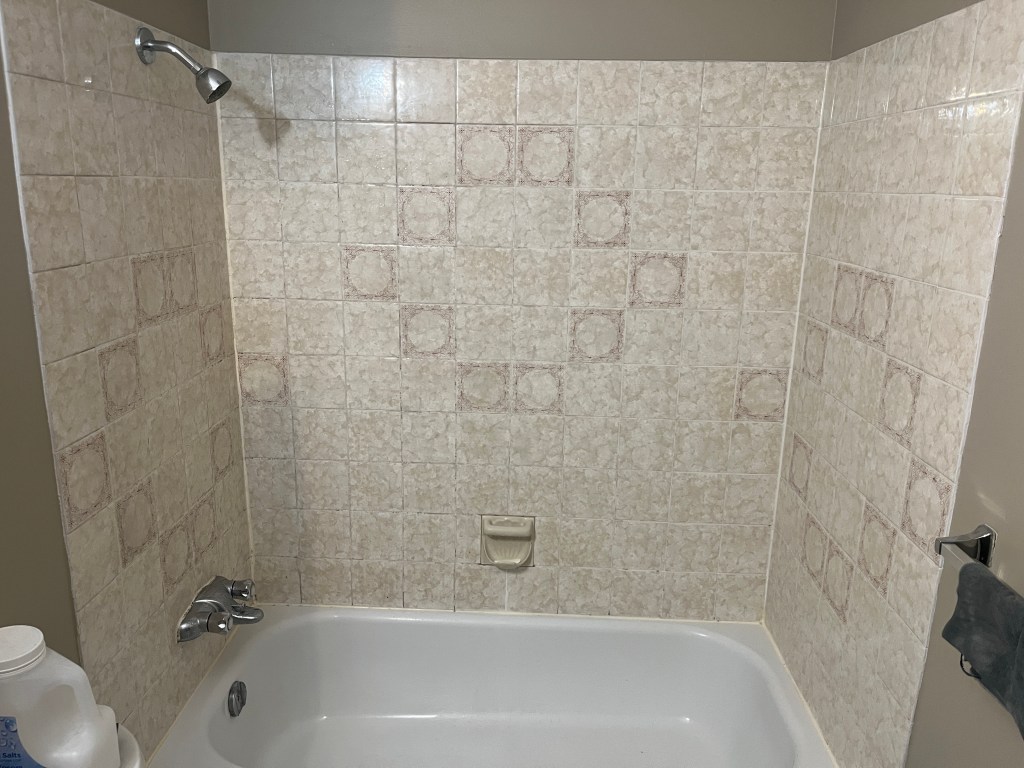
I’m not an experienced tiler and don’t pretend to be, but I have done a few backsplashes, and the odd floor and shower bit. In my own house the grout in the bathtub tile was quite old and was stained with black stuff that I had bleached once but not very well and it just bugged me. So I decided to try to re-do it. Here is the “before” picture. I think if you zoom in you can see the dirt a bit. The soap dish and the caulking needed help too.
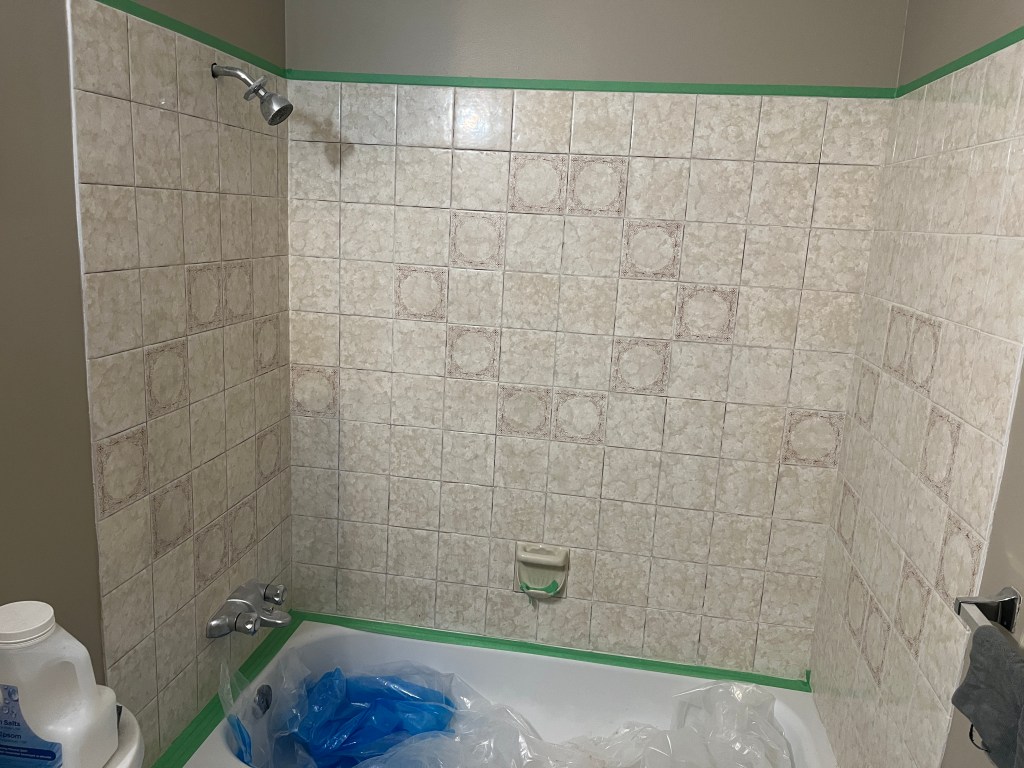
I scraped out the old grout with my two-dollar exacto knife. I went though a few blades and I got tired so I didn’t scrape the back wall (the one that doesn’t get wet). I know, there are other tools that would work better, but it did the job.
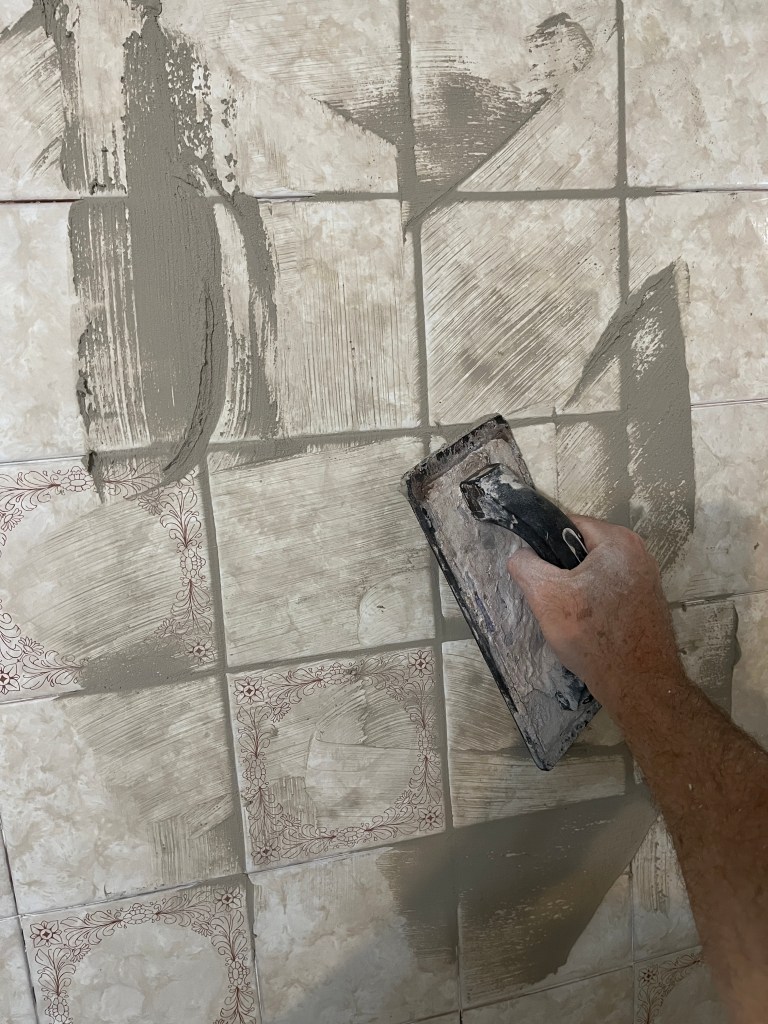
Next I mixed up some grout I had laying around from another job – not quite the same colour but close – and squished it in with my float.
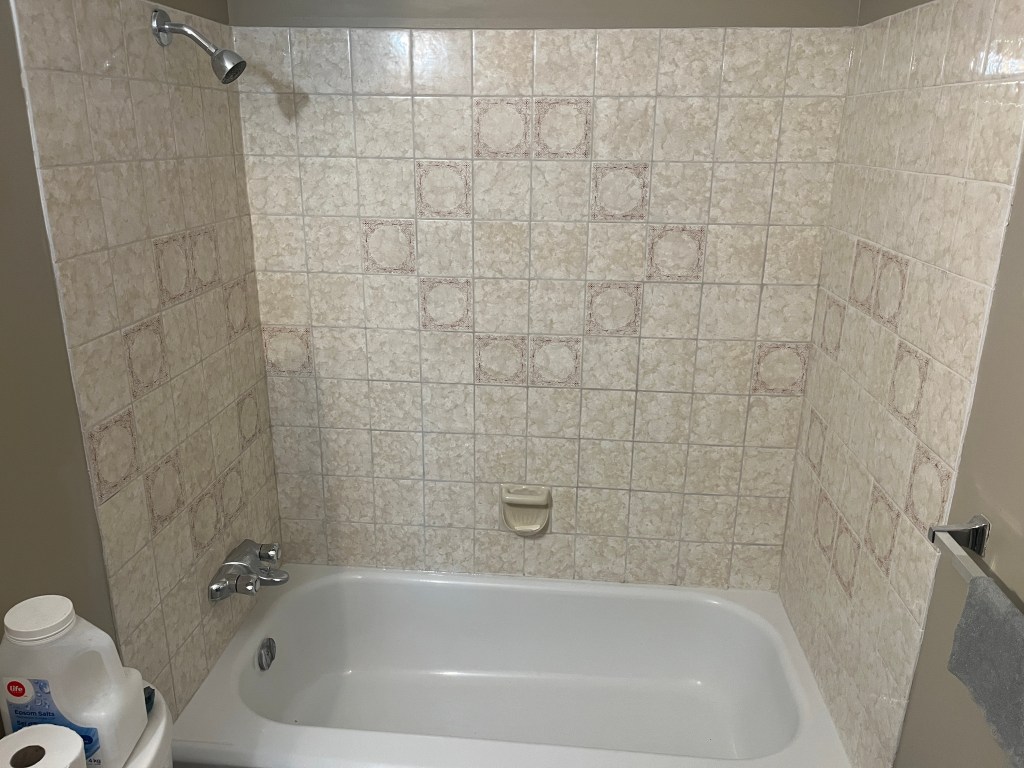
Lastly I cleaned off the excess and added a transparent white silicone caulk. Maybe you can’t really see the difference, but it looks a lot better to me!
The only issue I see is that the grout changes colour when it gets wet. Apparently this is normal, but I don’t think the old grout did so much. I did try using some expired sealer on it but it didn’t do much. It looks good when it dries again.
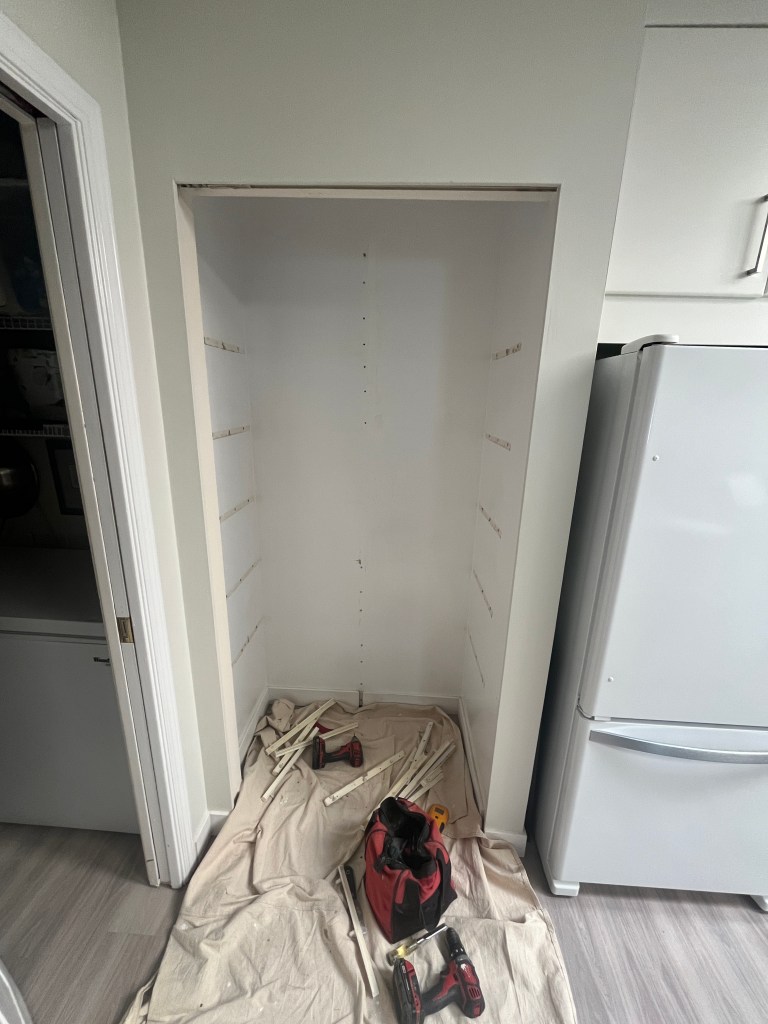
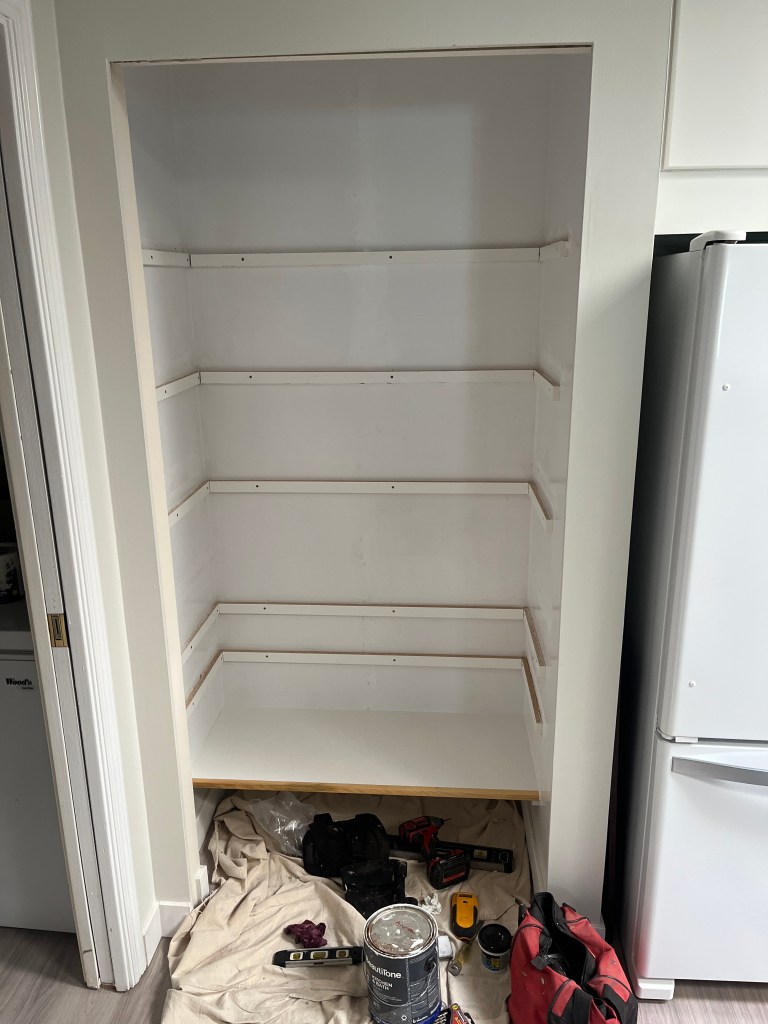
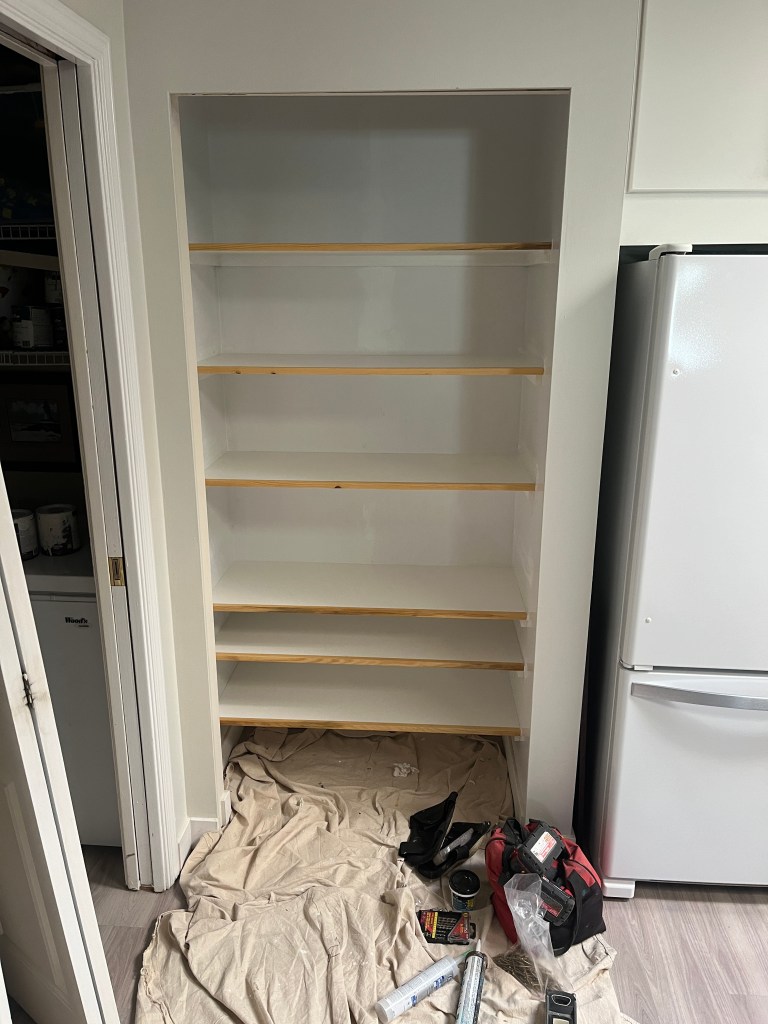
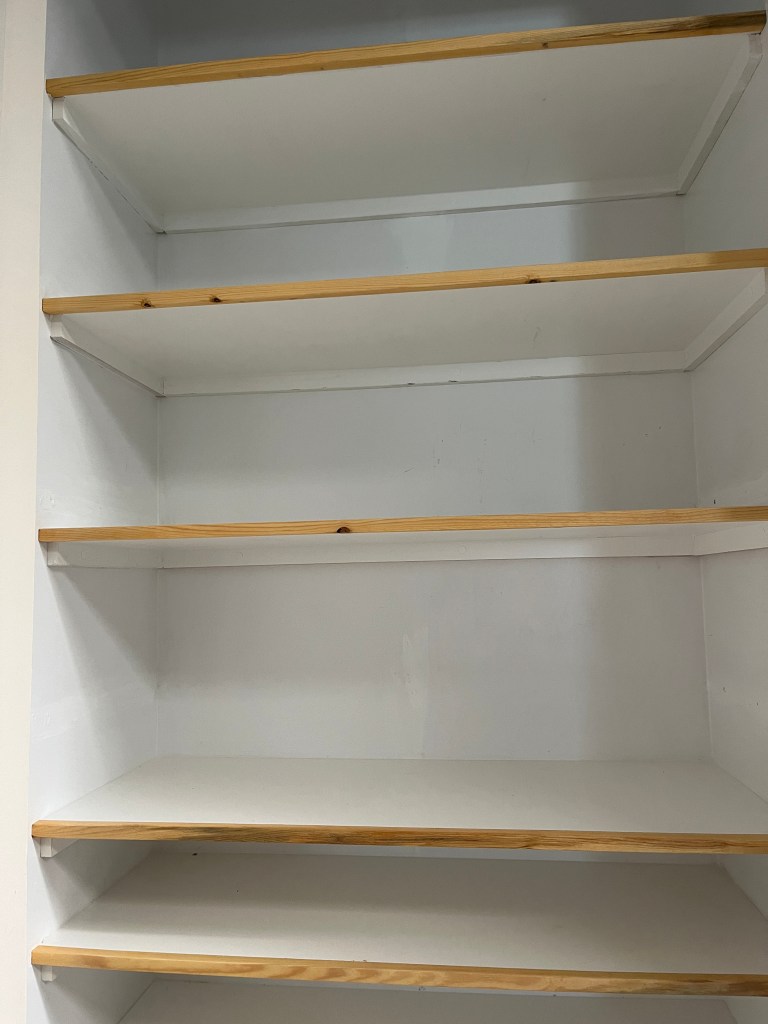
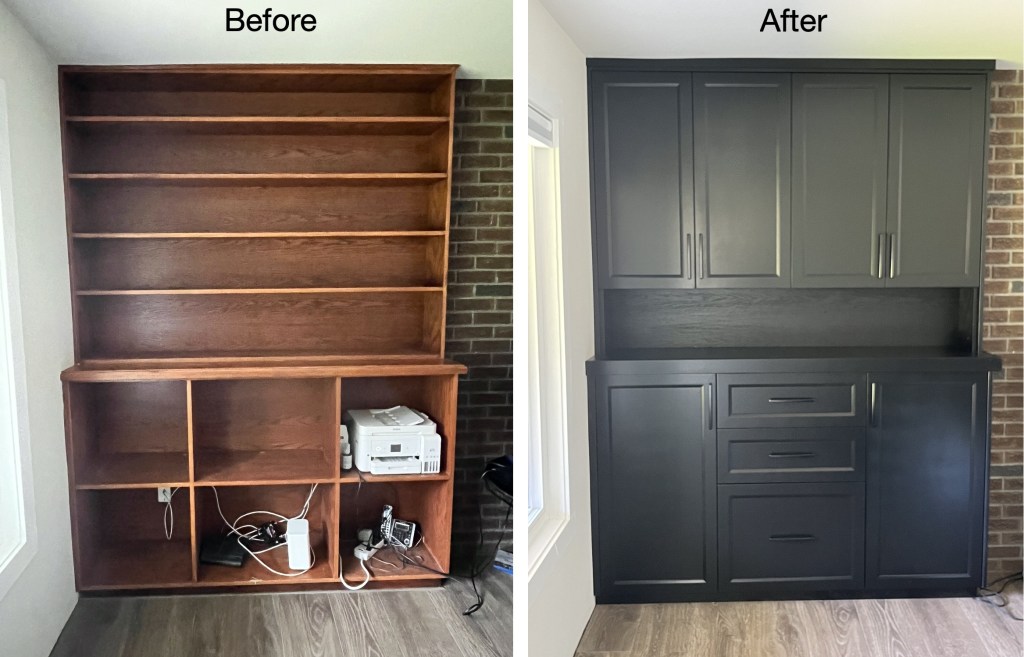
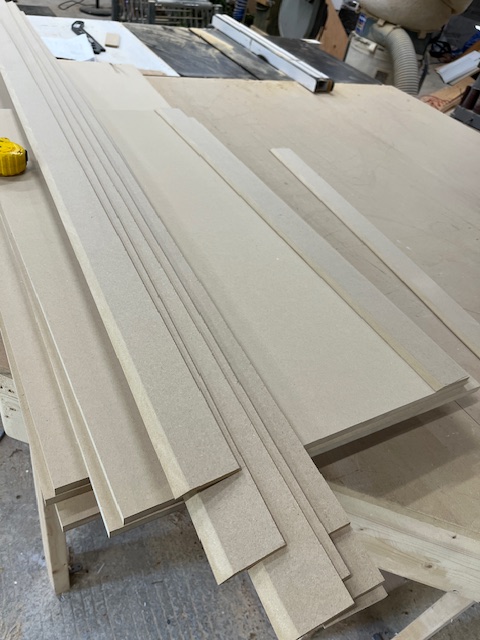
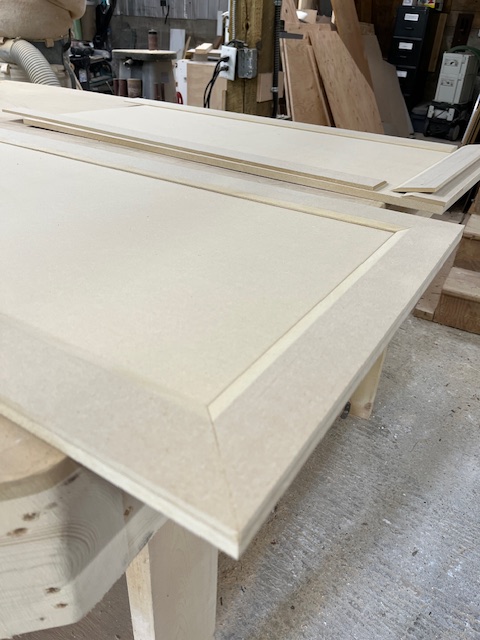
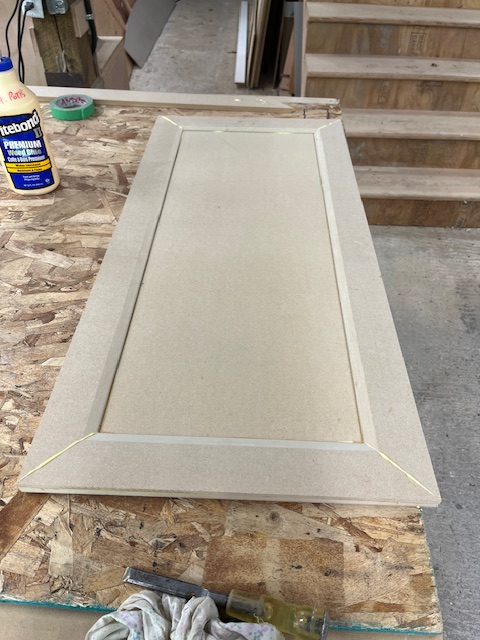
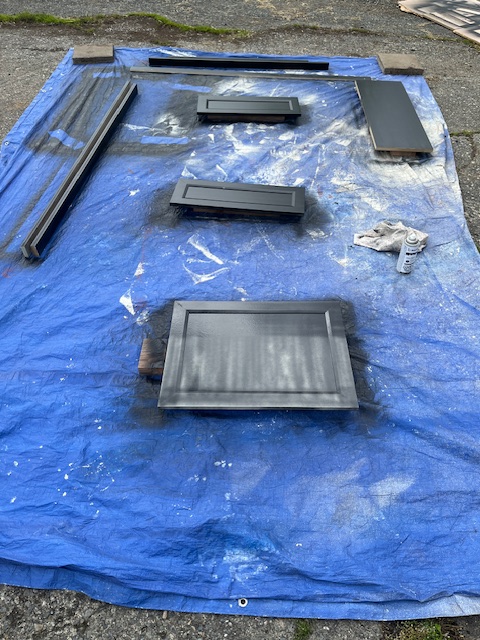
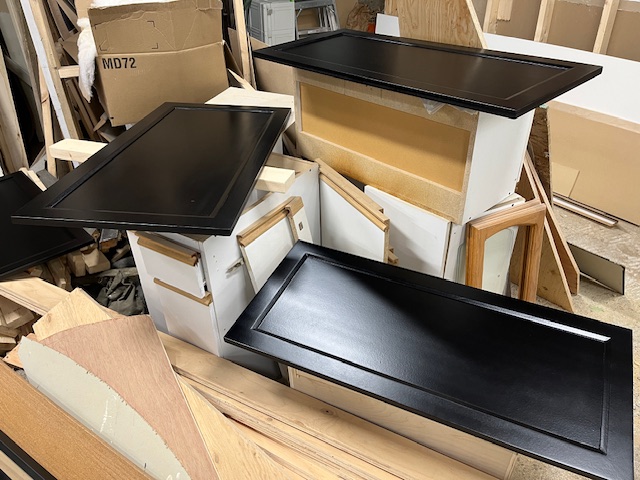
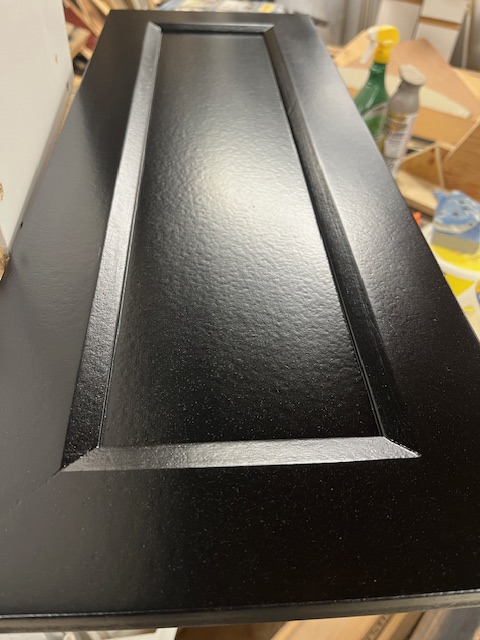
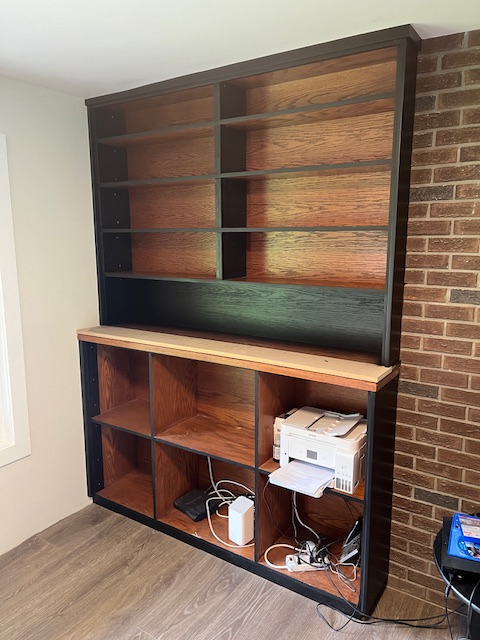
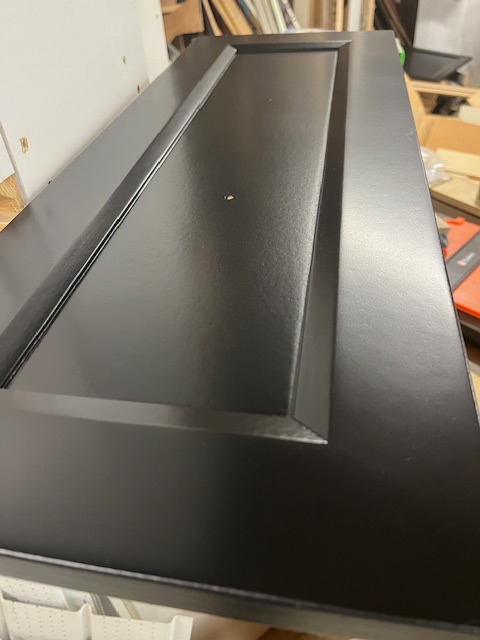
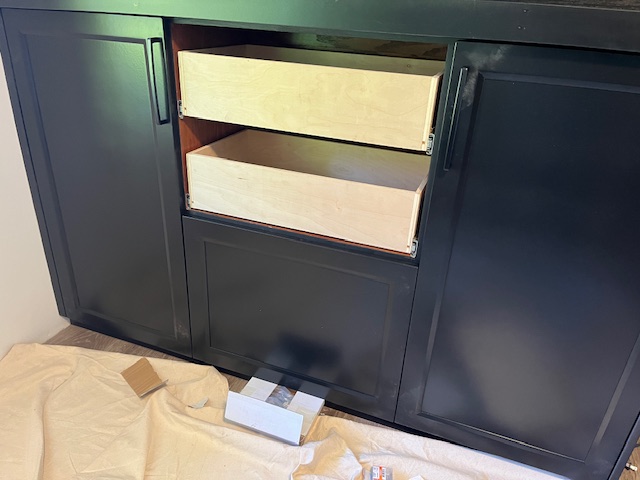
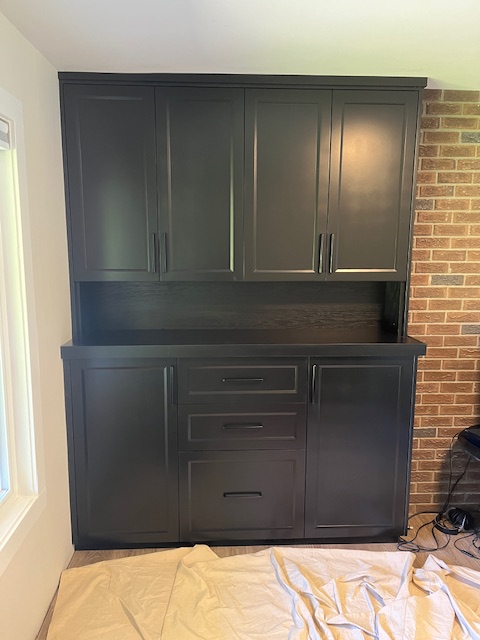
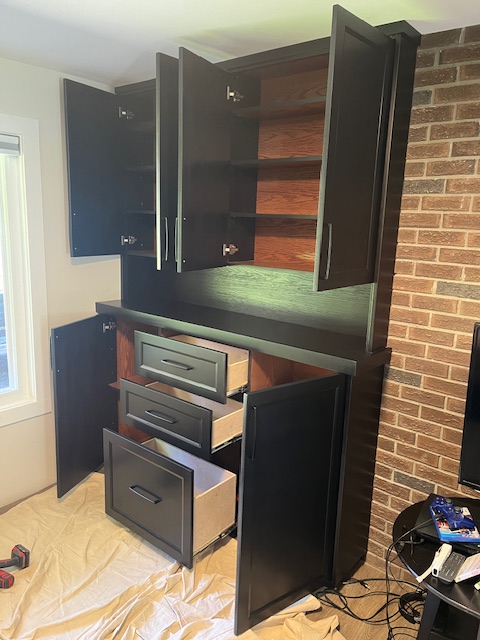
Stacey and Joe asked me to look at a built-in bookshelf they had that wasn’t working for them – just showing too much clutter. I suggested covering it with doors and drawers. We went ahead; they asked to match their kitchen style cabinets but in black… it was a challenge but it turned out well.
Luckily the bookshelf was square; however the wall and ceiling weren’t quite level so I had to consider that in sizing the doors.
Here are a few pictures of the process. I made my own doors out of MDF and painted them. It was a bit more of a process than I expected but turned out well.
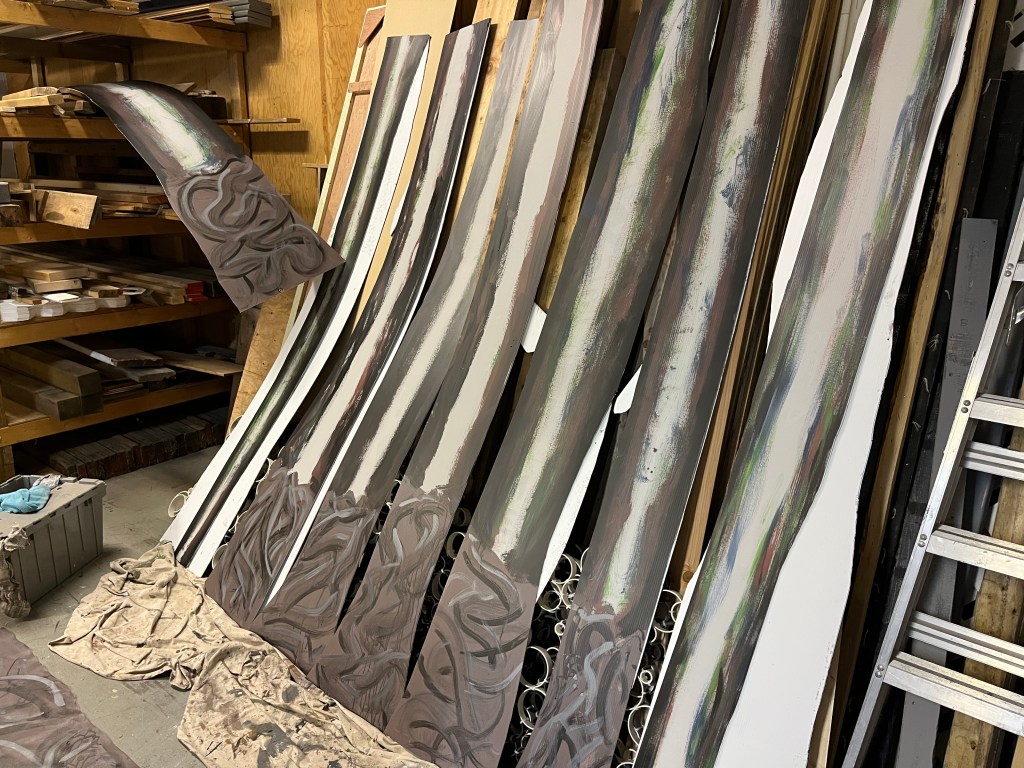
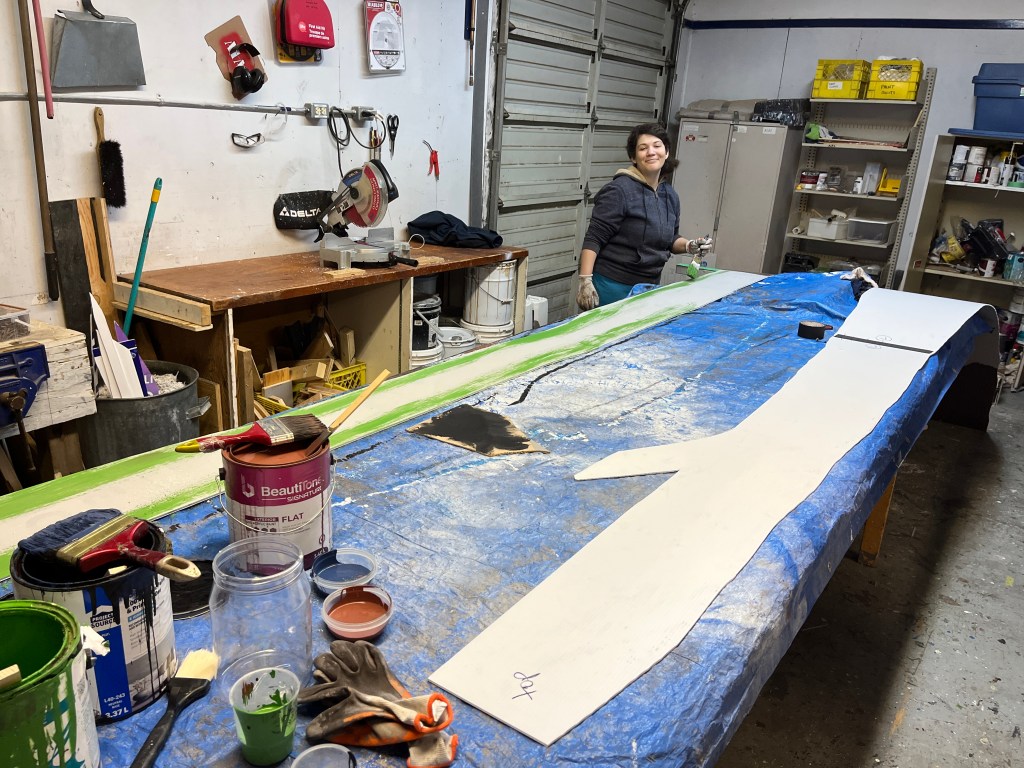
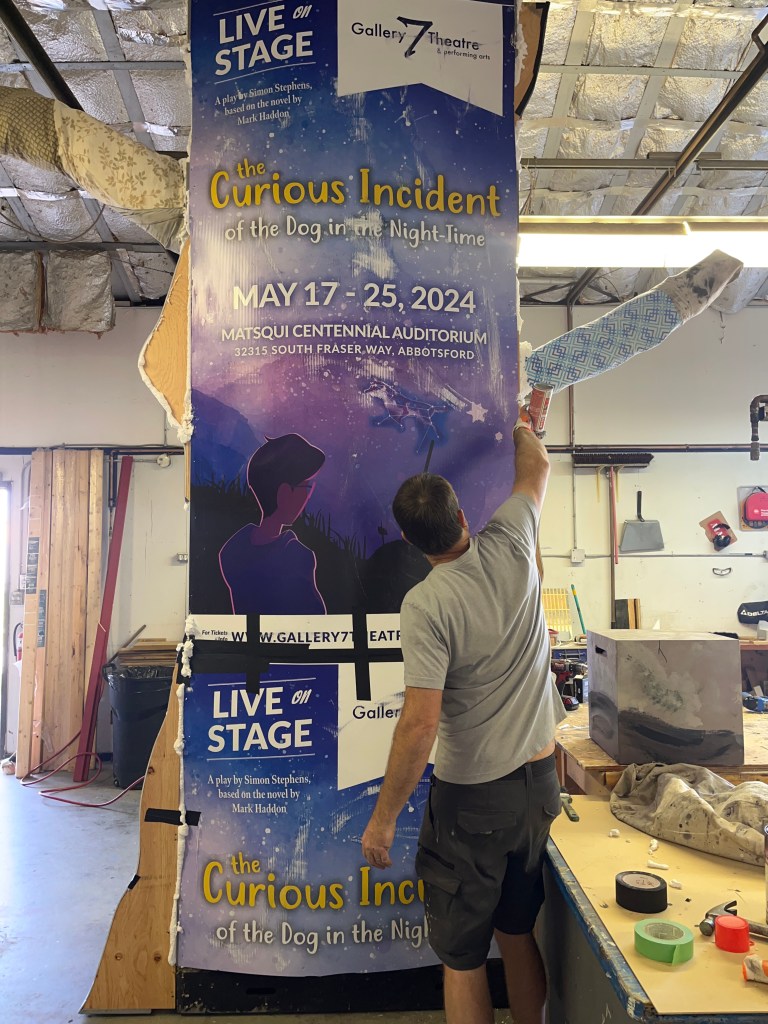
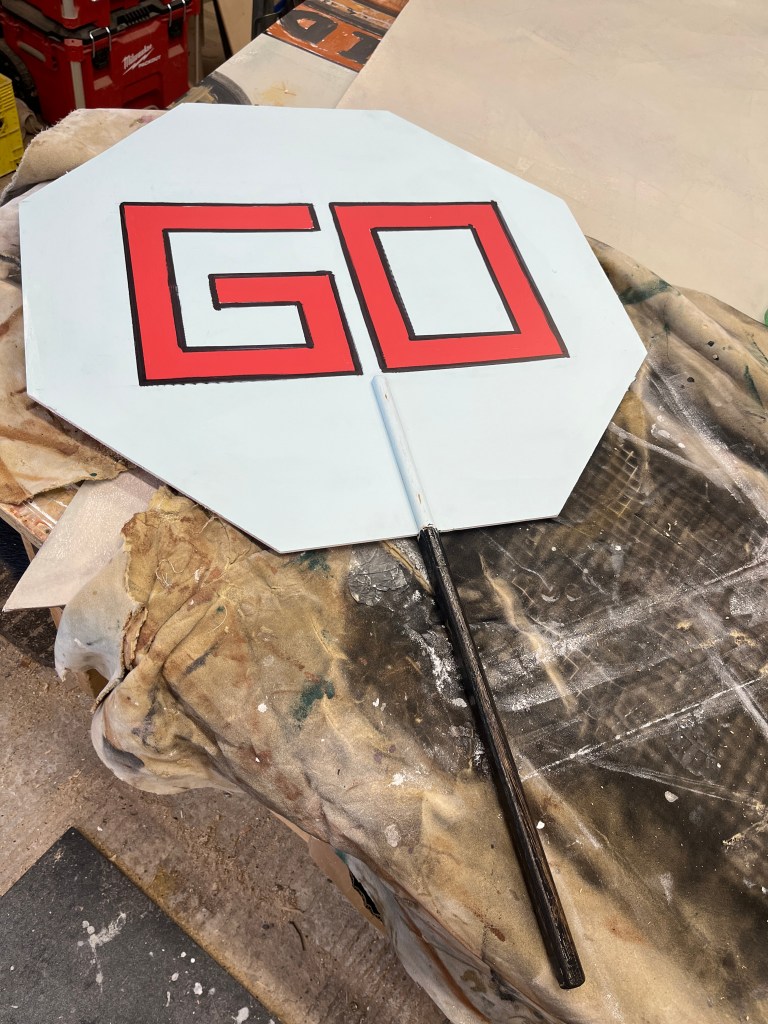
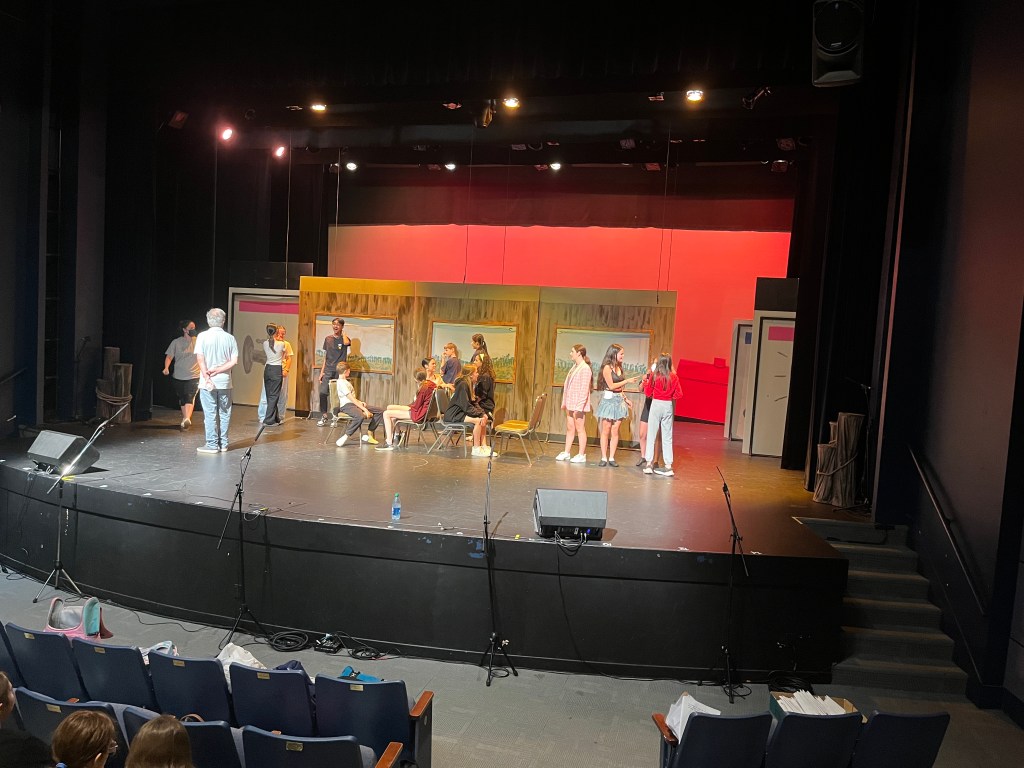
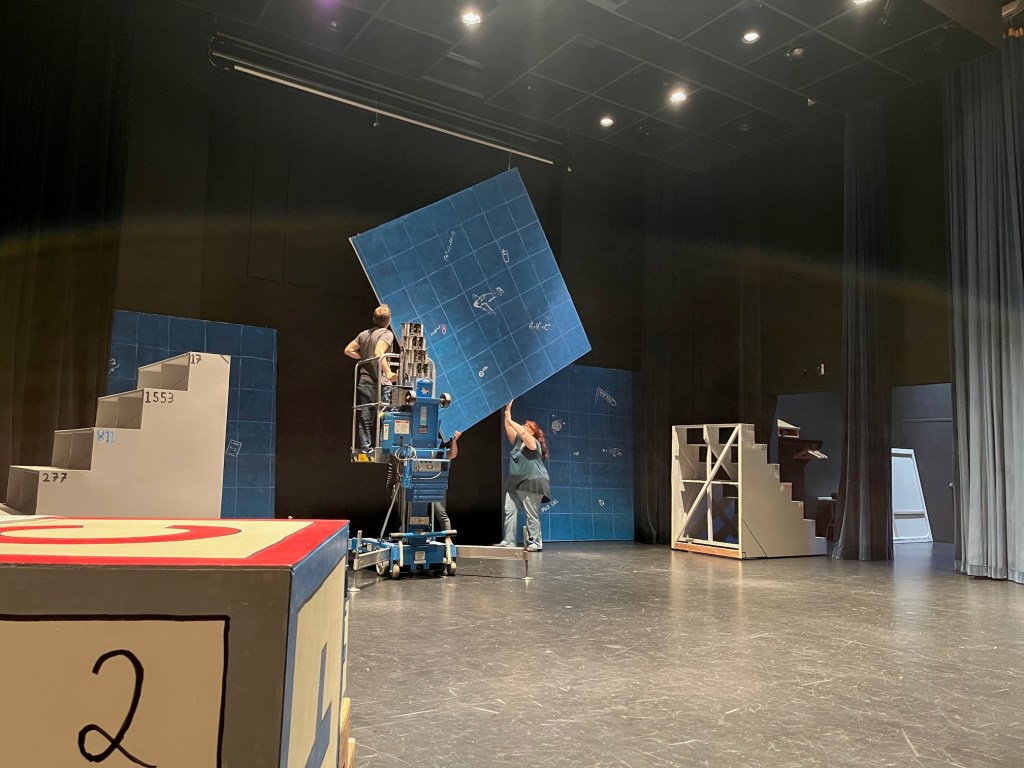
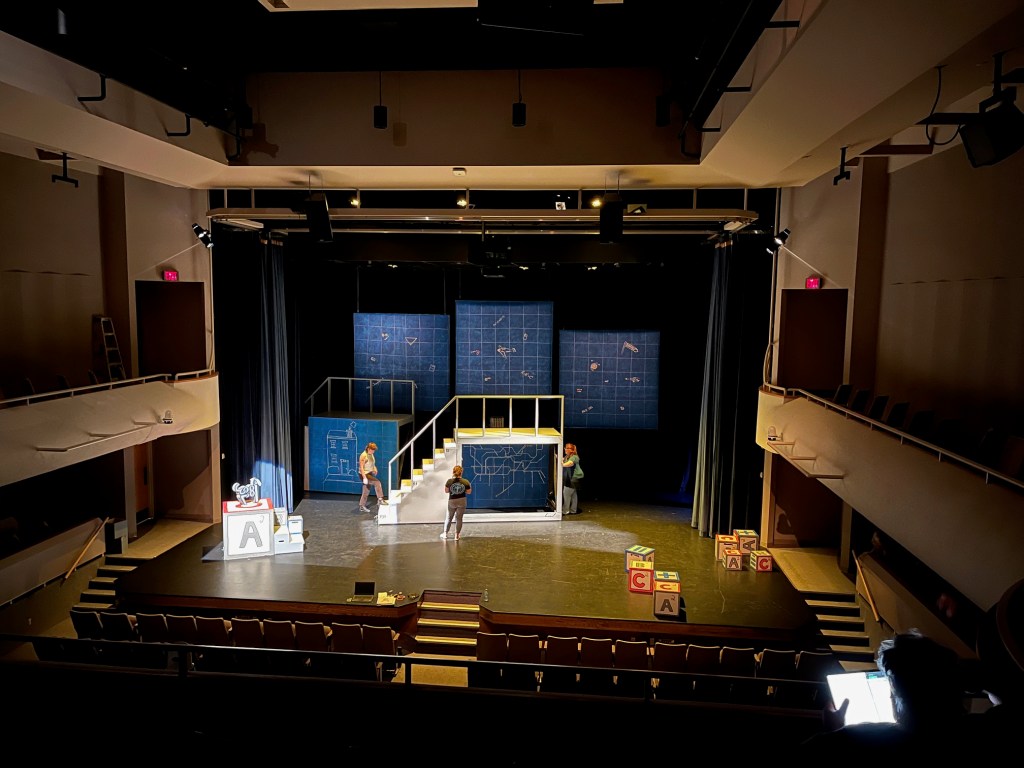
This is an interesting play about a neurodivergent protagonist as he tries to solve the murder of his neighbour’s dog, and encounters some other mysteries as well.
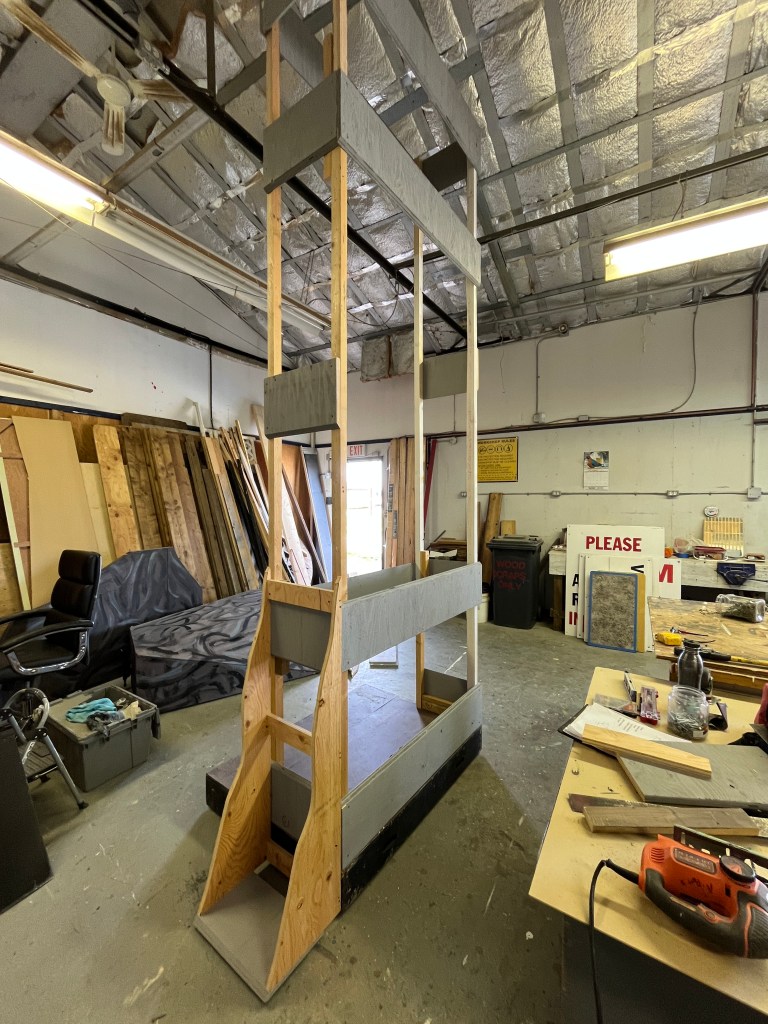
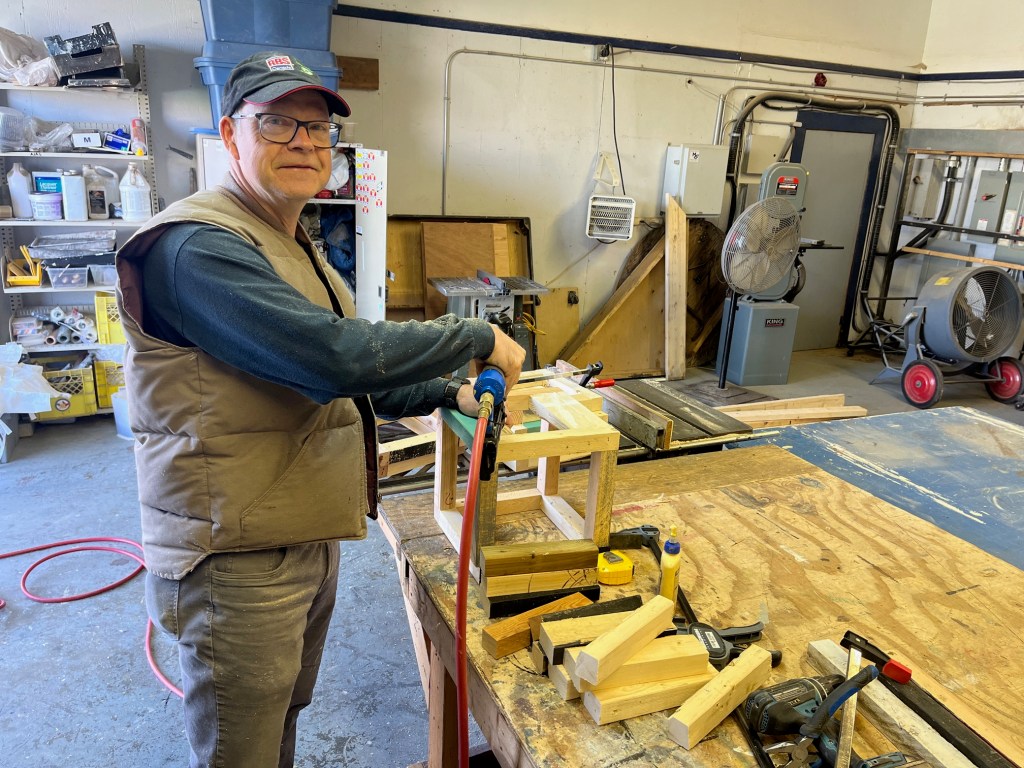
The build happened over a week and a half, with some help from three volunteers. It was a very simple set although I still had to plan how to build it so it could travel. Note to self: measure the inside doors of the auditorium next time you assume they are the same size as the outside doors…
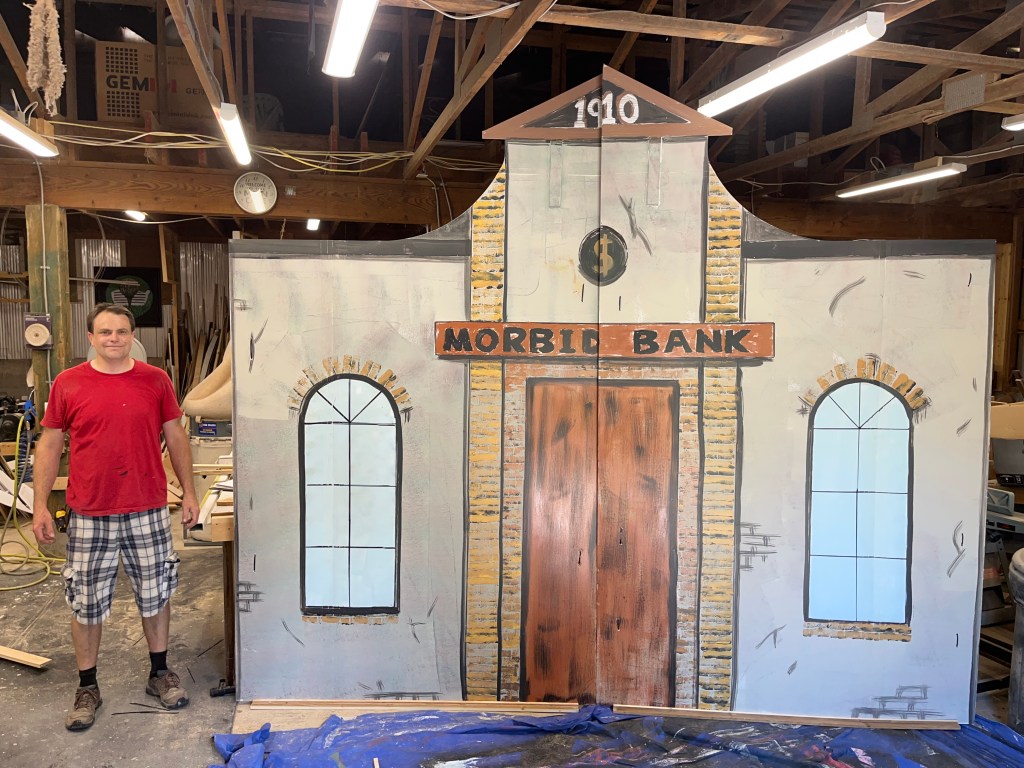
The set designer spent some serious time painting the set and backdrops. It looks fantastic!
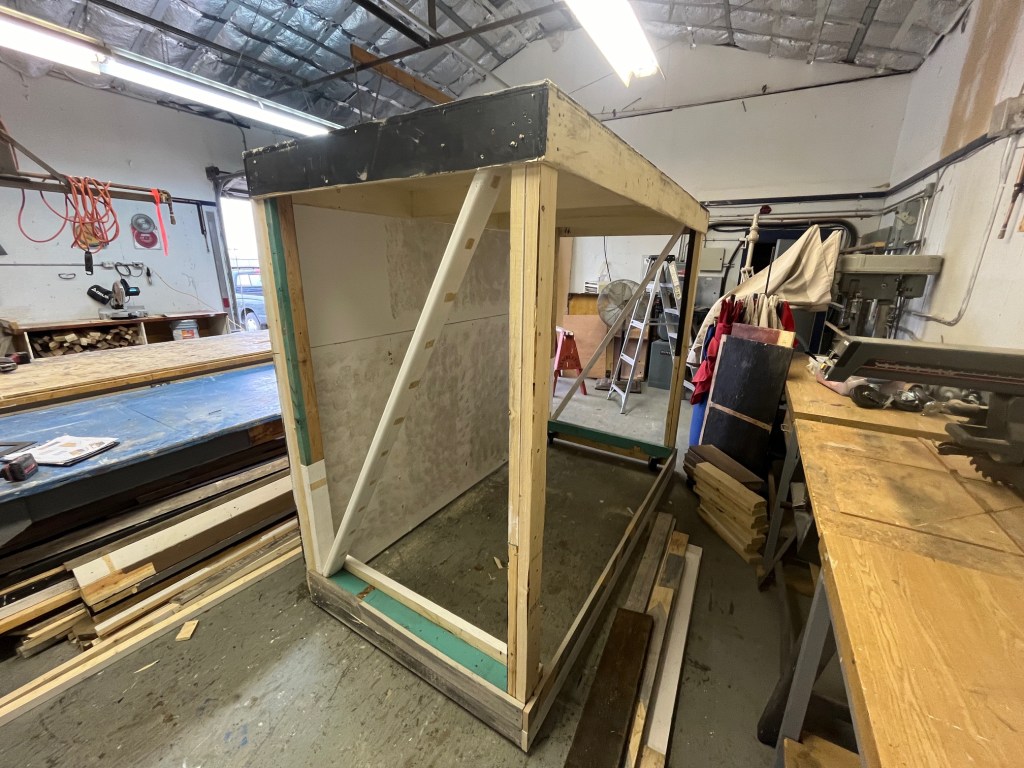
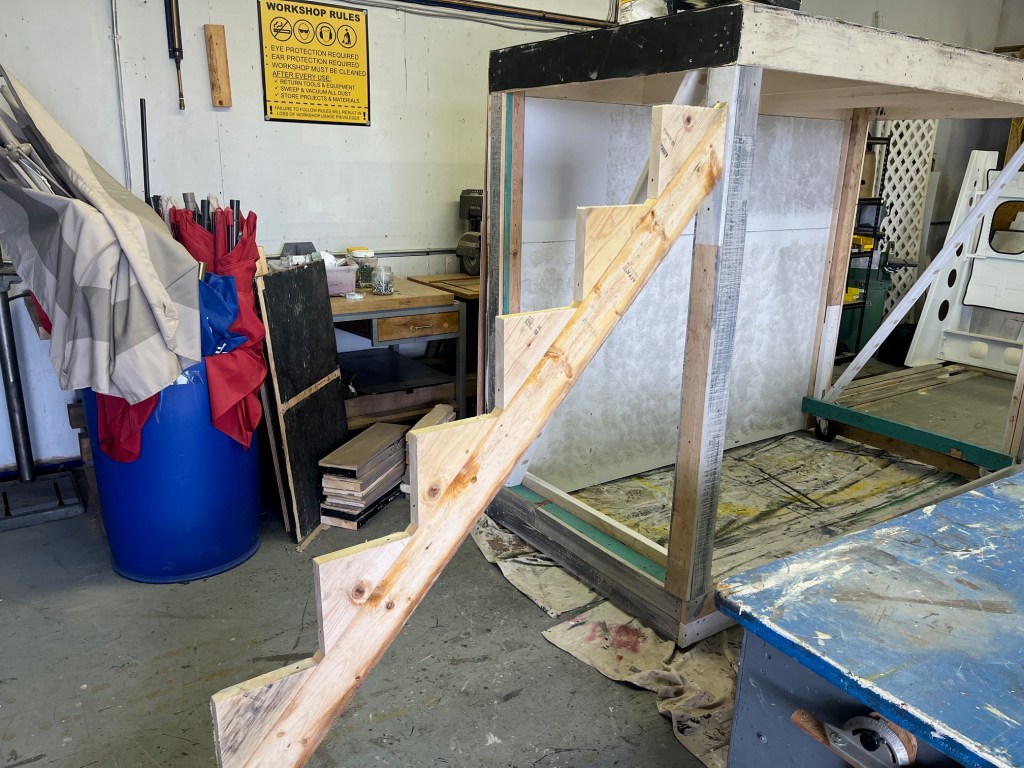
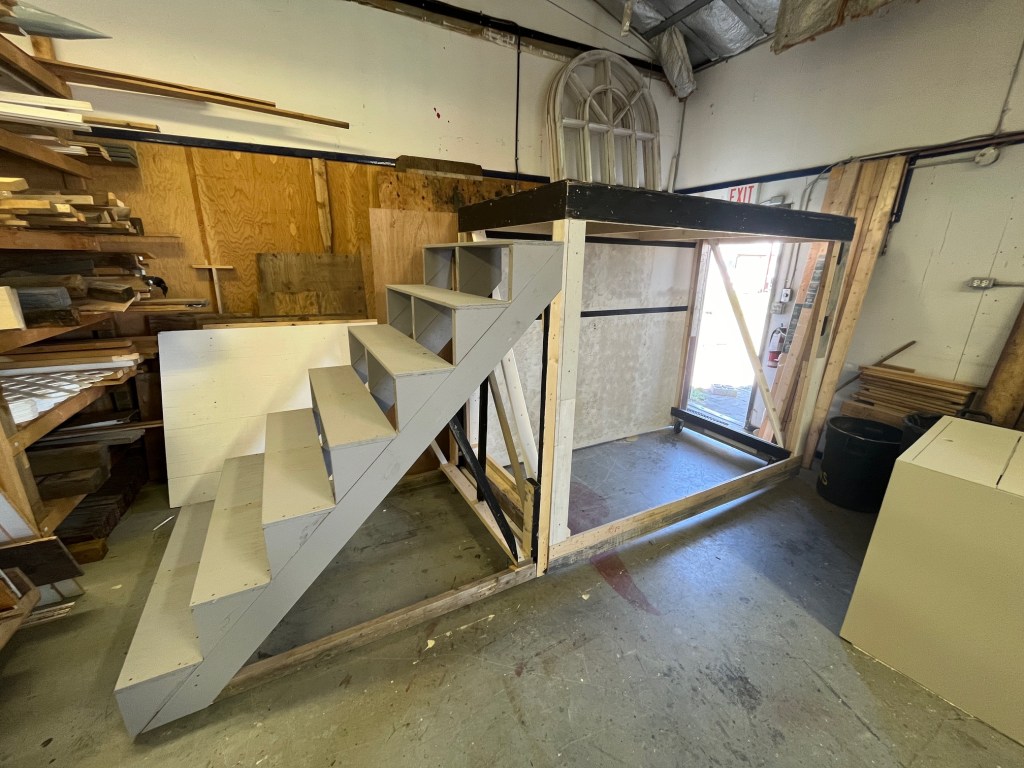
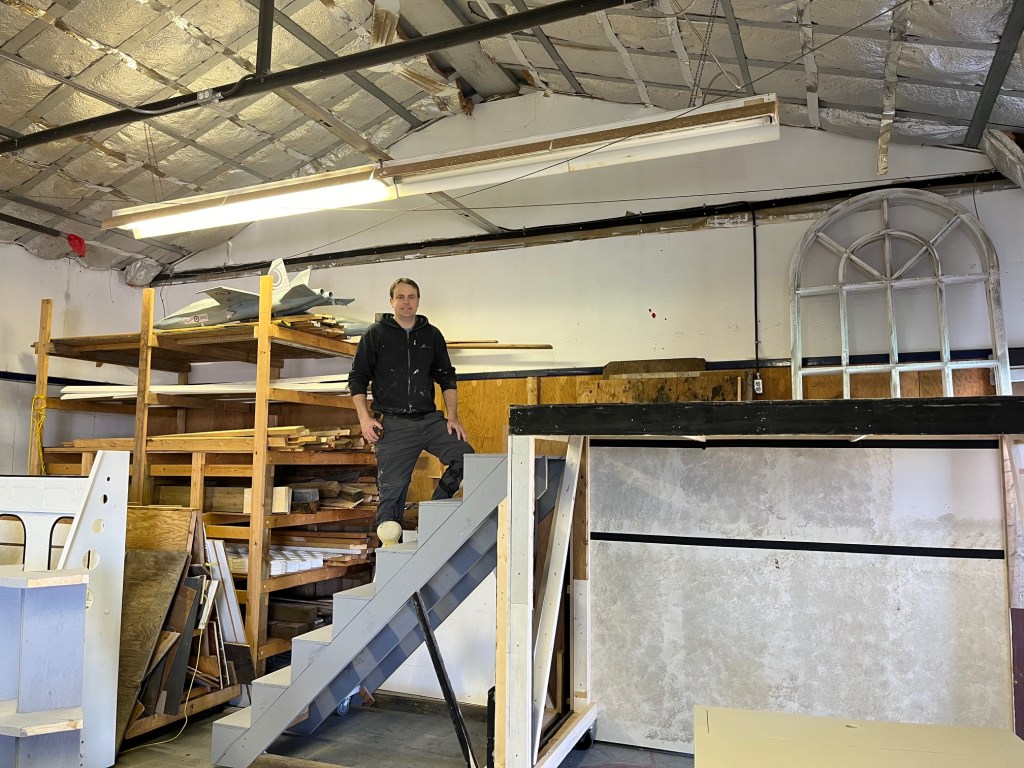
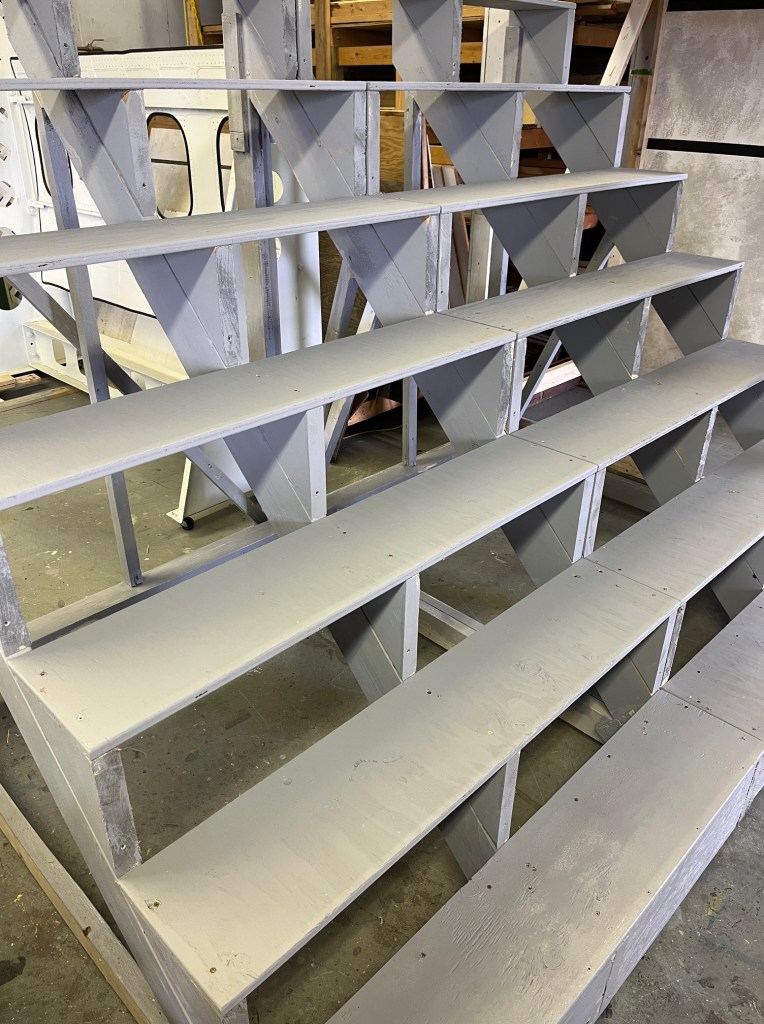
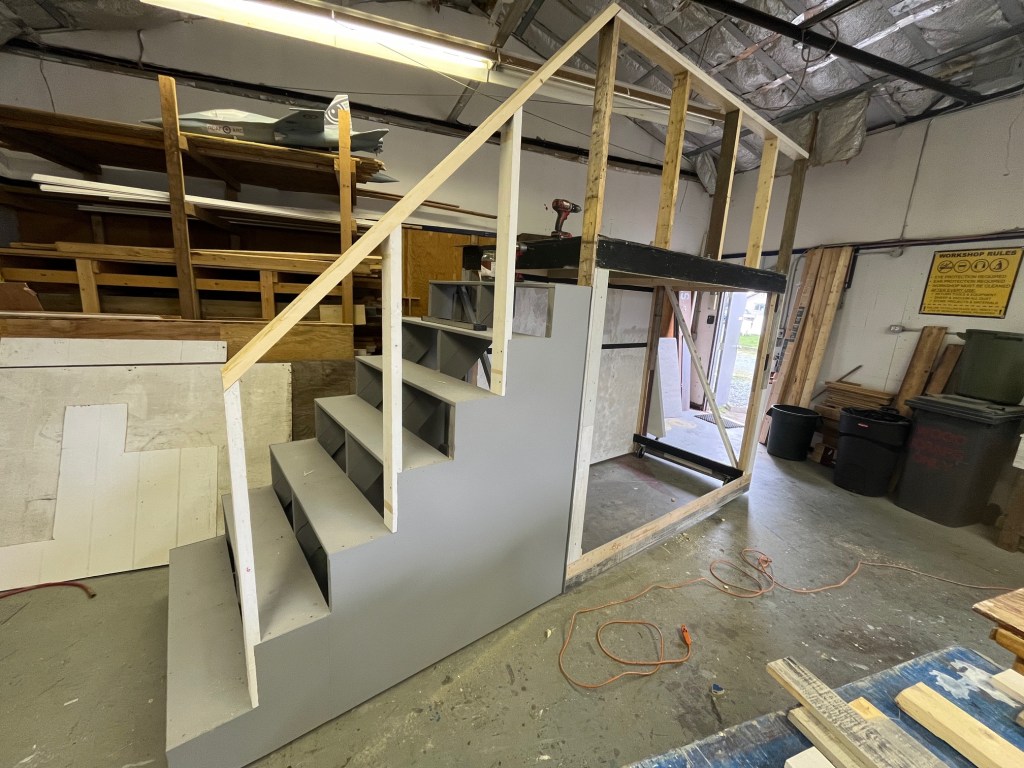
Platforms, boxes, and stairs:
Joined platforms, stairs, and railings:
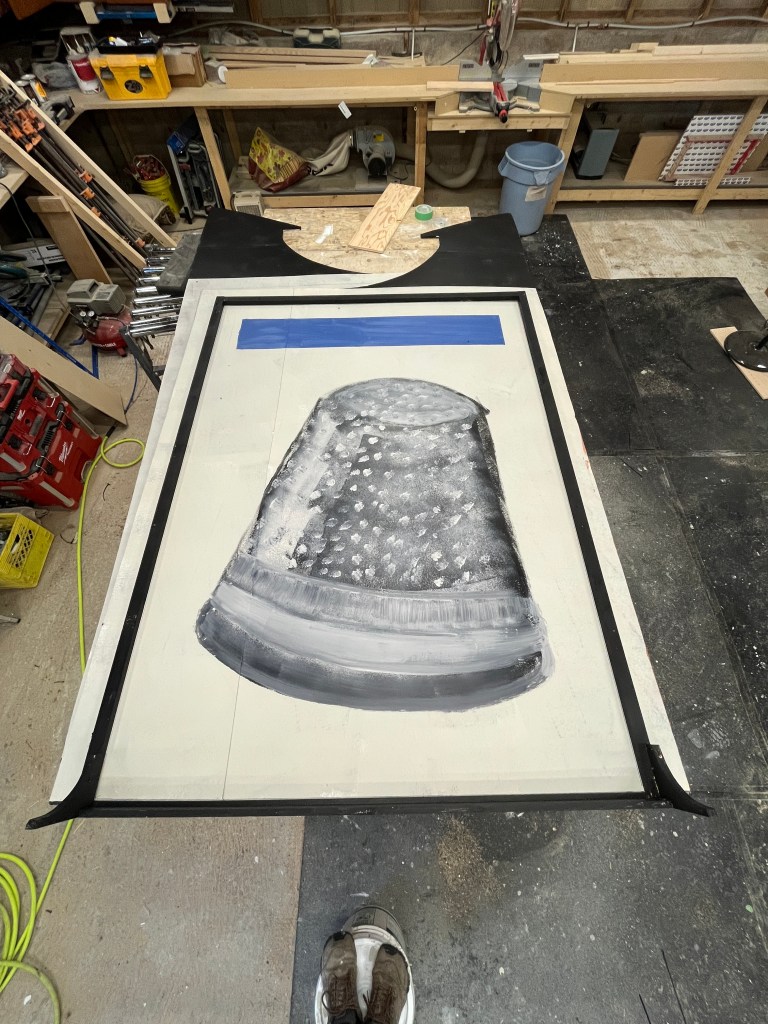
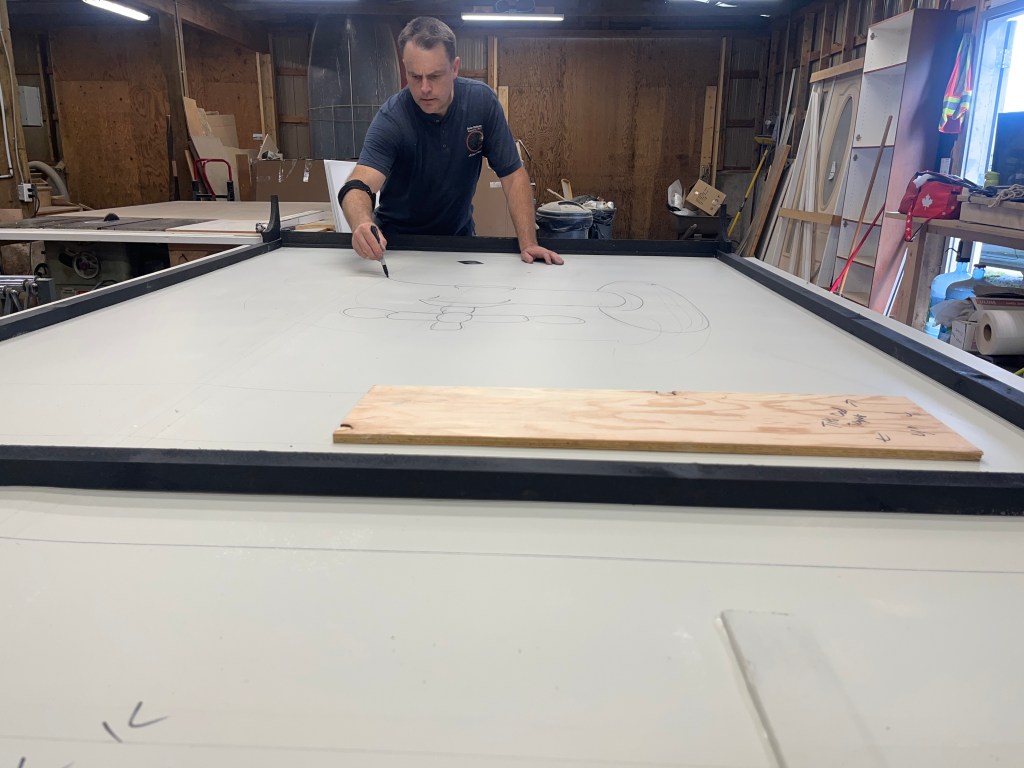
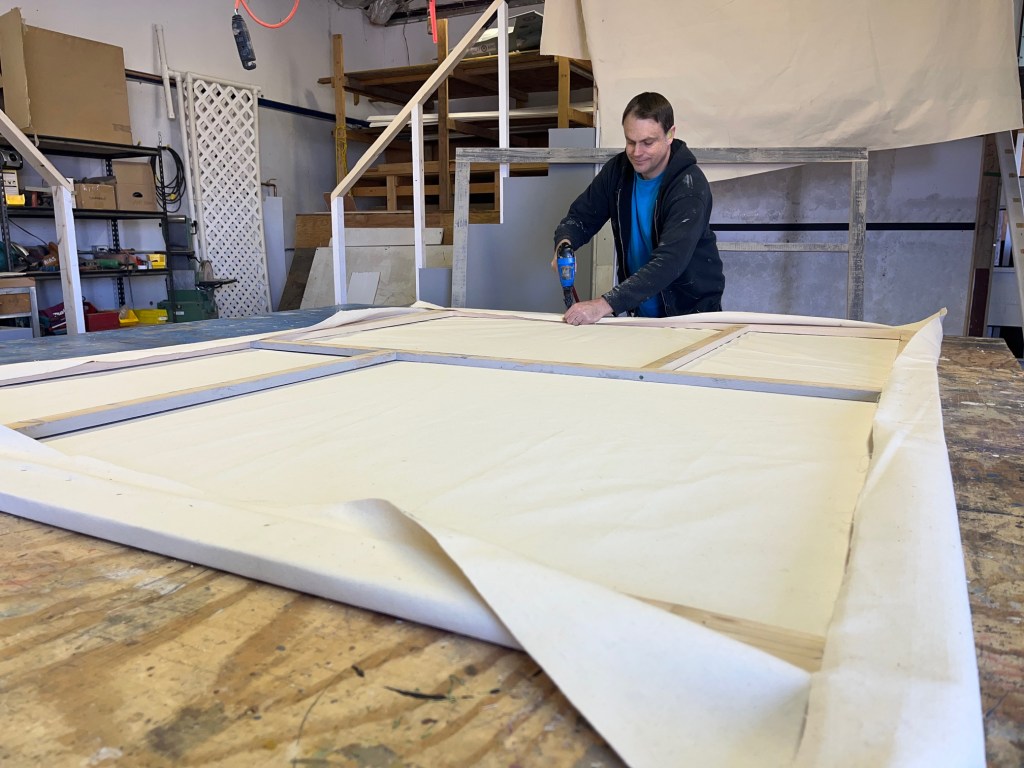
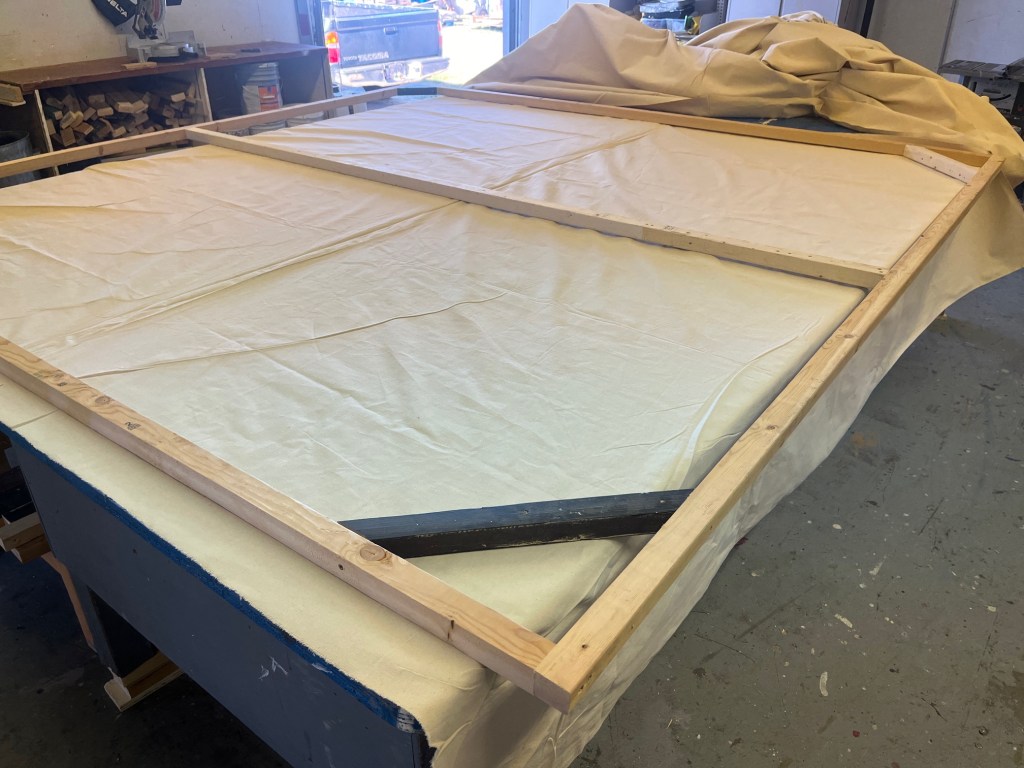
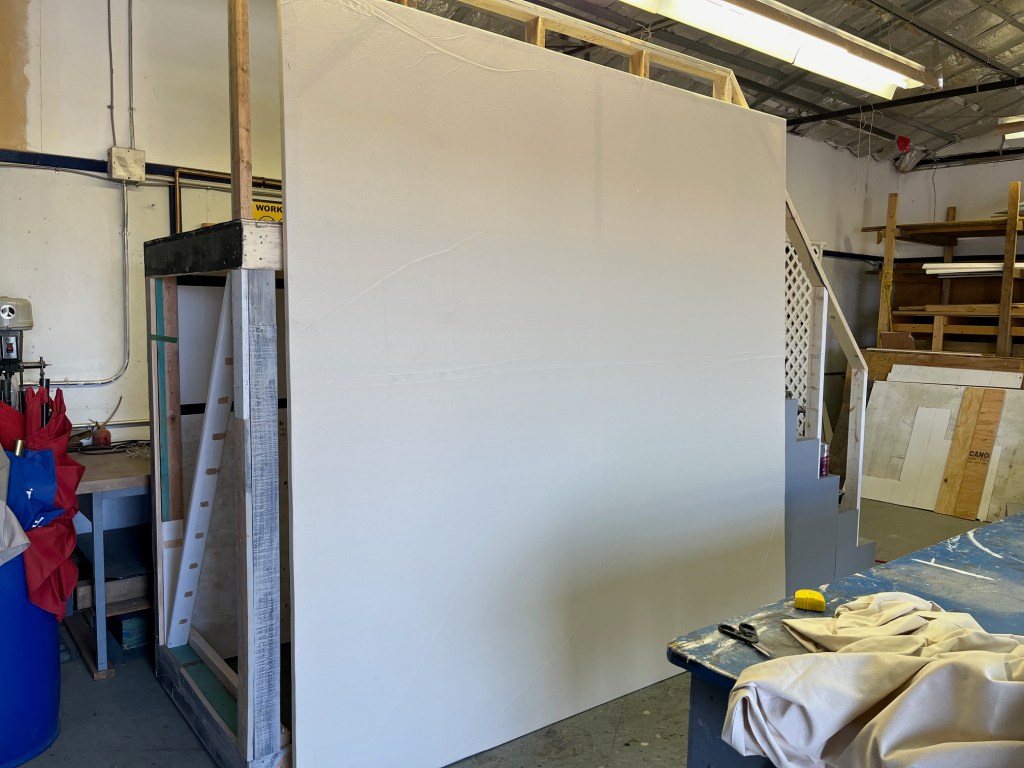
Canvases: I made 5 frames – 2 large ones, and 3 huge ones! Then looked at a couple of youtube videos to learn how to stretch canvas on them. It seemed to work out! Hayley took care of priming and painting them, luckily for me! The biggest ones are 9 feet x 9 feet.
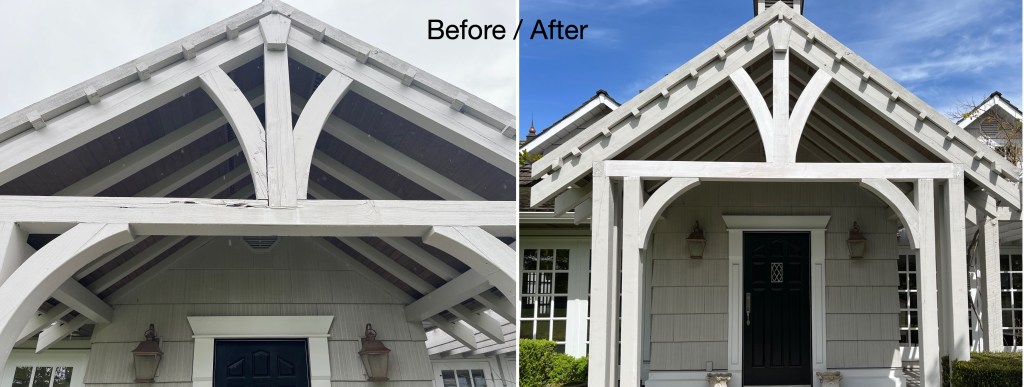
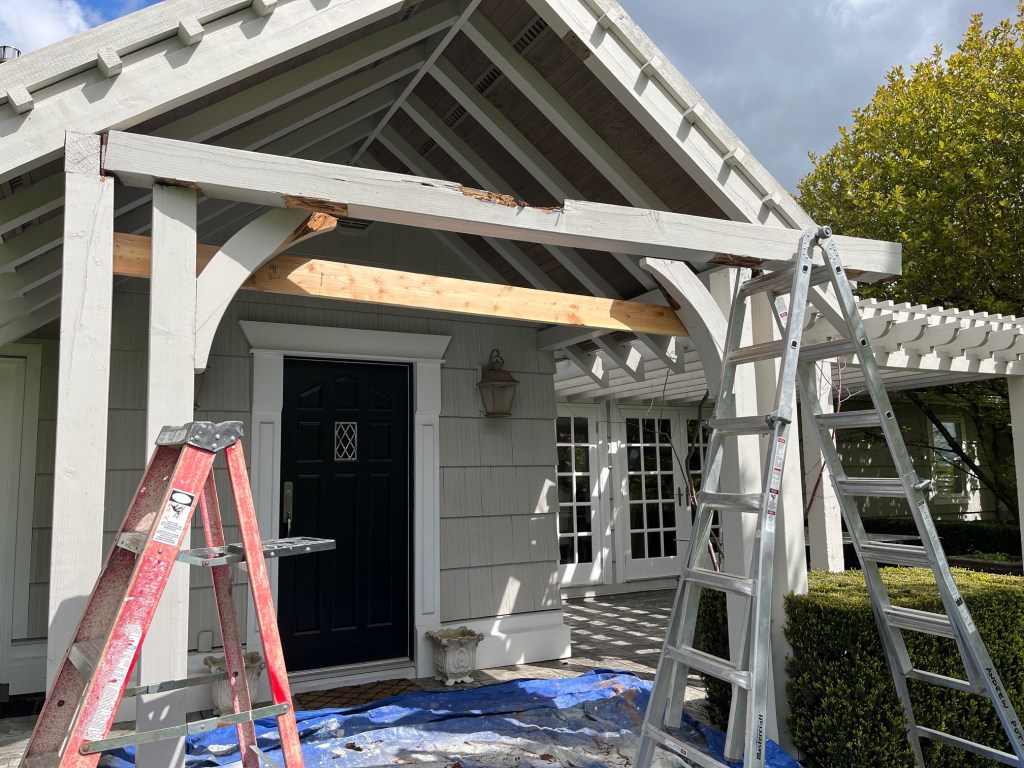
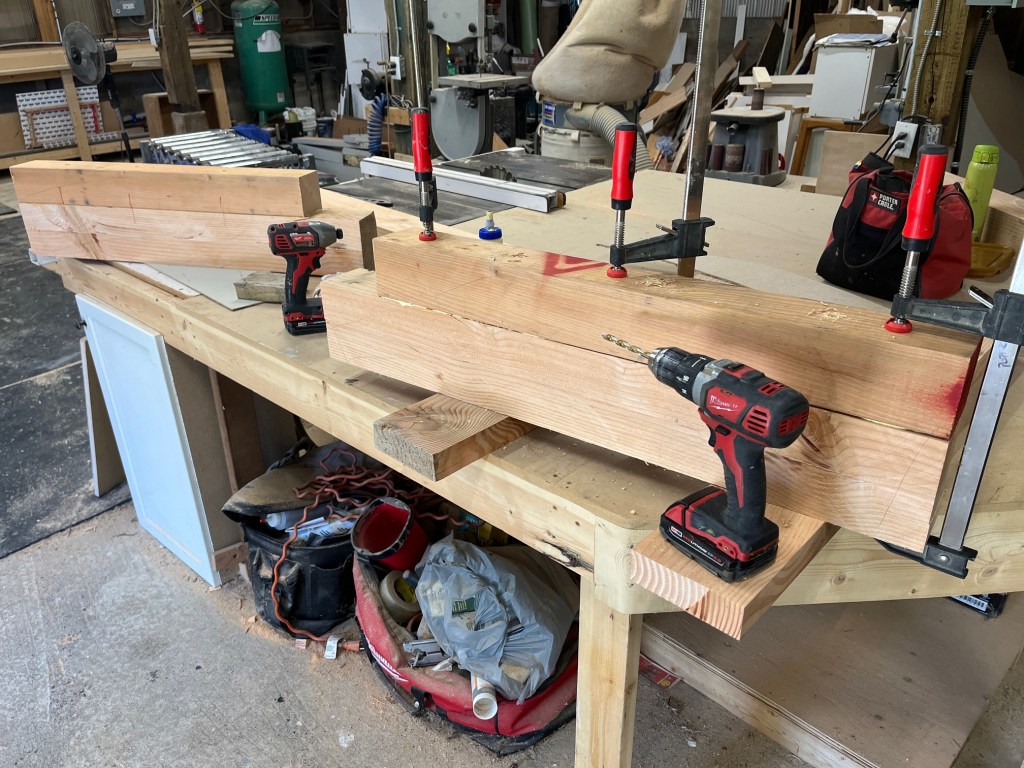
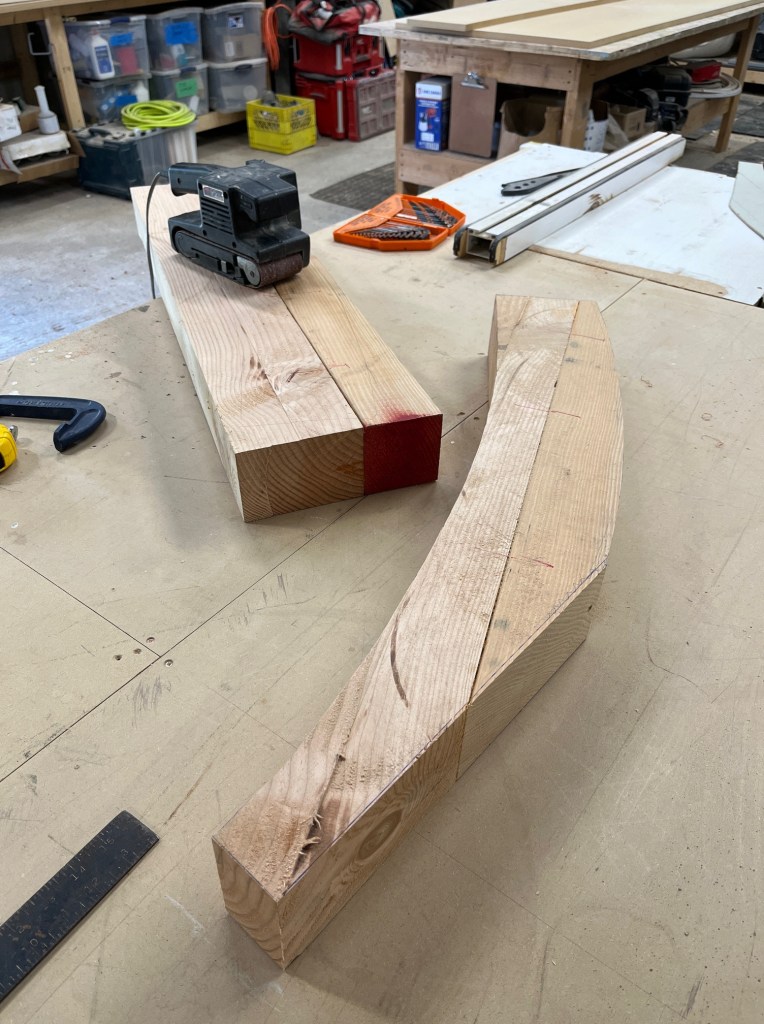
Byron hired me to replace some rotten beams on the south side of his house. The top ones were the worst; the others had a few soft spots but were pretty solid so I patched them a little bit and left them. I did have to replace the main horizontal beam and the 3 pieces above it.
I bought 6×6 douglas fir posts and cut them to size. To make the curves I cut them down to 4×6 and then glued a 4×4 post to them, then cut them out with the bandsaw. I sealed everything with Kilz 3 exterior primer. It will be painted properly later.