Deck PVC roof

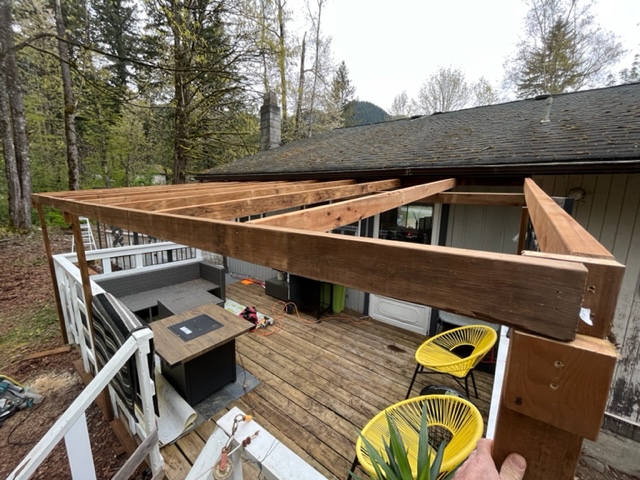
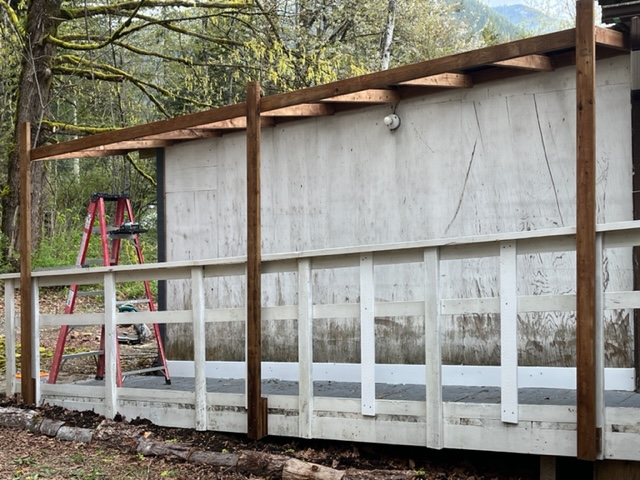
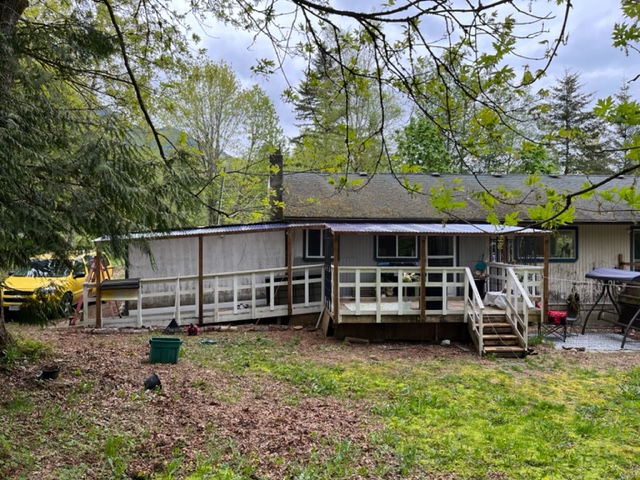
Dorothy asked for a roof over their deck.

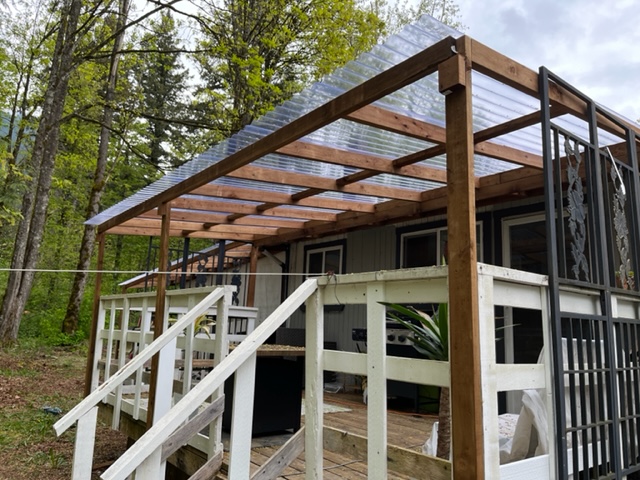
There was not a lot of room to get over the storm door and still have some slope without hitting your head on the other end. But I managed to get a 5% slope (would have liked to have more).
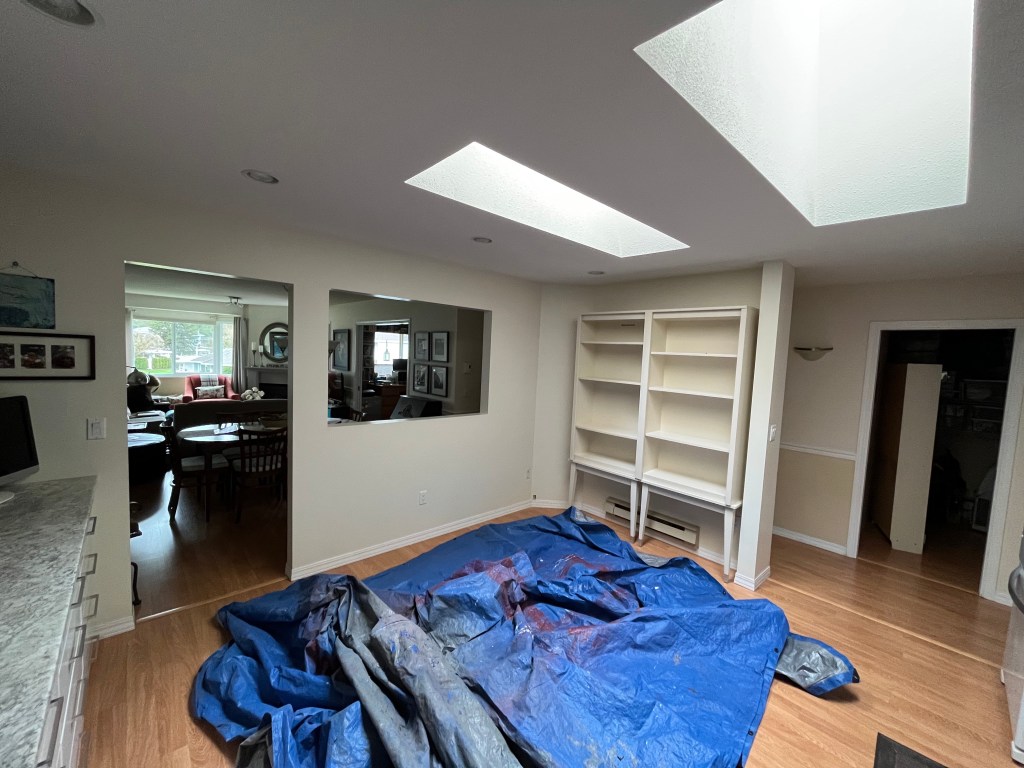
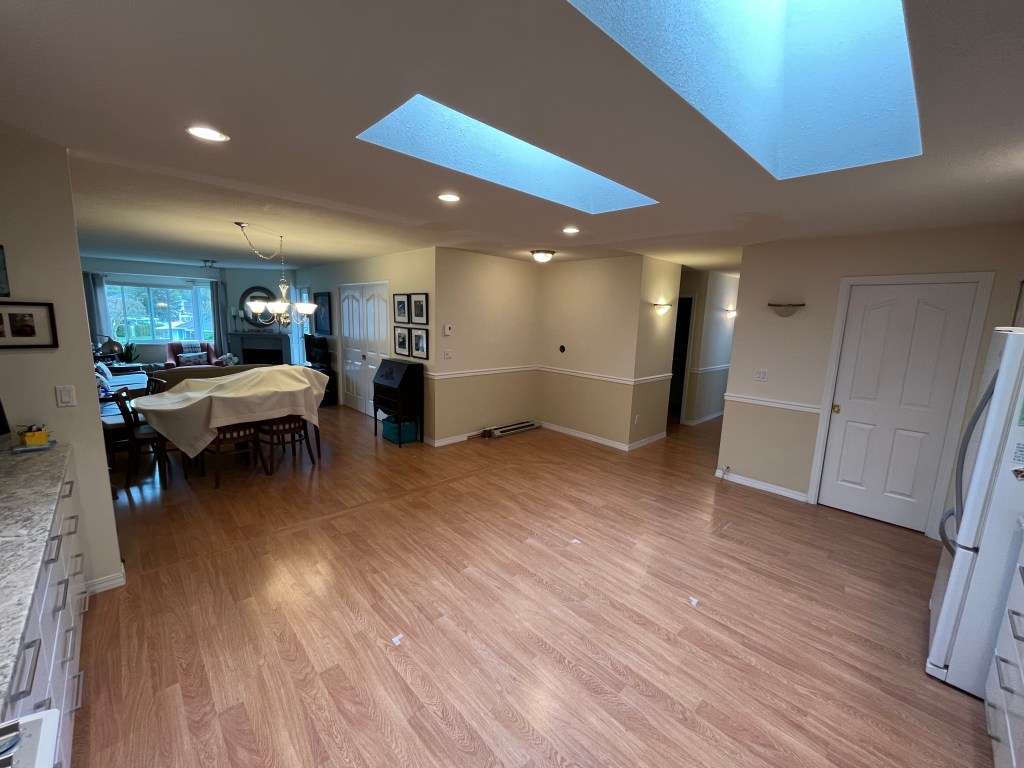
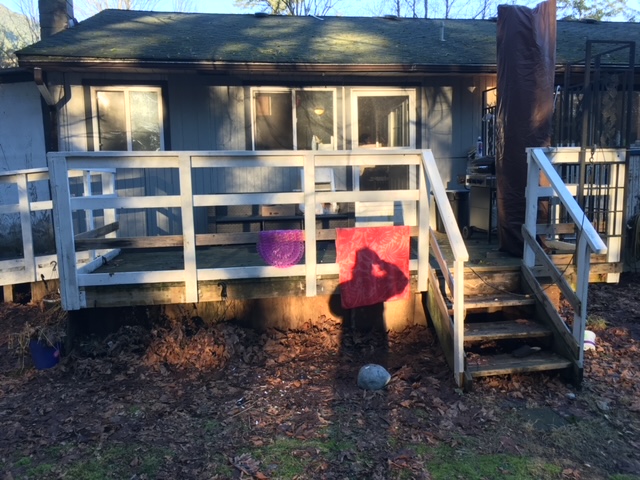
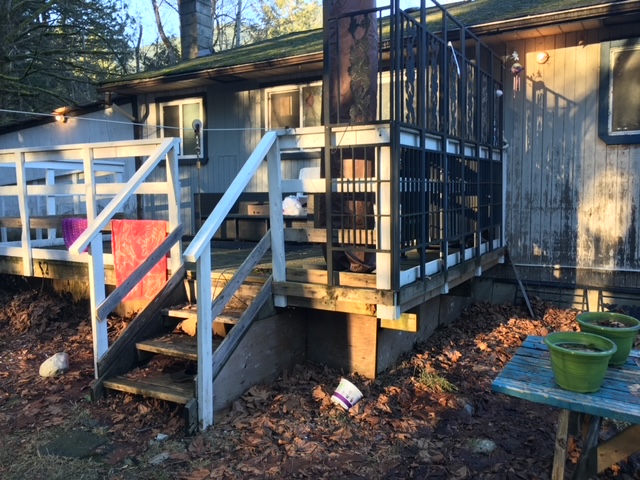
Before photos:

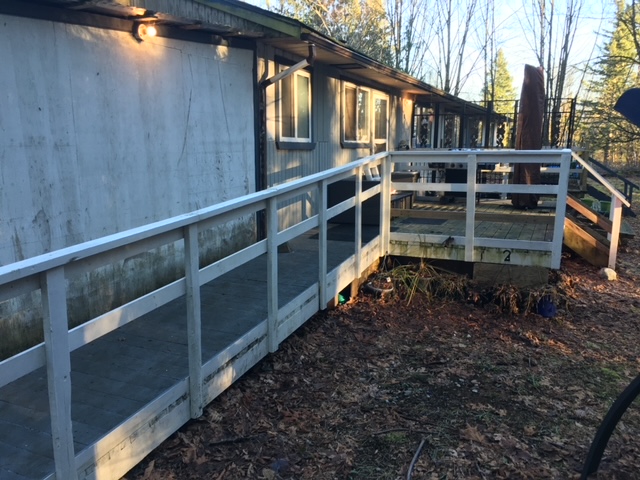
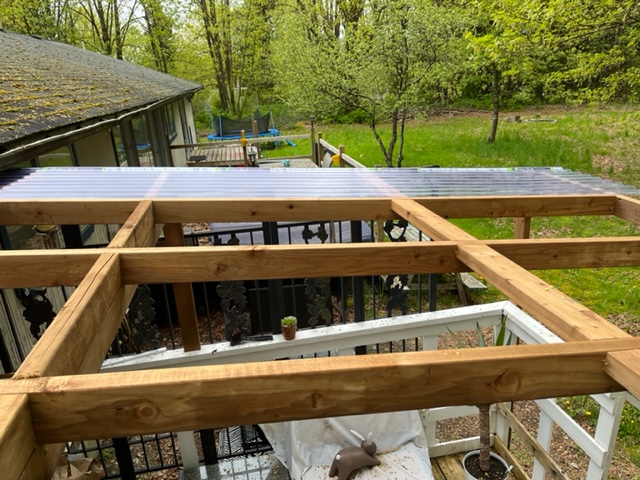
I used 2x4s to build the frame and attached it to the railings. There is not a lot of weight. Normally thicker posts and joists would be recommended.

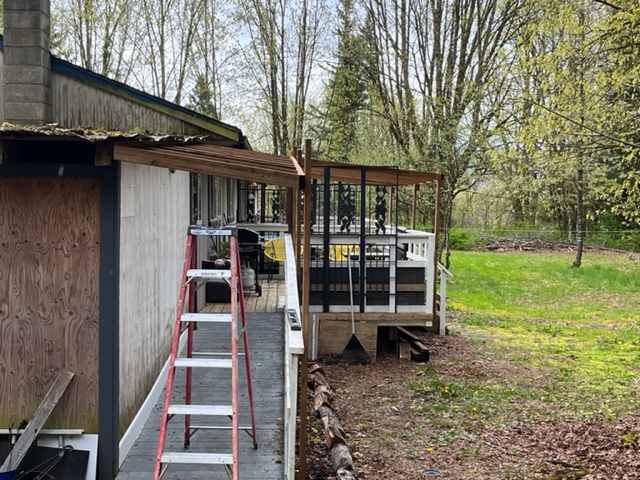
We chose clear PVC Palruf roofing as it was the most cost effective. It is installed using screws with rubber washers. Holes must be pre-drilled and larger than the screw to prevent cracking.

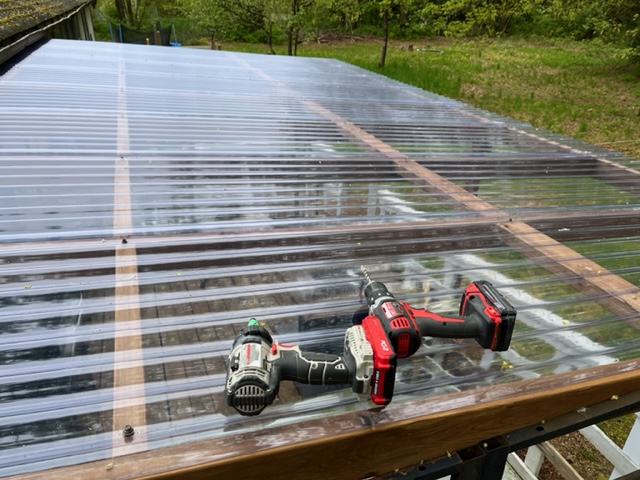
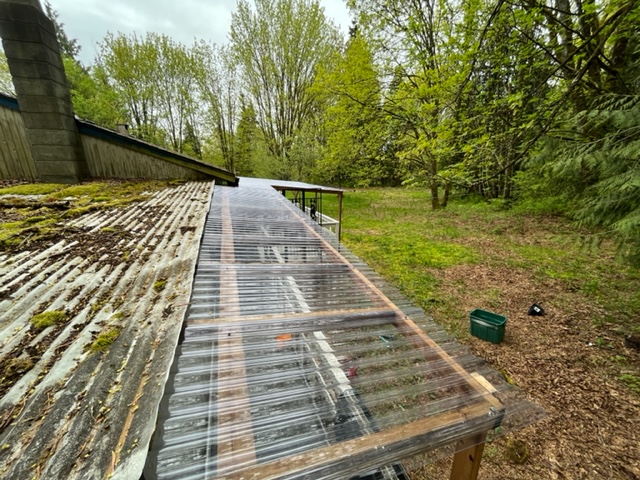
The deck will be more usable now that it is covered, as we get a lot of rain here. Will it need some maintenance? Probably. I have fixed another similar roof where the northeast wind blew some sheets loose. Will it hold snow? I think so! It will block UV rays, not heat; shades can be installed below the joists/blocking.

Drawer Face match

Ken was missing a drawer face – the drawer had gotten stuck somehow in the past and broken.

I repaired the drawer and then looked at the leftover pieces of the drawer face and decided to make a one-piece face out of plywood instead of trying to start a tiny stile and rail project. I routered out the inside panel, stained it and then colour matched it a bit with a pencil crayon before wiping on some polyurethane.

Definitely not a perfect match…but better than before!

Removing a wall

Carol hired me to remove an interior non-load-bearing wall. She got a permit from the city and tested the drywall for asbestos. We knew the wall was not supporting the ceiling because the trusses ran the length of the attic.

Before and After:

Before
After

During:

The drywall came down pretty nicely. The studs were a little bit harder – mostly one top plate which was attached to part of one of the trusses.

I called an electrician to re-wire the switch and heater. He also had fun climbing around in the attic. 🙂

The ceiling was more challenging. Some blocking needed to be adjusted to keep things level. There was also a cablevision cable running floor to ceiling that was a bit of a mystery. Shaw came and tested it and cut it, luckily.

The floor was also a challenge. It is laminate and going to be replaced at some point, but can’t be done for a few months…so I was asked to patch it. I ripped some pieces to fit with a gap for silicone. It is not ideal…but should last for a few months.

The ceiling got taped and 2 coats of mud. Then sanded and texture sprayed:

After the texture dried, I attempted to match and paint the ceiling (off-white). It took quite a few tries but I got close. Very rarely do I get a perfect ceiling.

Set Build – Baskerville

Another set build! They just don’t stop. I guess that’s why I’m so behind on my other work!

This one is for Baskerville: A Sherlock Holmes Story, playing at Abbey Arts in March. See Gallery 7 for more details.

Set Design is by Jeff Kiers.

Here are a few pictures of parts of the set in production (1.5 weeks). The stage itself is relatively simple, but there are quite a few pieces that are flown in or wheeled in. It is ready for painting!

Set Build – Bright Star

I was contracted by TWU to build the base set for their upcoming Spring Musical. I wasn’t able to commit to the entire project, but I did give them a full week to get the balcony and stage going. I had a lot of help from the students at various times as well. (Design credit – V. Salim)

Floor done

The set design is very creative and I look forward to seeing it after the TWU Production Team is done with all the scrims, paint, flats, doors, and other finishing touches!

Bright Star runs March 15-April 2 at SAMC Langley.

Set design & build – Trying

I designed the set for Gallery 7 Theatre’s current production of Trying:

But first, I had to pull some stock in a blizzard.

snow blowing into the container

I used stock from our previous show to build some heaters and flats…

I modified a double bookshelf ($17 at MCC) to make two bookshelves. I was proud of these because they have false backs, and spin around for fast scene changes.

I made some 1960’s gas heaters…or something like them anyway!

I needed a few shelves full of books…they had to be light. My volunteer, Linda, found a bunch of covers, and I borrowed some from our Props manager, Dianna; but the bulk I made out of cereal boxes and printer ink:

Then it was time to move the set to our venue:

One challenge was to build a “light box” behind the window. It was a bit more involved than simply shining a light at a flat.

The part that should be the funnest is the set dec: all the little knick knacks that get added to add some detail to the space. However, I was tired at this point and blanked a bit…but felt it was enough.

Tech run

The show runs until February 5th, 2022 at the Abbey Arts Centre! Buy tickets at gallery7theatre.com.

Kitchen countertops & tile backsplash Reno

A long time ago Sandy talked to me about re-doing her kitchen backsplash. It was previously done using leftover vinyl flooring (and looked alright in my opinion). She waited while doing other small renovations and then was ready. I discussed changing the countertops first, mostly because they had a cove backsplash and things would look cleaner with that removed.

So we went ahead with the countertops. After choosing a colour, I ordered laminate blanks and cut the mitre with a router. I pre-glued the mitre as it would have been difficult to glue onsite.

After countertops were installed, it was time to choose tile for the backsplash. This was a long process with many trips to the tile stores and several samples.

The old vinyl backsplash peeled off reasonably easily. After scraping off as much extra paper as I could, I coated the wall with a quick coat of Mapei Aquadefence to give my thinset something to bond to. Then it was time to install thousands of mini-tiles! I bought them at Lowe’s, and they come in 12×12 sheets.

I sealed the natural-stone tiles before grouting. Grouting took a long time, presumably because with such tiny tiles, there was more grout space than I expected.

Finished look! Happy customer!