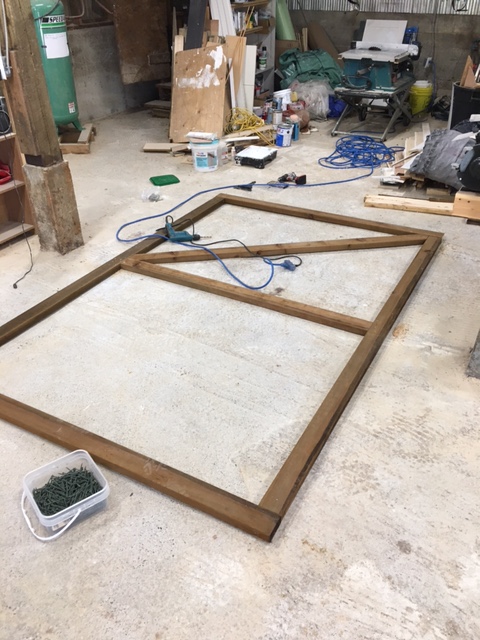
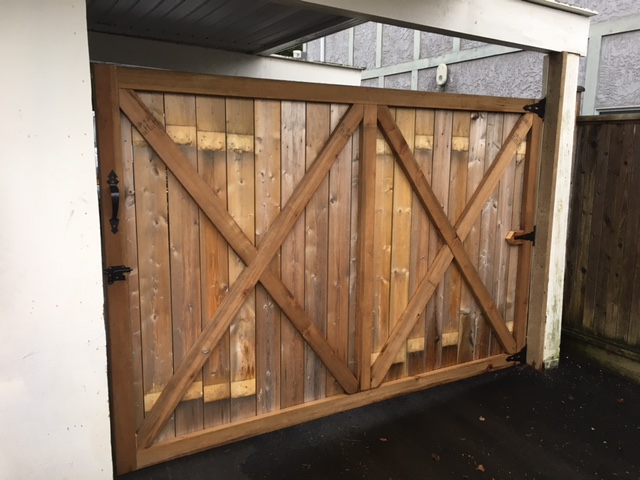
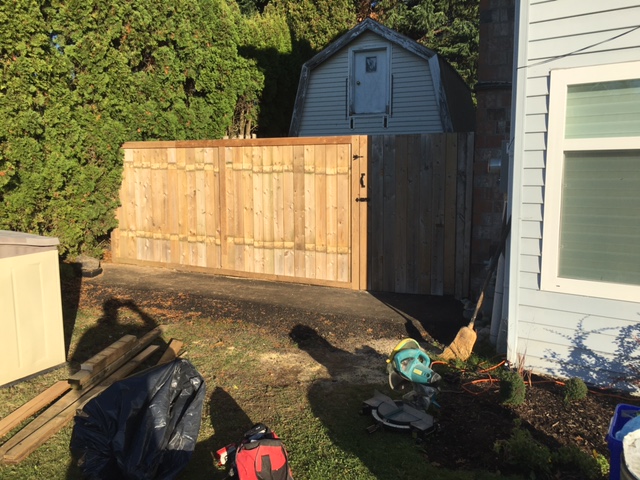
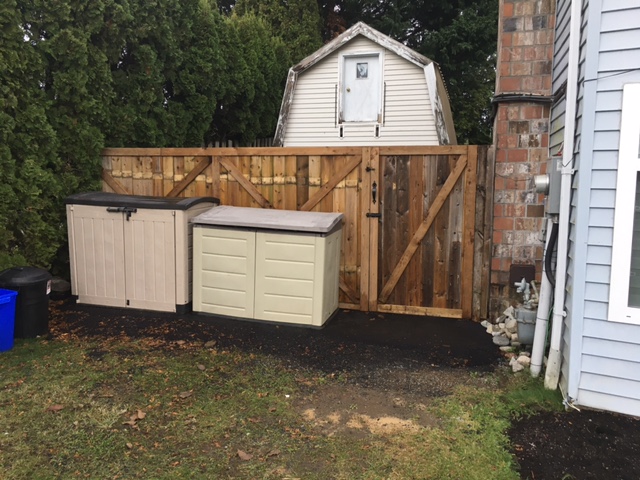
Gary needed a gate under his carport area. It needed to be fairly heavy duty, open on hinges both forward and backwards, have a latch, and -the most important part-have an X design. The post I wanted to use for the hinge side was not very level so I levelled it as best as I could and then built the X gate.
We reused some of his fence boards
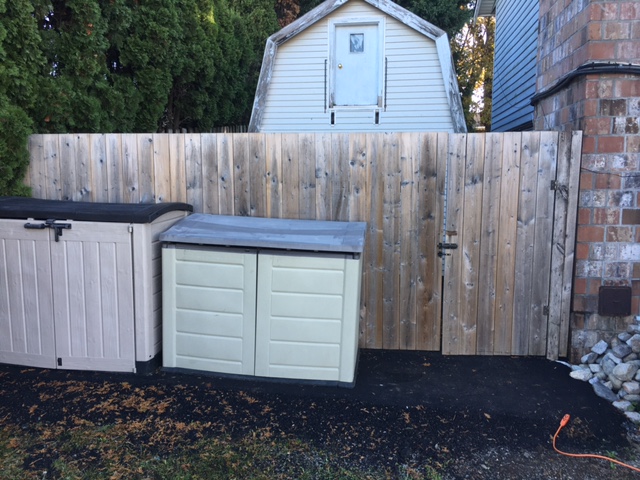
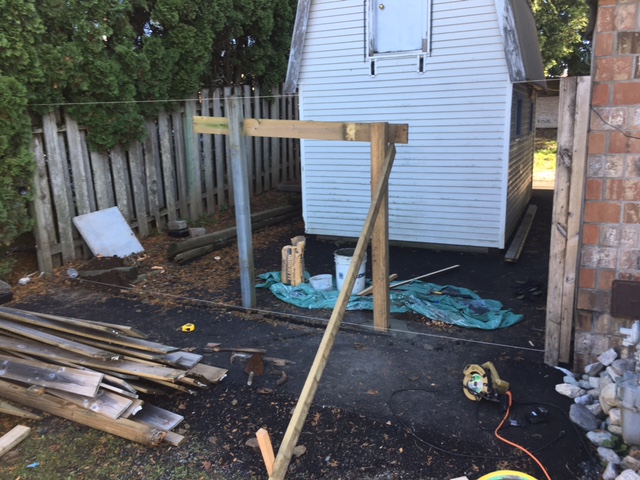
The next project was a loose gate post on the other side of his house. I thought he just wanted the post strengthened so the gate would close better. Turned out he also wanted the gate widened, the fence re-done (it was not very straight), and – don’t forget – an X design. OK.
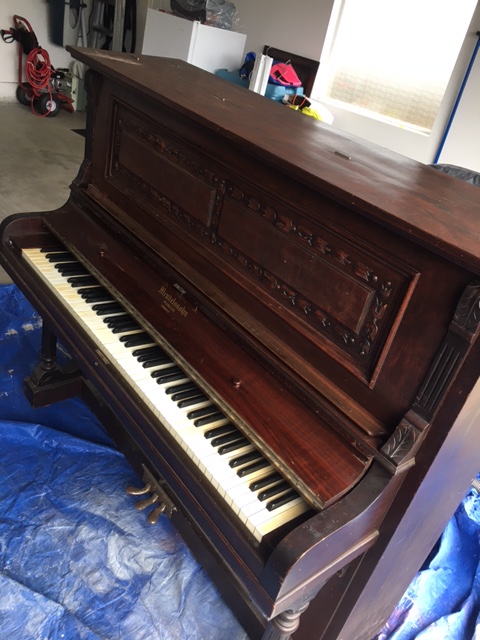
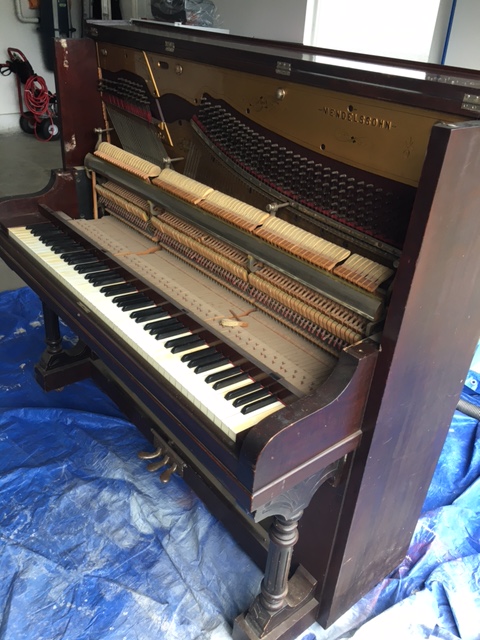
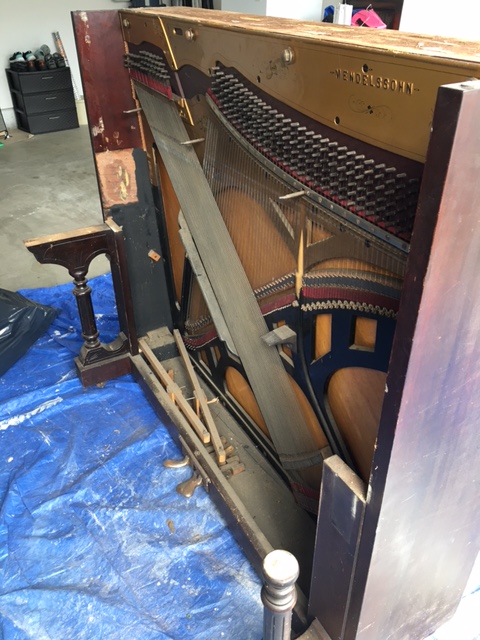
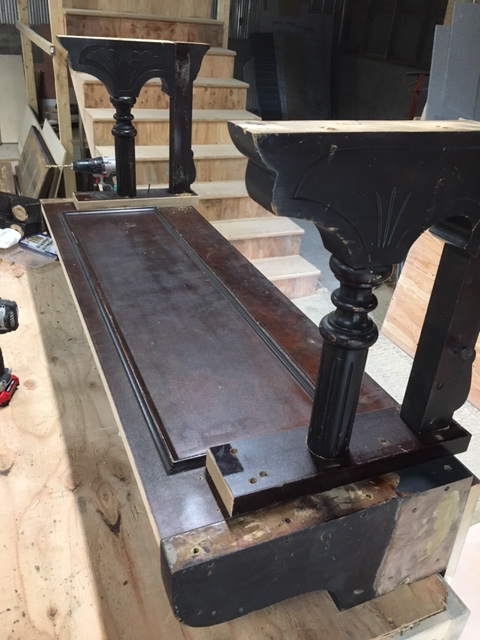
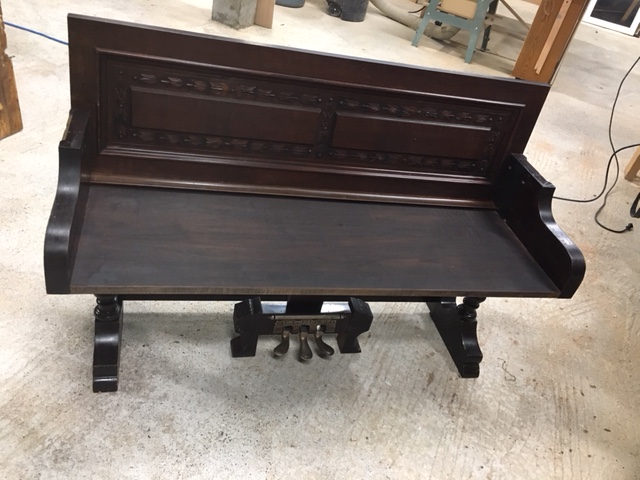
Heather asked me about repurposing her antique piano into a new piece of furniture. The piano has been in the family for several generations, but for the last 12 years it has been in her garage because it was too wide to be moved into the house last time she moved. It was also in need of some very expensive repairs and a tune-up. After trying for a year to give it away on Craigslist, she came up with the idea to make a bench as a gift for her mother.
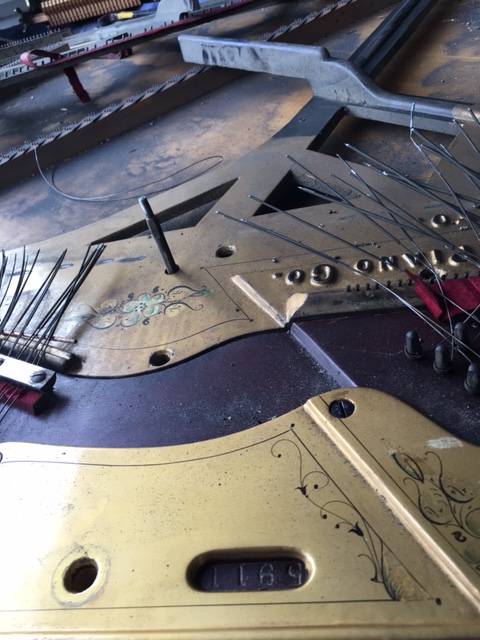
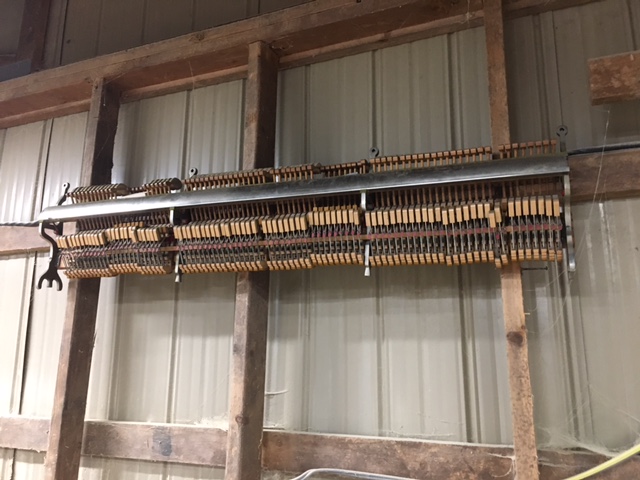
It was sad to take apart such a work of art. I was amazed at the intricacy of each piece and the quality of craftsmanship I found. However, it was time for a new life. A couple of hours later I had unscrewed, pounded, and angle-grinded my way through this Mendelssohn (Toronto) upright. It did not have a year date stamped that I could find, although it did have a serial number. I found a 1927 penny inside. My customer estimates the piano is 120-150 years old.
I thought I would get some decent money for the steel(?) harp (290 pounds) but the yard only gave me $11. Better than paying to dispose of that much weight! I kept the wood for this project/future projects/the burn pile.
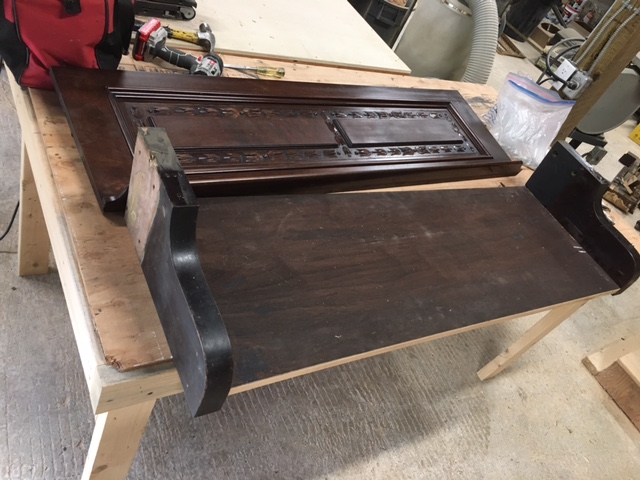
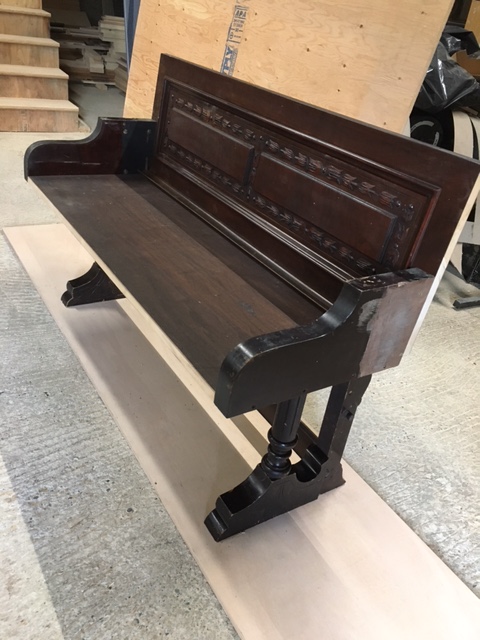
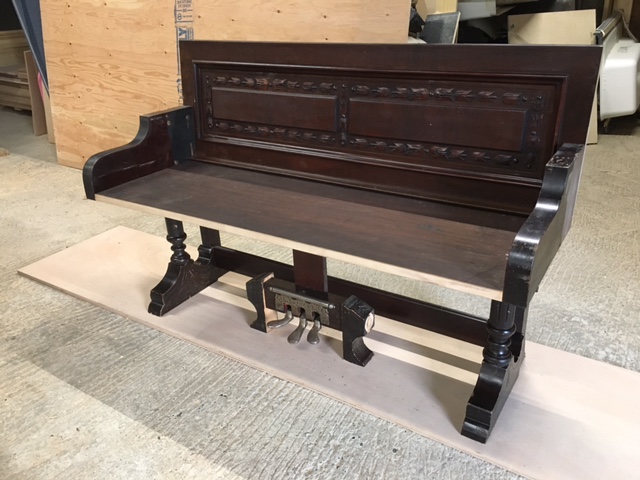
Then it was time to get creative with the pieces I had salvaged. I had a working photo that my customer had found online, and did what I could to save some of the nicer pieces.
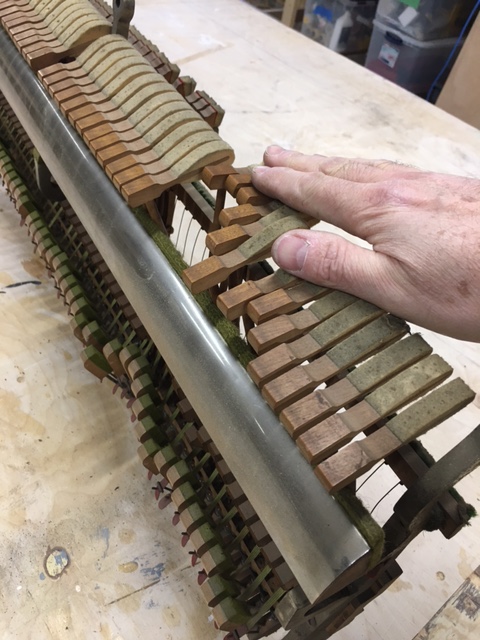
One piece that I kept that couldn’t be used for the bench was the hammer board (I’m not sure that’s the correct term). I am picturing spray painting it pink and blue, and mounting it to one of the larger ebony offcuts, such as the lid, and calling it art. Any takers?
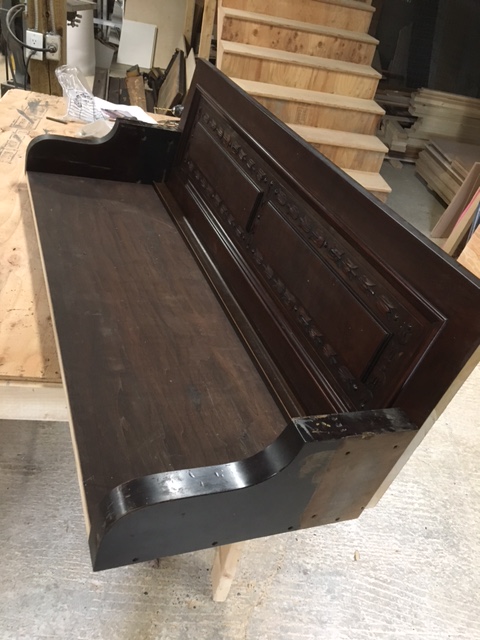
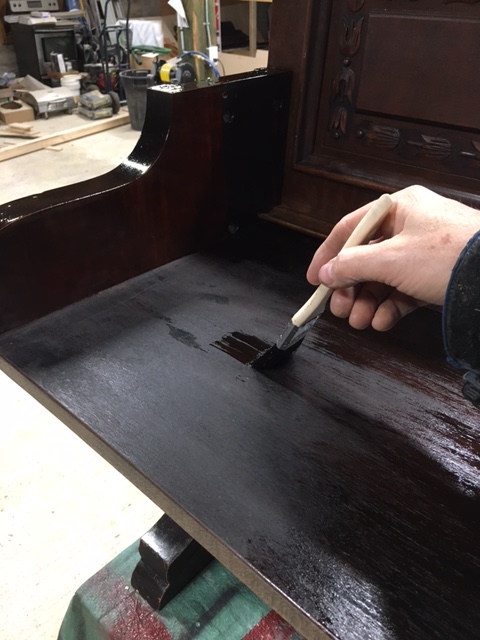
A few coats of stain on some of the exposed surfaces, and some polyurethane on the seat, and we have a beautiful bench, full of history.
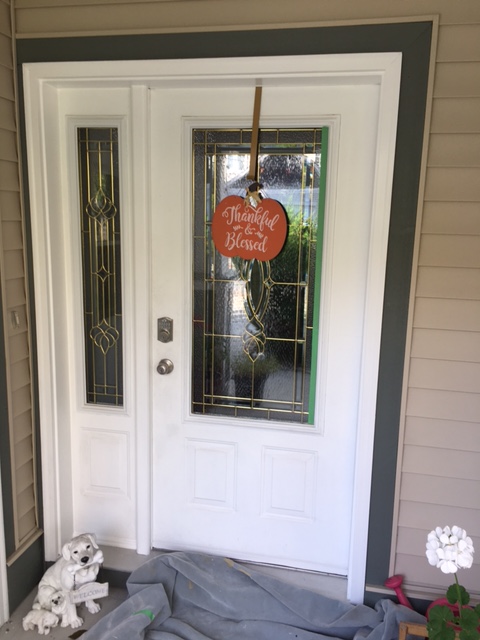
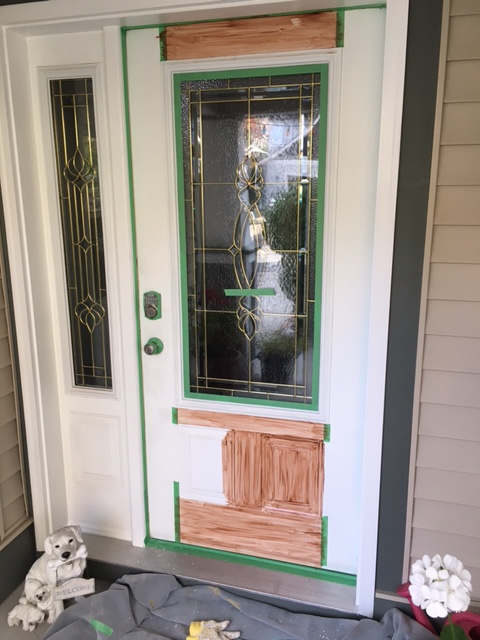
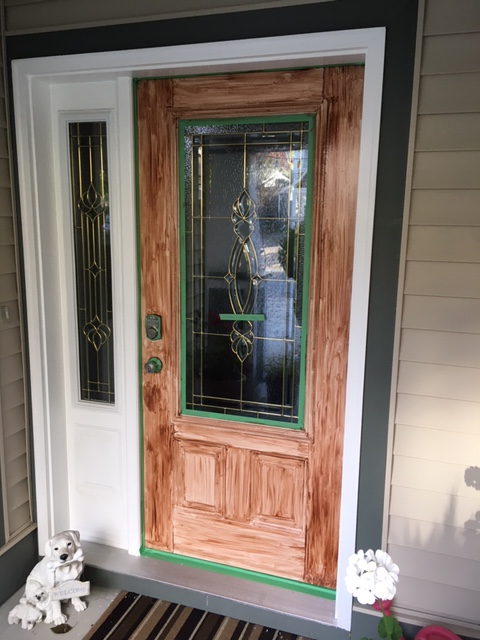
I had done some work on the brick mould of Josephine’s front door some time ago; touching up the paint where it had peeled over time. Then she asked me if I could paint the door itself. It had been white for many years and it was time for a change. (Many of her neighbours have doors in different colours). However she didn’t want to add another colour to the overall scheme, so I said I would try to match the cedar shakes in the front. How to turn a white metal door into a cedar door?
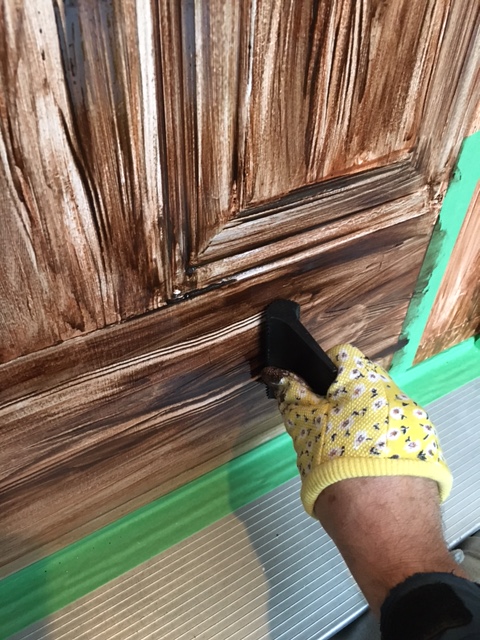
I chose two shades of gel stain and over 3 trips I layered them over the white paint. I started with a lighter shade and then used a darker shade with a wood-graining tool ($3 at Michael’s!). This made the door a shade darker than I had planned, so I went over it all again with the first colour. It was still a tad dark but luckily my customer liked it.
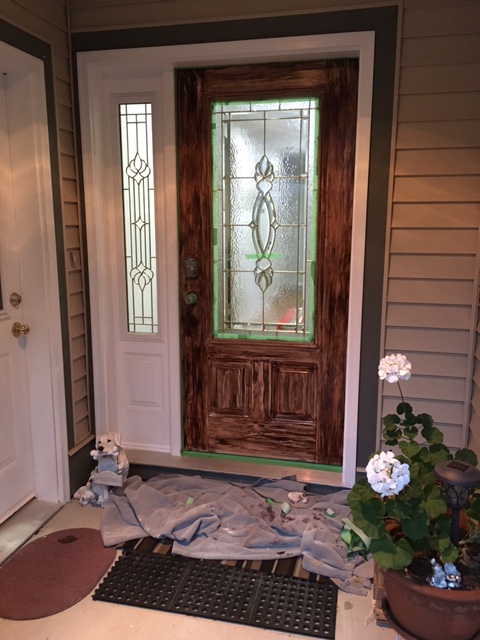
Now in most situations it would be advisable to remove the door and work on it elsewhere, but for various reasons that was impossible this time. So I had to be careful not to get stain on the nice white frame. I used paint markers along the edges where the door contacts the weather stripping, and that dried quickly enough. Varnishing was another matter – the first coat of varnish went on at 1 degree Celsius so it did not dry very quickly. For the 2nd coat I tacked a blanket over the door and left it open for the day, and it dried nicely.
So there you have it. A cedar metal gel stained varnished door!
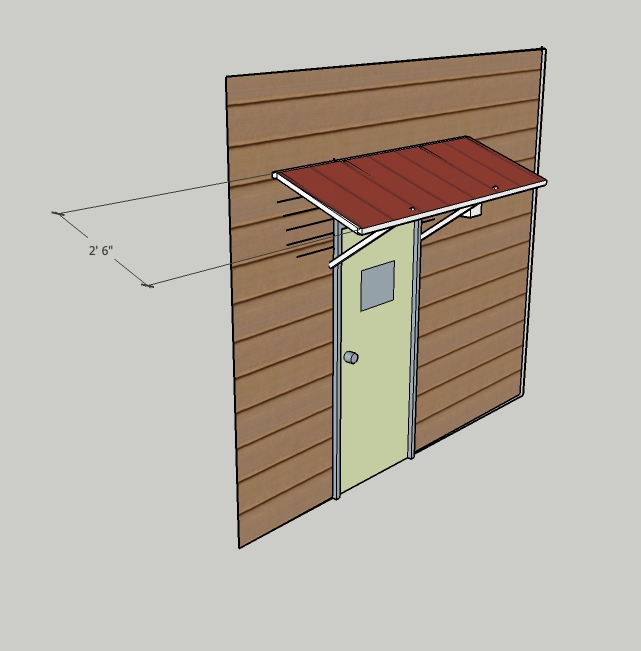
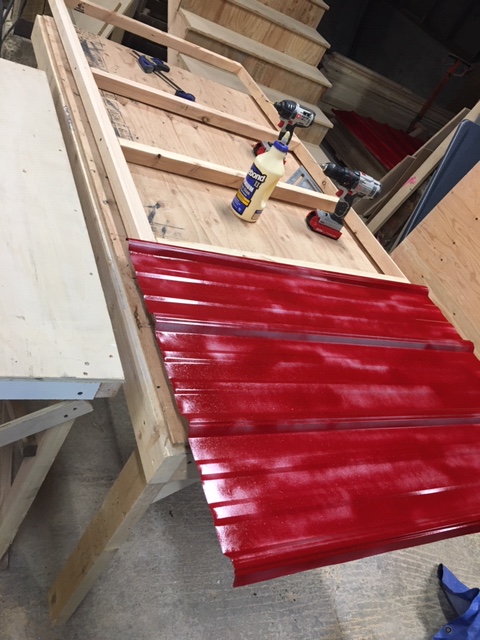
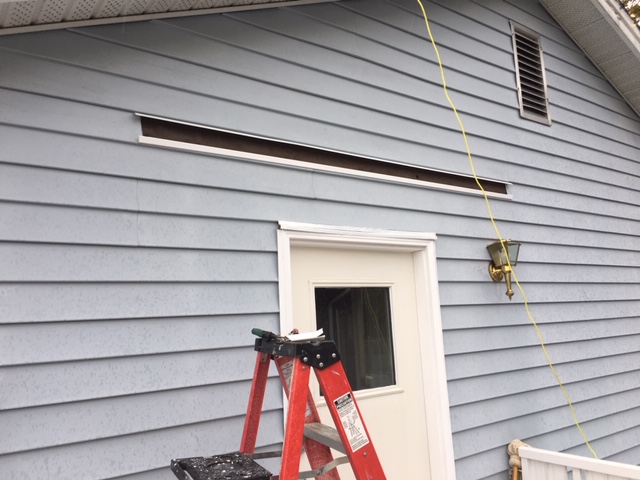
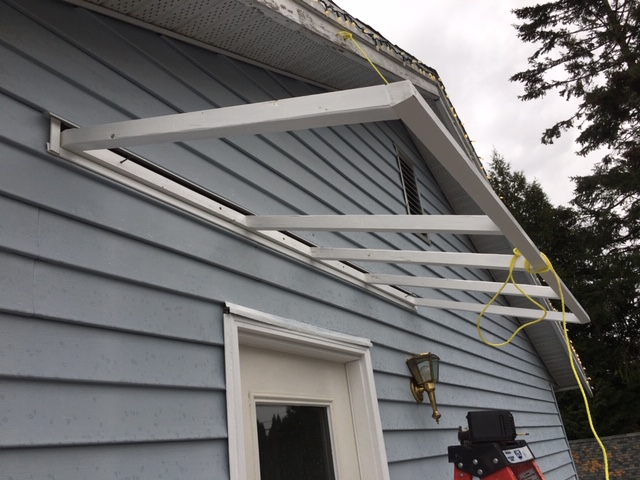
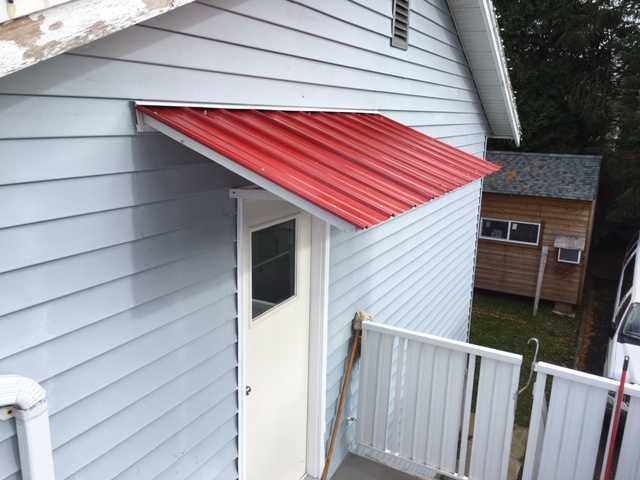
Gary asked for a 3-foot roof over his porch door to help keep him dry this winter. So I made a drawing and sent him a quote. The roof in my drawing happened to be red and when he saw that he knew he had to have that colour. So I spray-painted some galvanized steel roofing with a nice, gloss regal red.
The supports are fir 2x4s ripped in half and painted white. Installation was fairly straightforward with a bit of flashing above the roof and a pocket for the vinyl siding to slide into below.
We were both really happy with how it turned out…especially the red colour. However Gary’s wife disagreed… so now I have to go back and paint it white. Too bad, little red tin roof… you can live on in this blog post.
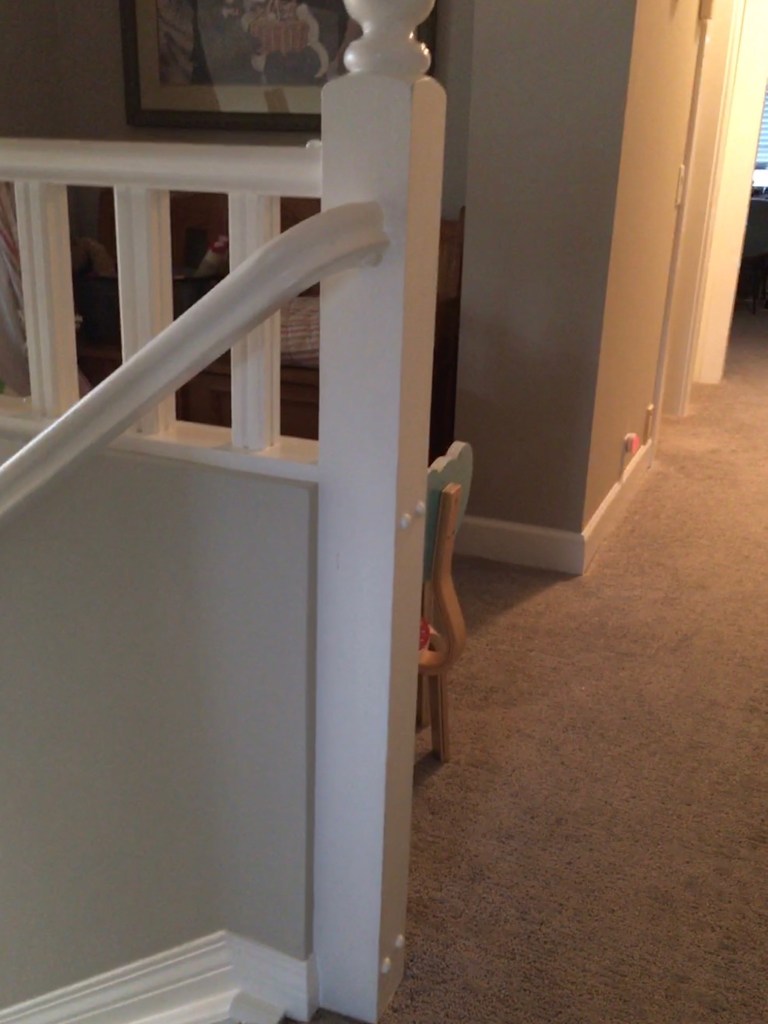
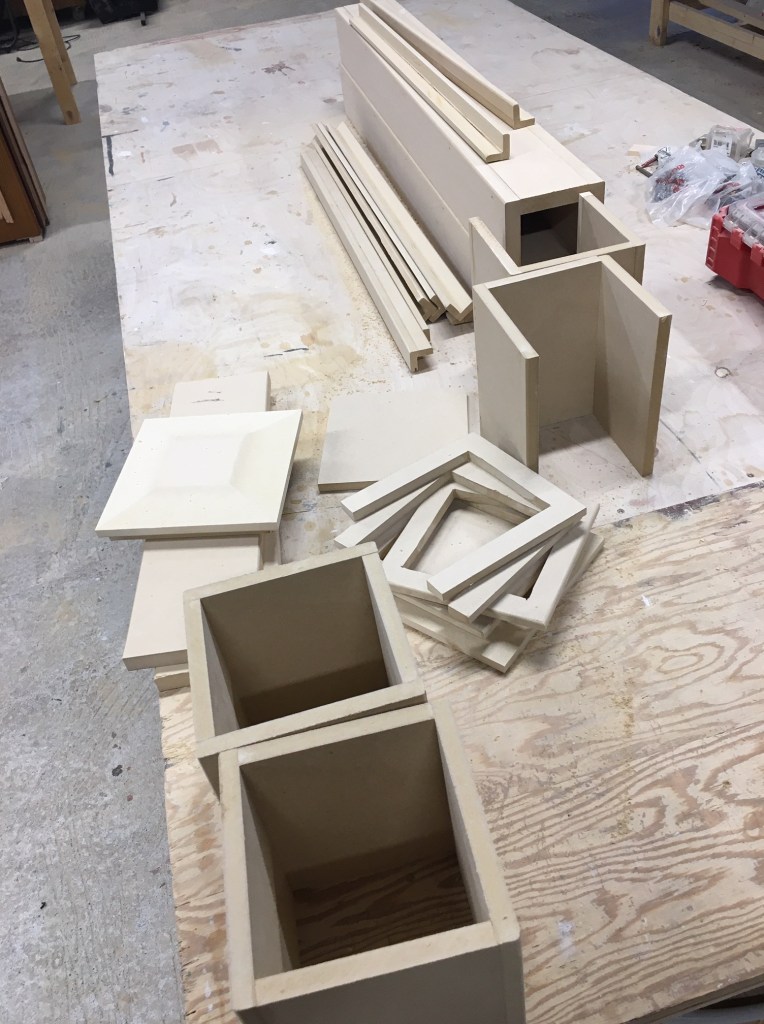
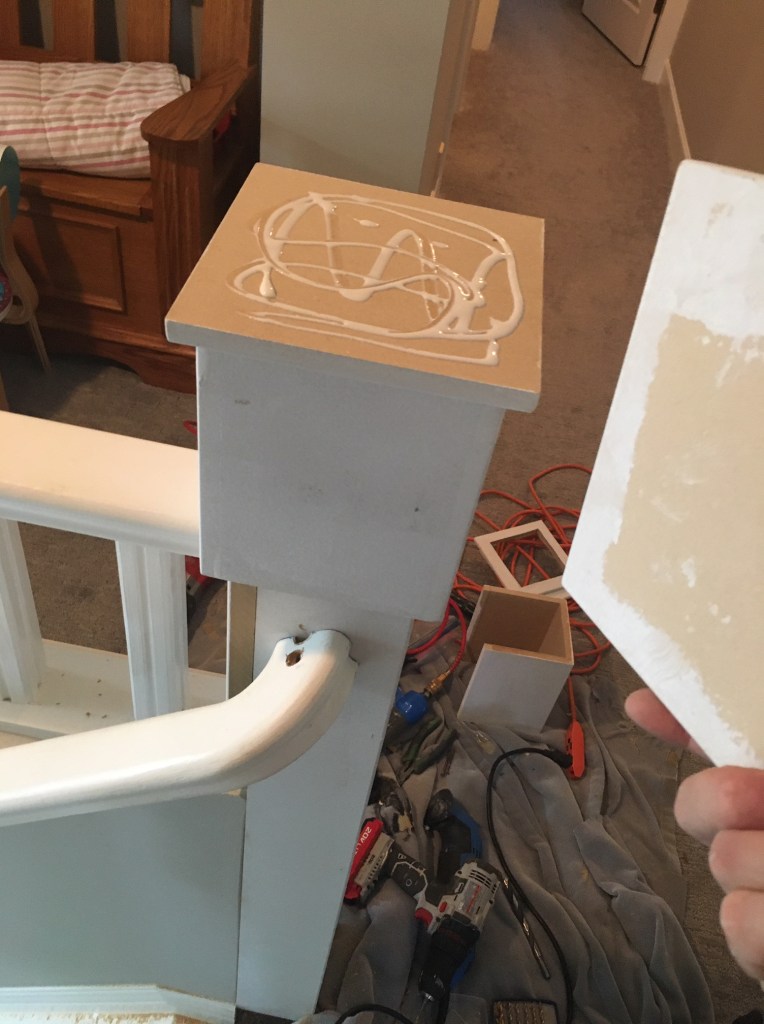
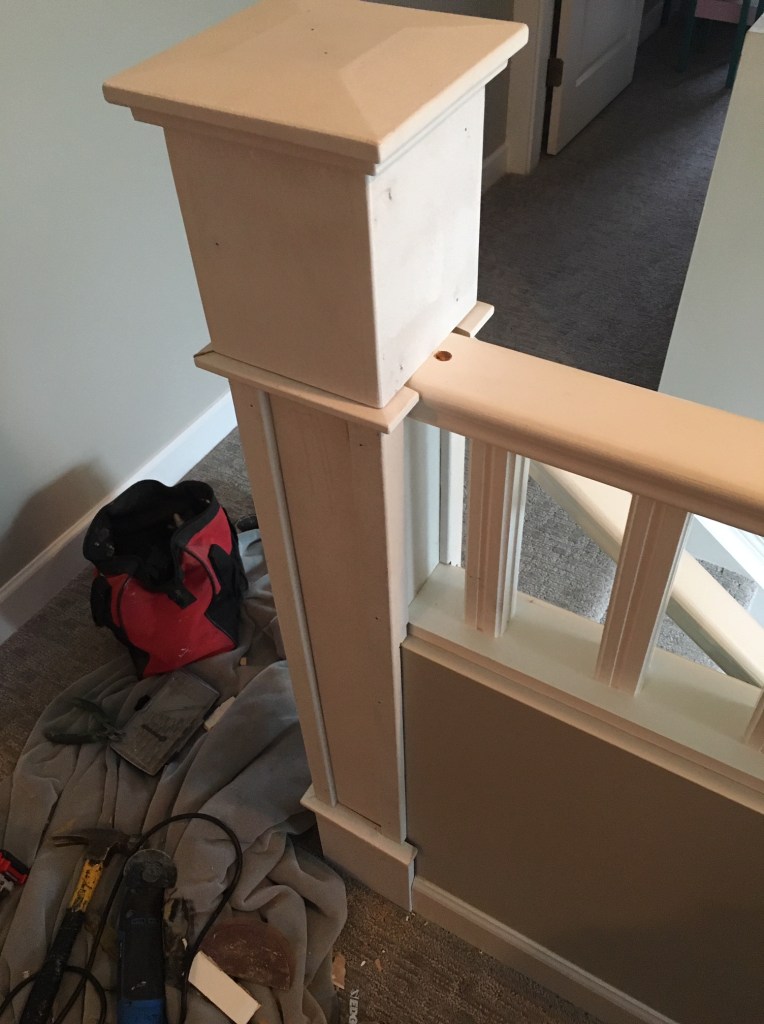
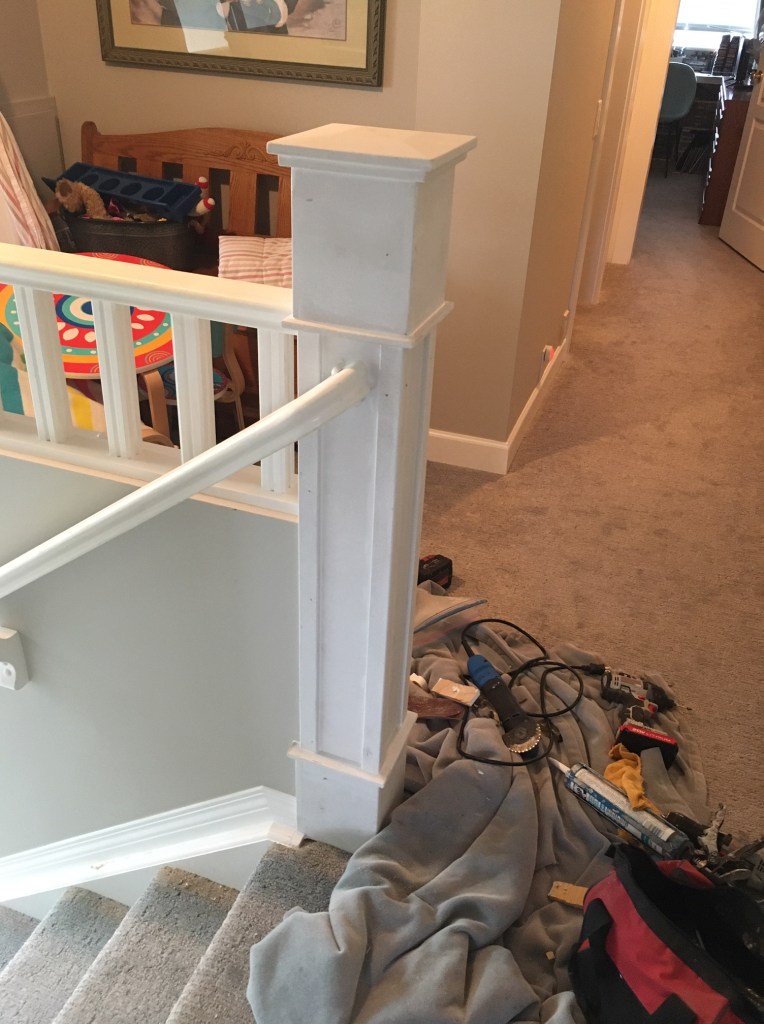
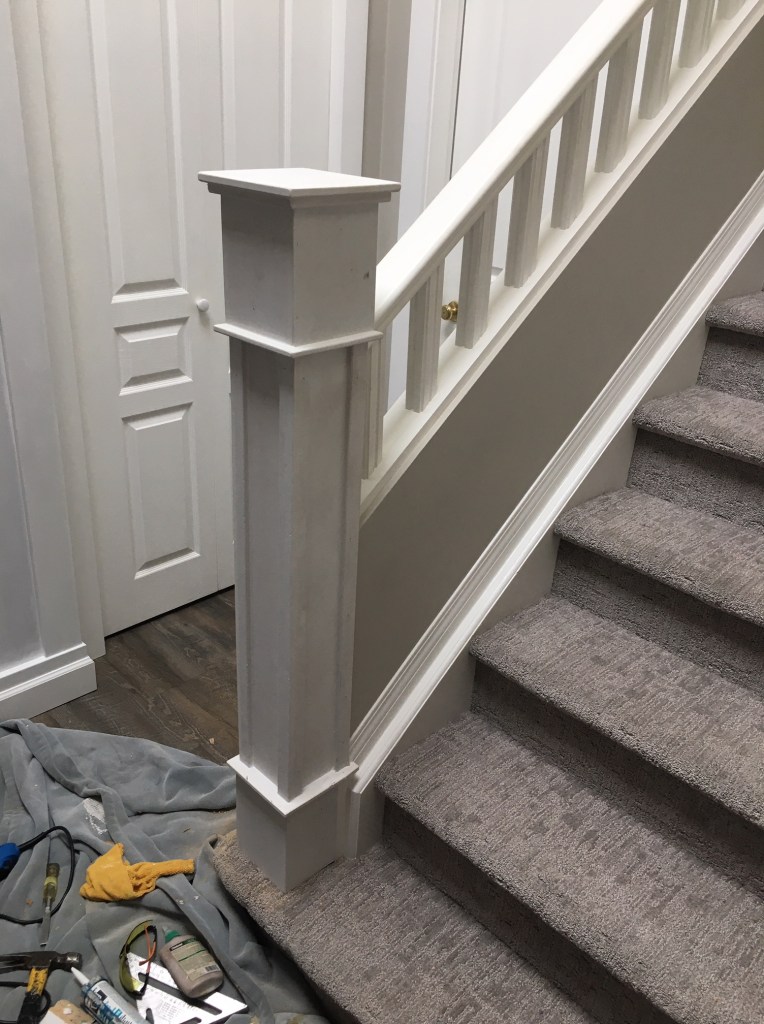
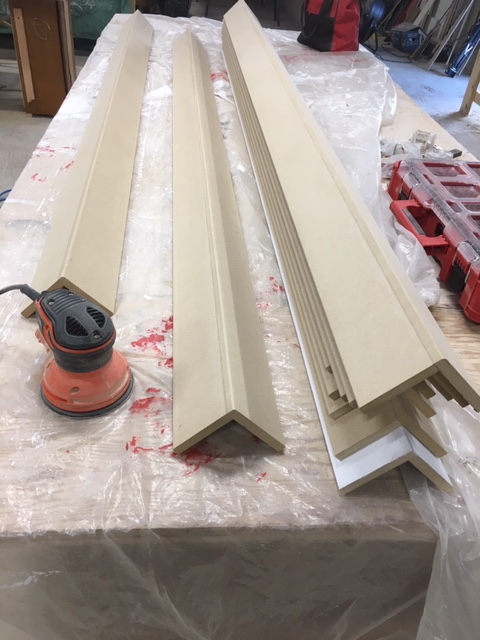
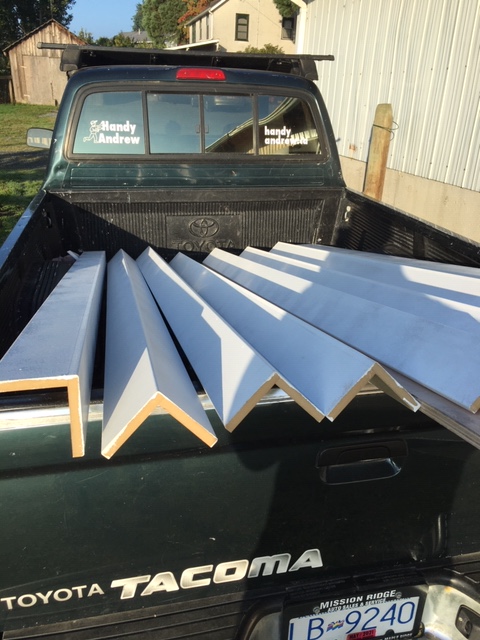
Pursuant to my previous post about finishing carpentry, I dressed up some stair posts with some custom mouldings (all primed MDF).
Original post (top of stairs)
Pre-fabricated pieces
Wrap with 3/4″ MDF
Slipped a box on top with a cover
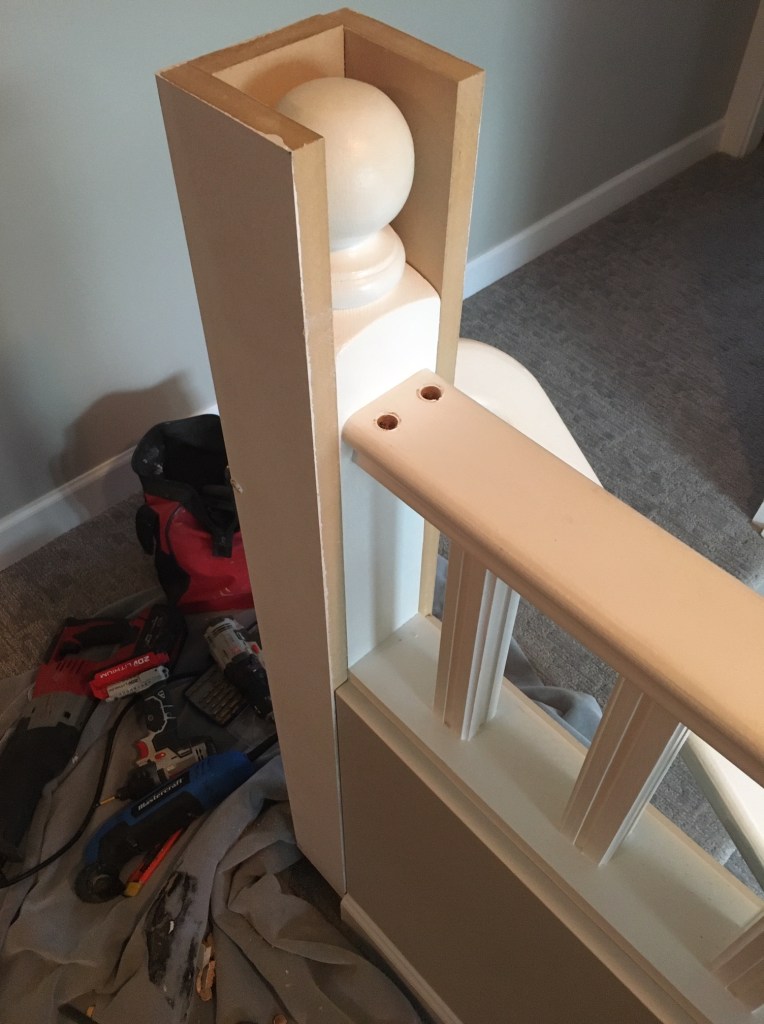
Finished post (top of stairs)
Finished post (bottom of stairs)
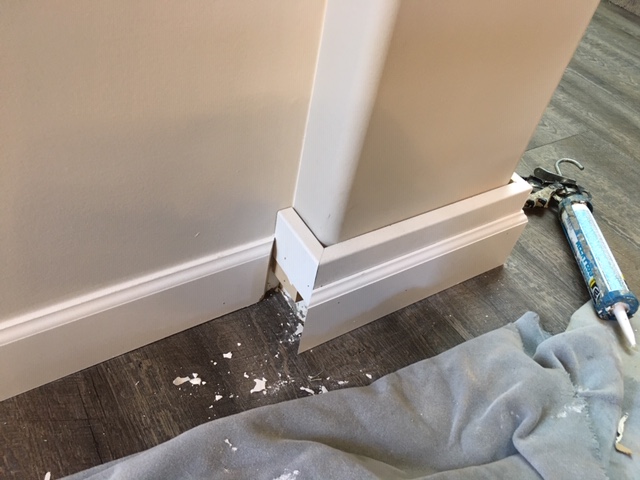
I had to cut 3/4″ off of the railings so that the new post would fit. I used a reciprocating saw for this. I caulked everything and the customer will paint them.
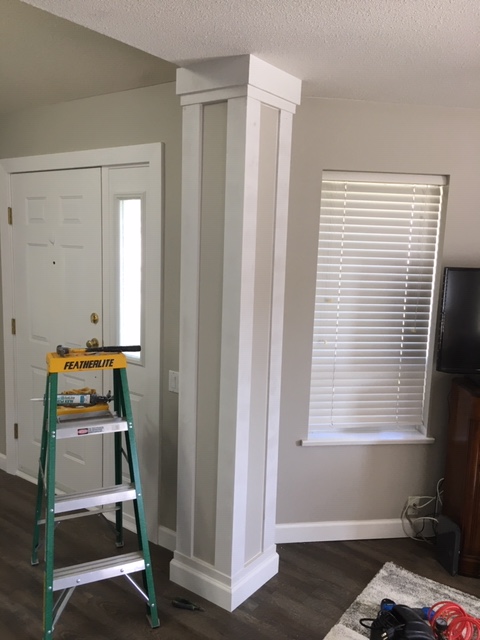
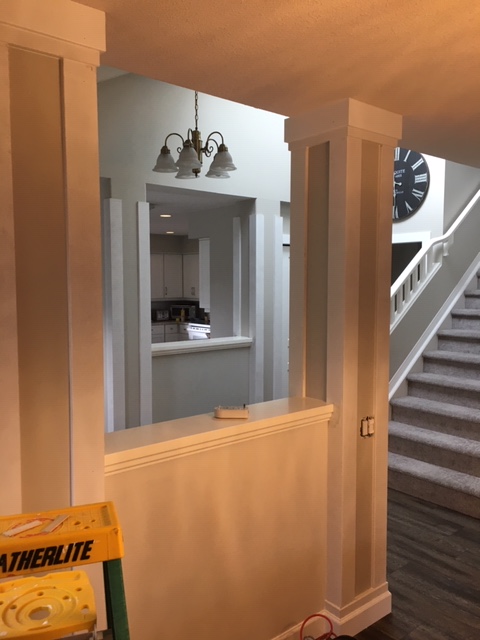
I’m working for Joan and Tom in their townhouse, updating some mouldings. First the columns got wrapped:
Then the windows and door headers received some archetype goodness, sills extended and side frames.
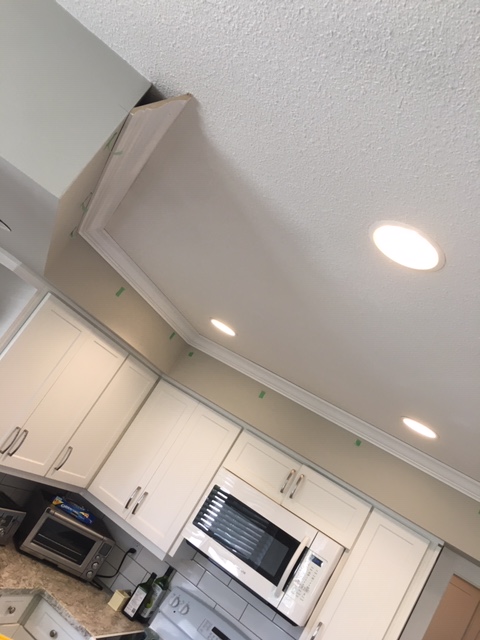
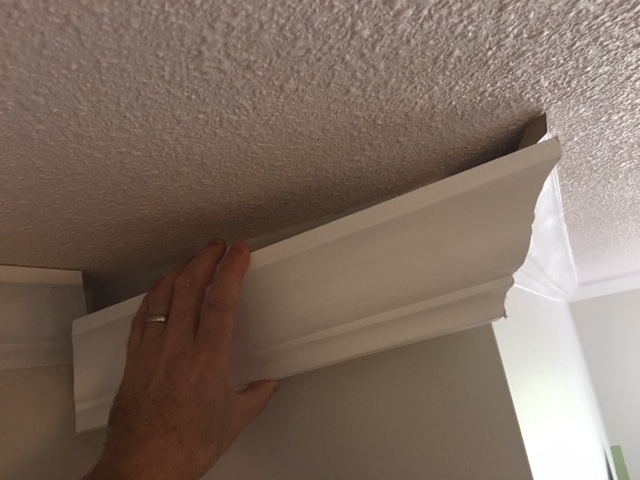
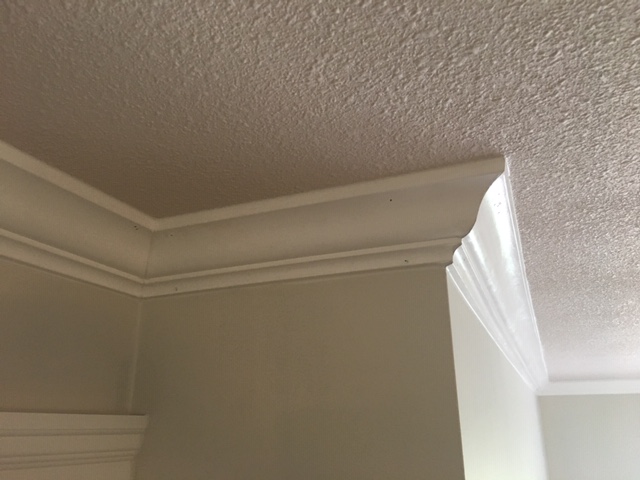
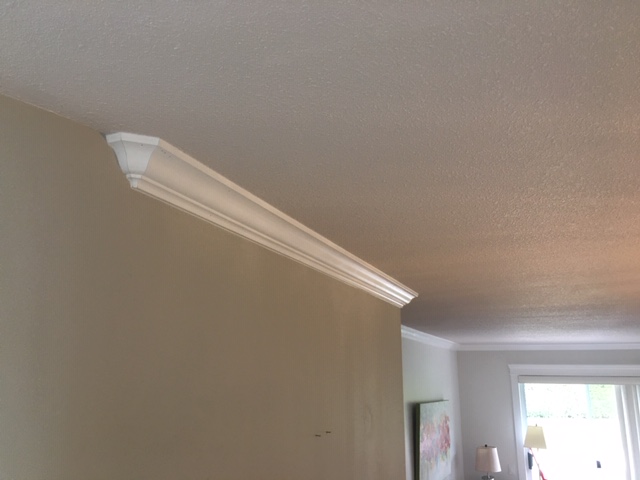
Lastly I installed crown moulding in the living area. I tried using stilts for the first time for some of the smaller pieces, and they worked well, but for the long pieces, Tom helped me put them up and I used my ladder to nail and caulk them. (Mouldings were pre-painted and my customer will do the finish painting, for which I am grateful.)
I still have some stairwell posts to wrap and there seems to be plenty more to do when I have time in my schedule!
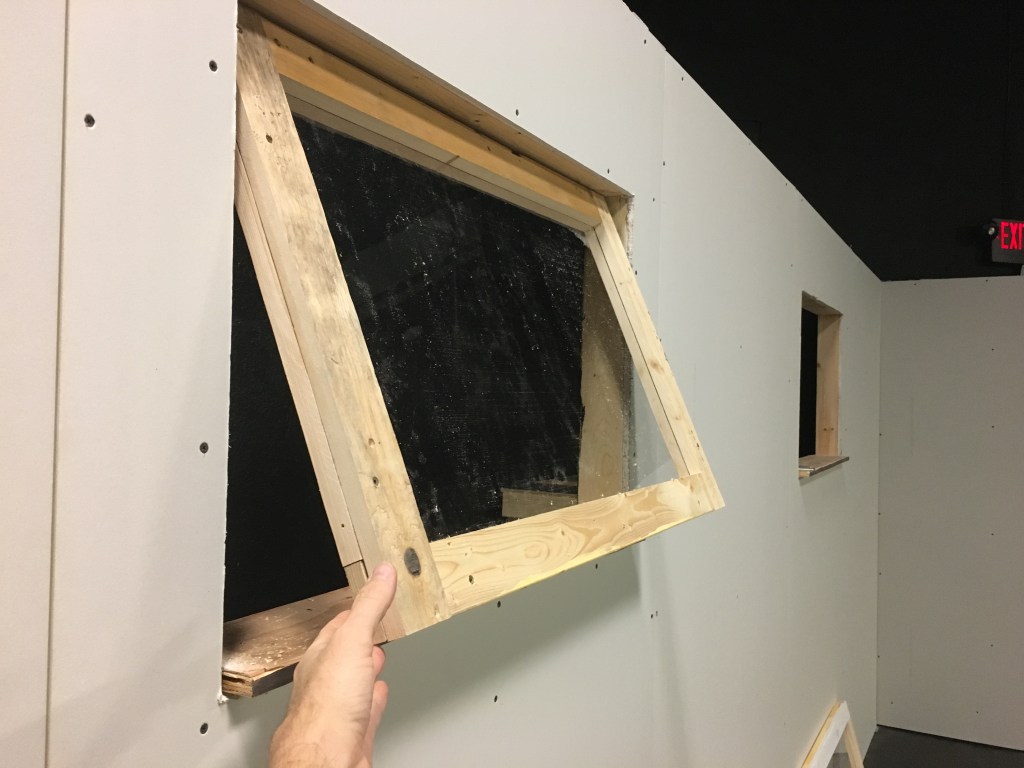
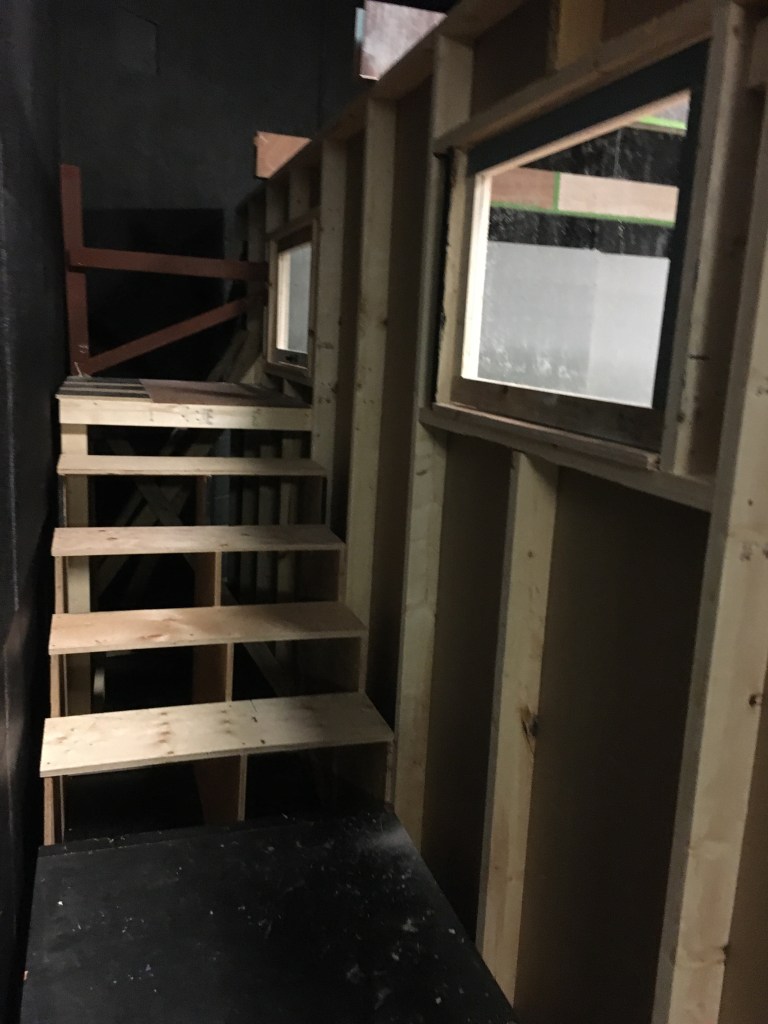
I was very surprised to be contacted recently by a director I have worked with at Gallery 7, about building a set. Ever since I packed away my last project in March I had not thought I would be building a set until a Covid vaccine was available. However, TWU SAMC was filming their show so I suppose this is technically a film set. I won’t post much in the way of pictures…basically it was 3 walls with windows and a door, some of the walls being moveable. Great to build!
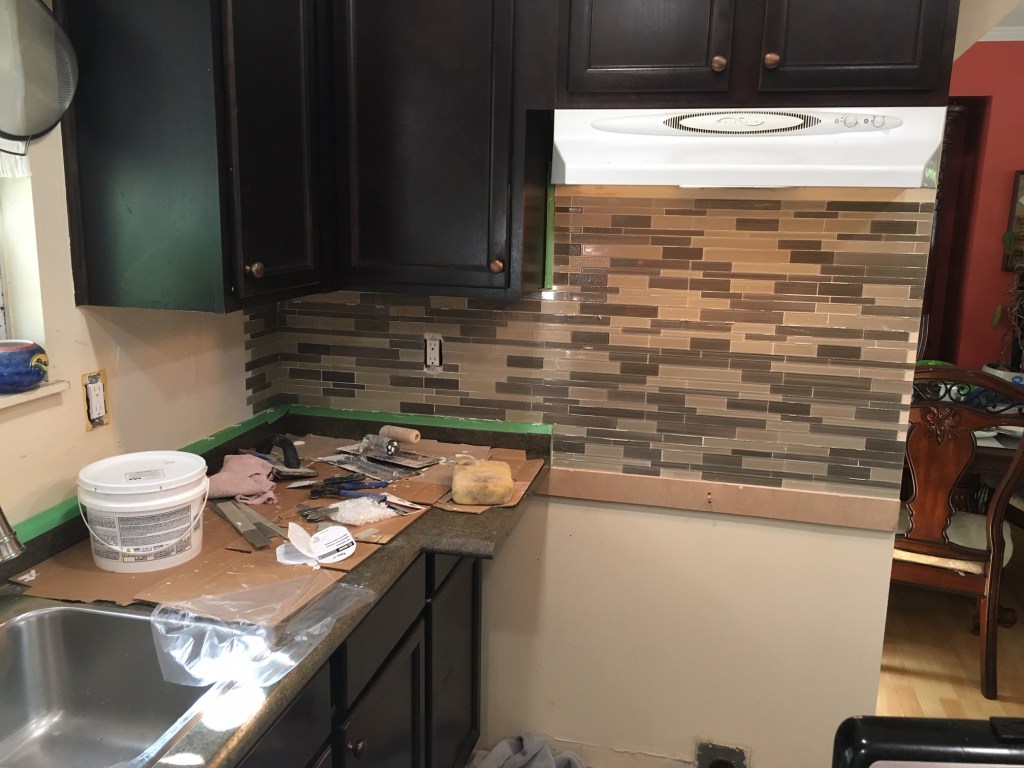
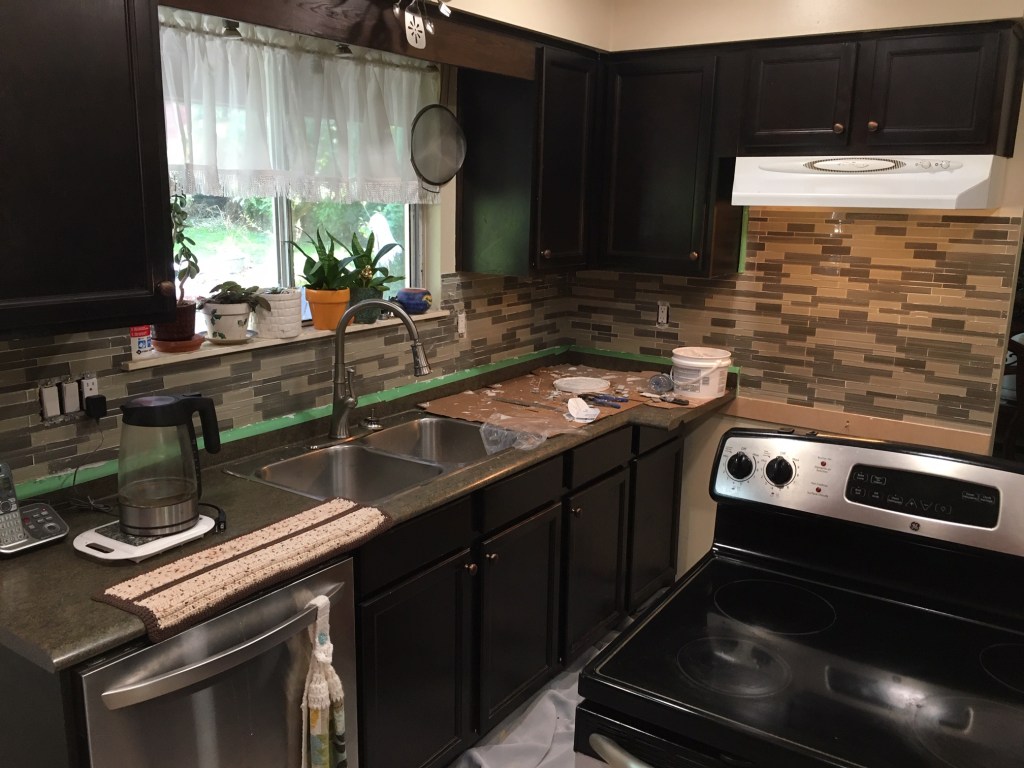
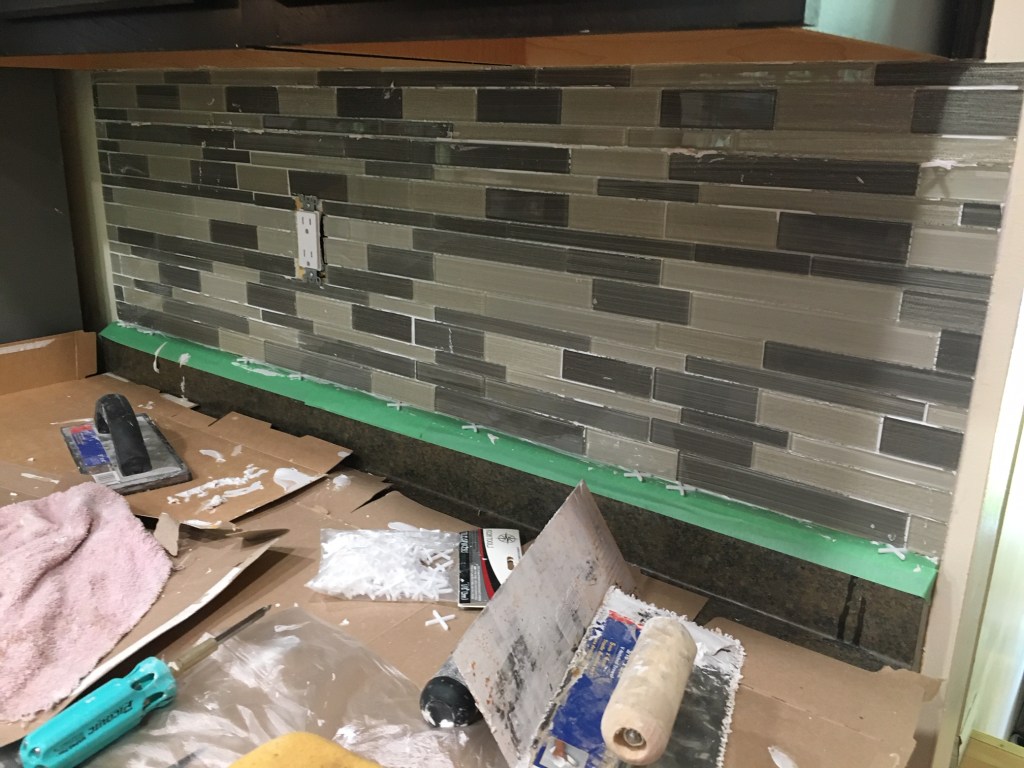
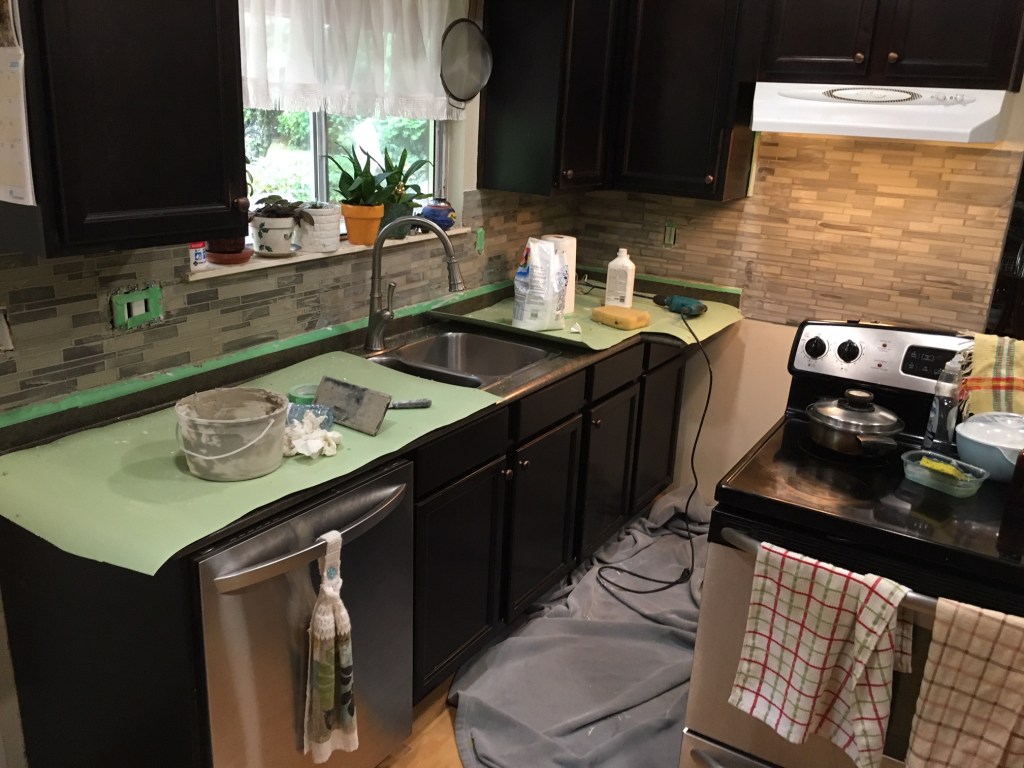
Gilbert asked me to do some tiling in his kitchen. I had done one backsplash a couple of years ago so had to watch some Youtube videos again 🙂 but it all came back to me pretty fast.
I charged 8 hours (2 half days) though it took a little longer–I always forget how long it takes to clean off the grout and put the plugs back together! My customer bought all the materials (tile, adhesive, grout, caulking). I also asked him to do the final cleaning the next day after the grout is good and dry.
I have a nice diamond blade on my wet saw which works well for cutting glass sheets.
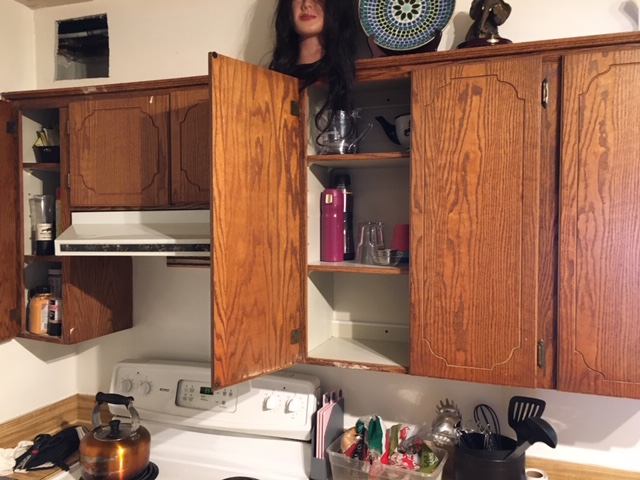
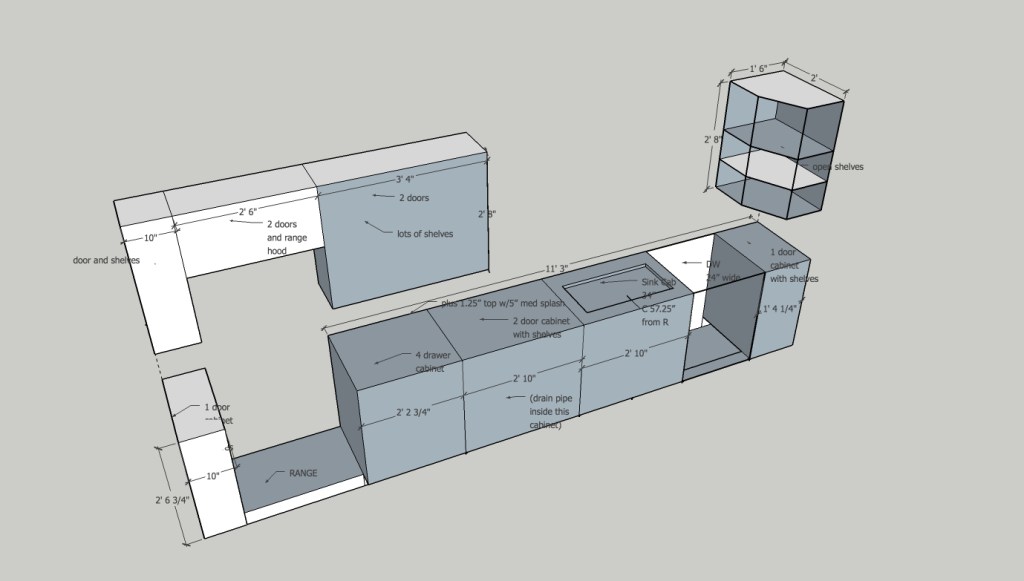
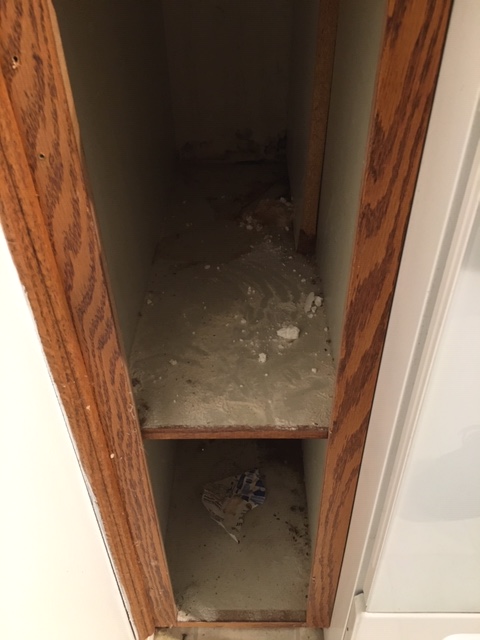
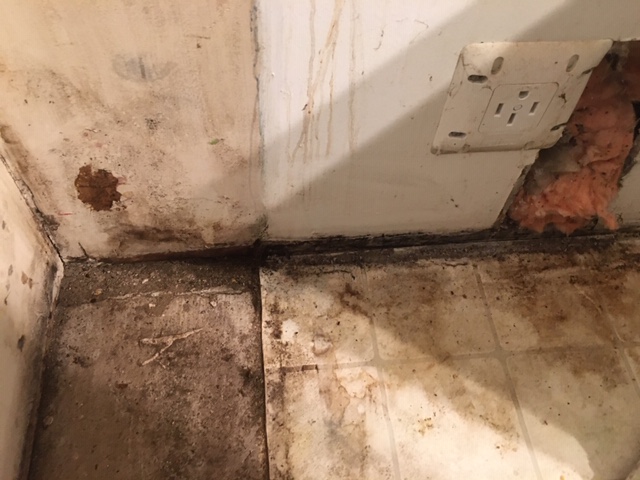
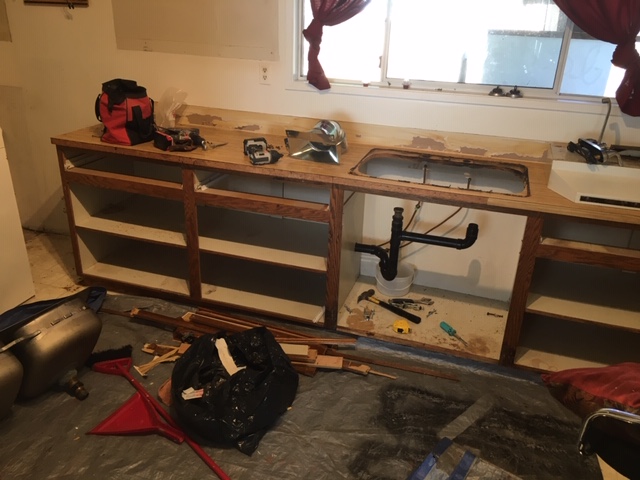
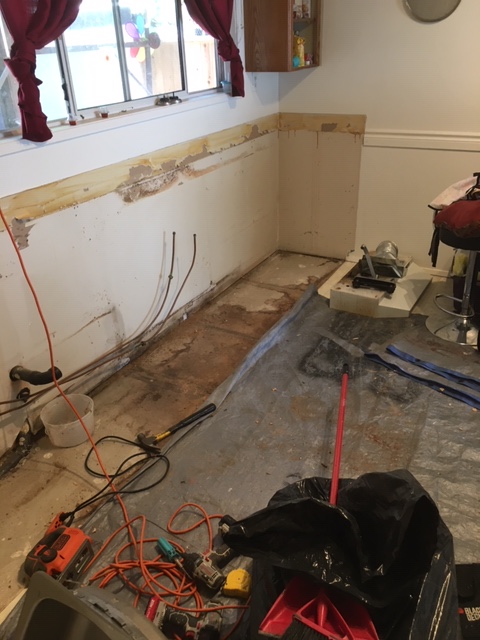
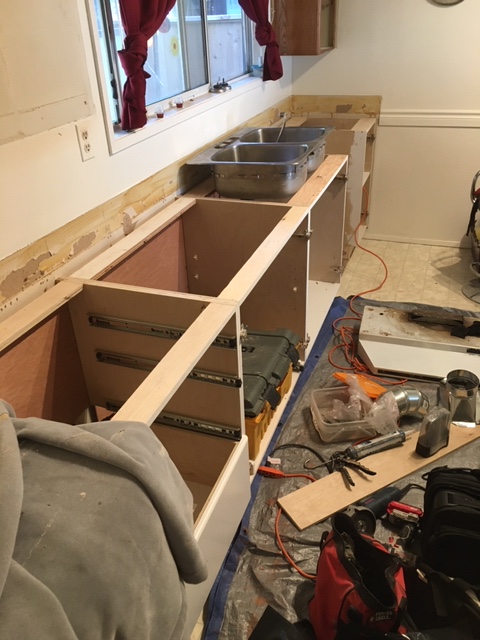
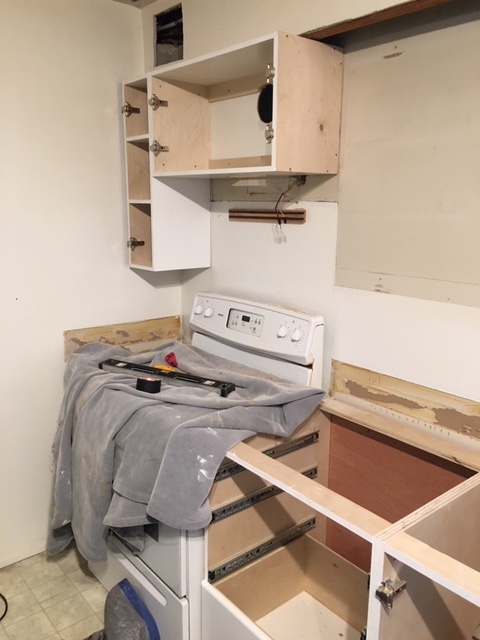
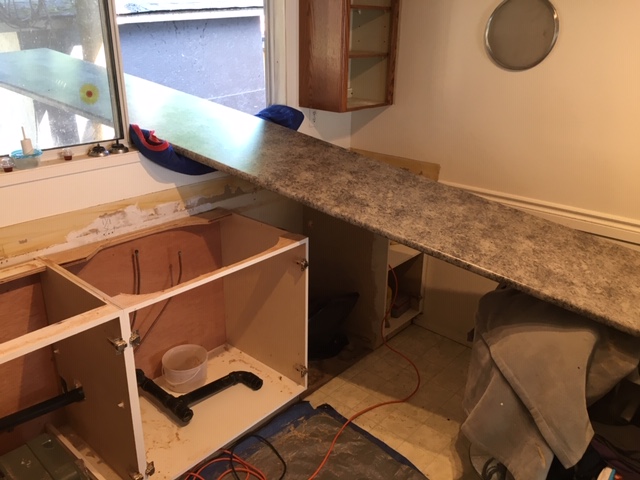
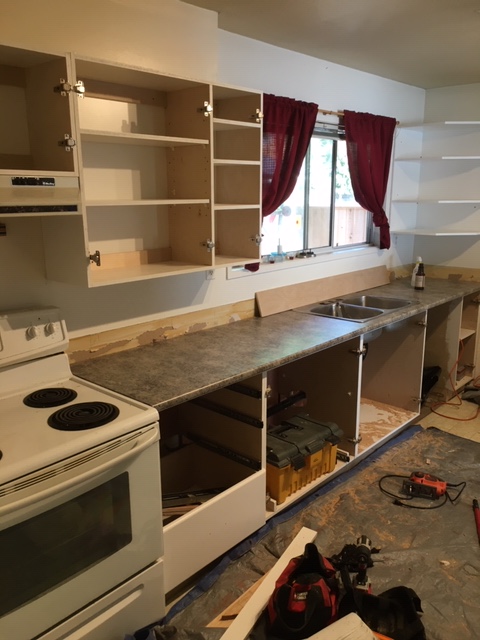
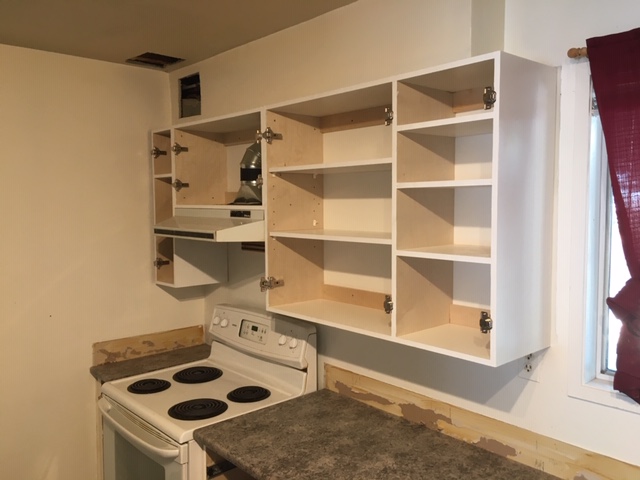
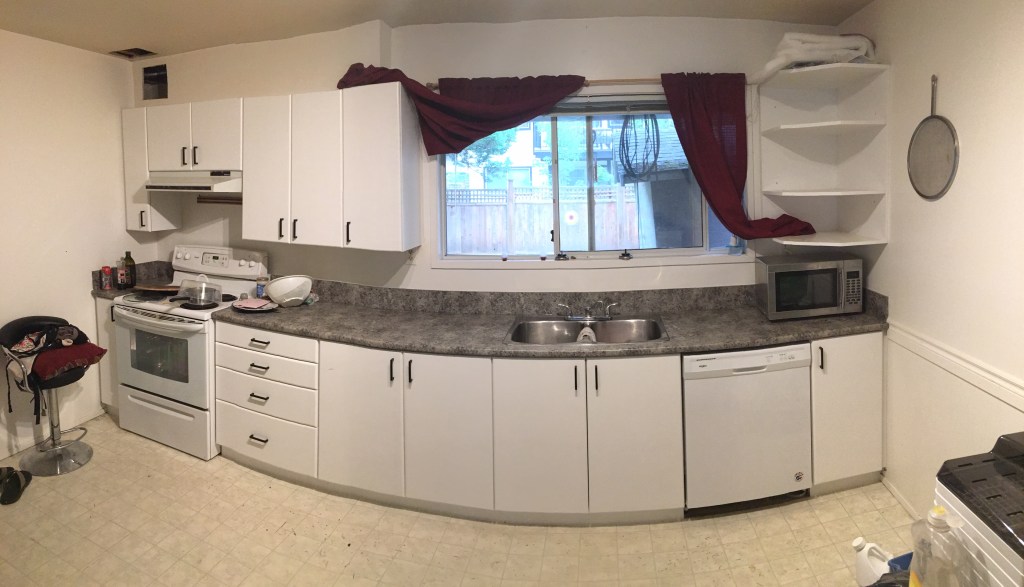
I worked on a rental suite recently. The cabinets were in OK shape, but there were some mould issues and most of the drawers were not working. So the landlord asked for a quote for new cabinets. They also requested a built in dishwasher.
As they wanted to keep costs down, I quoted using basic hardware, basic paint, basic doors (MDF slabs). It also helped that it was a simple layout.
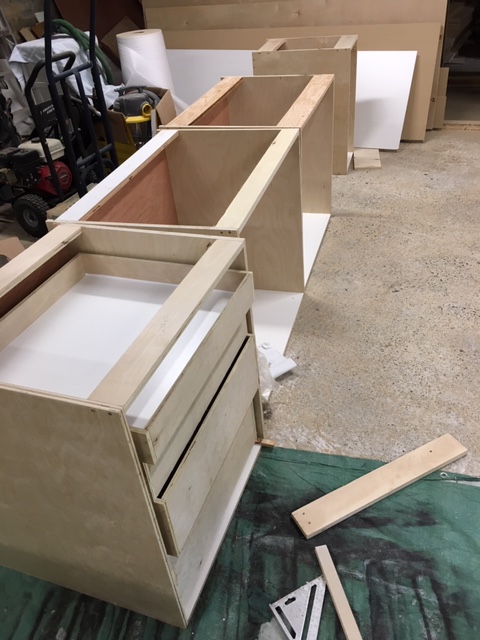
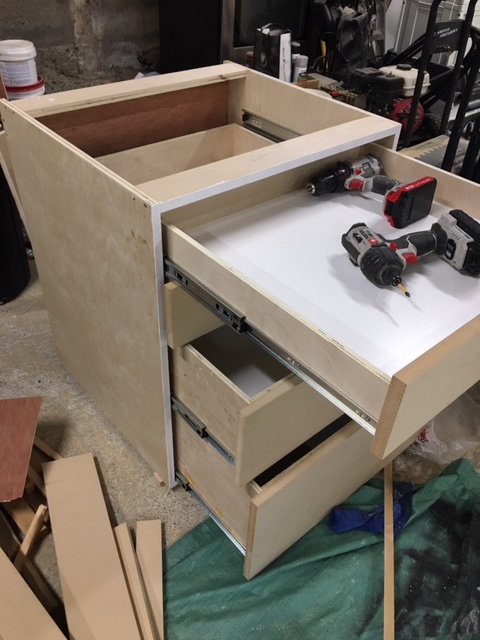
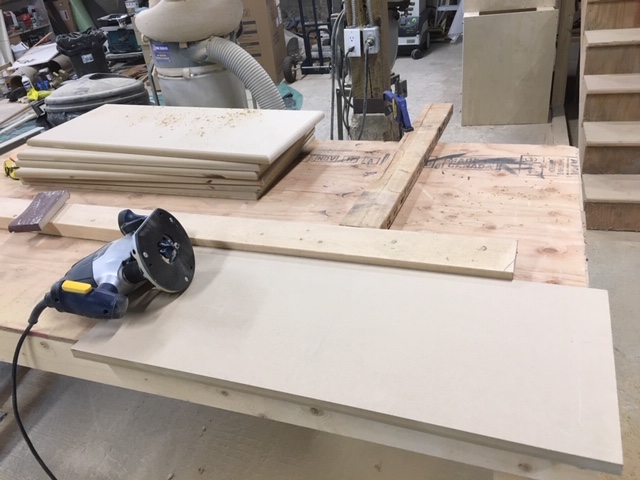
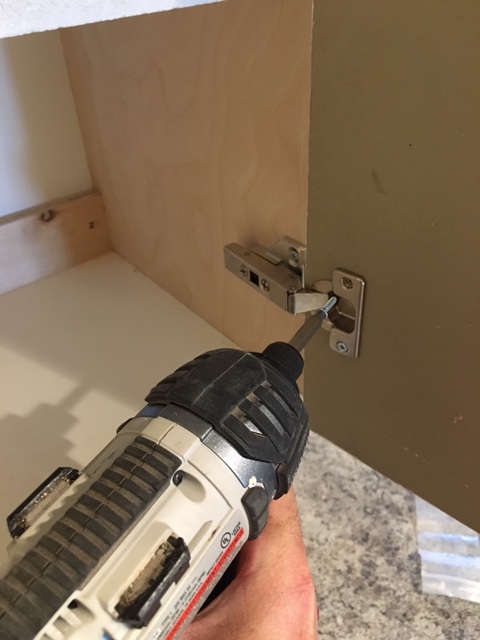
I spent a few days at the workshop making the cabinets. Plywood sides, melamine shelves.
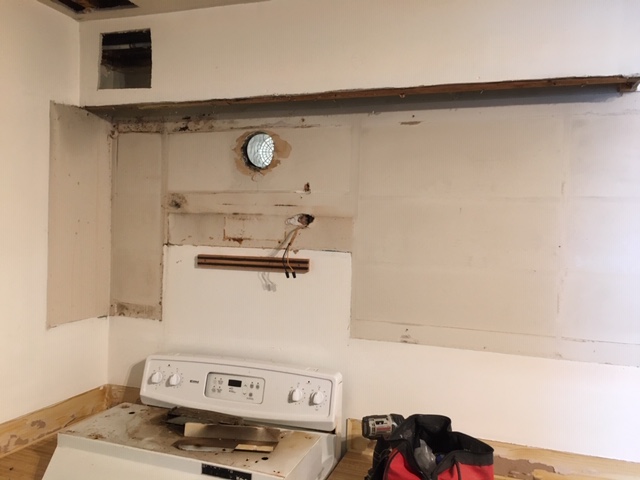
Then it was time for demo and install, over a couple days and part of a weekend.
Everything went fairly smoothly. The countertop didn’t fit through the door but luckily it slid nicely through the window!
It turned out beautiful and now we are just waiting for the plumber to install the dishwasher!