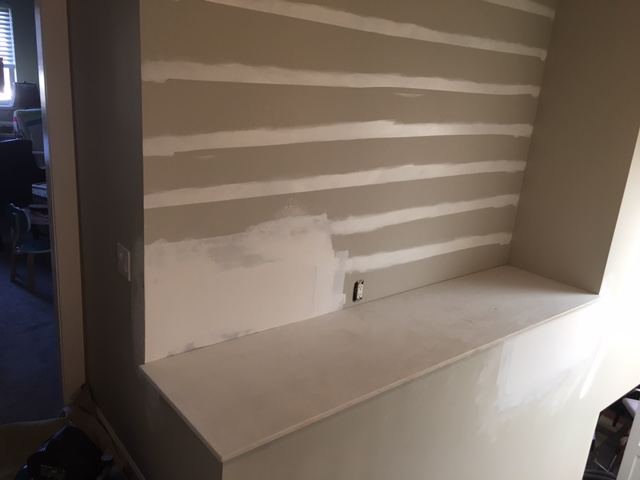
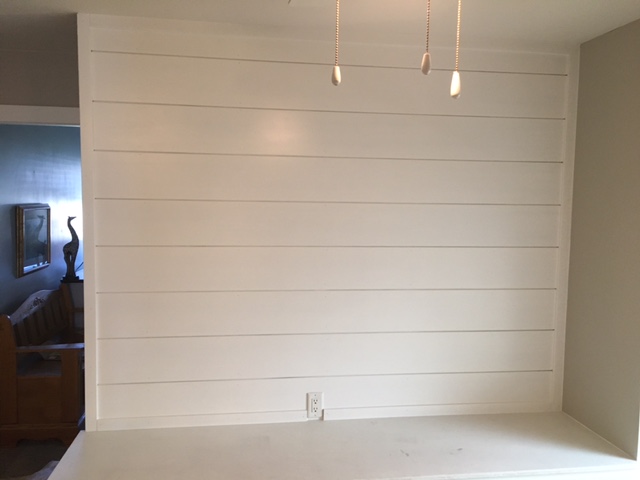
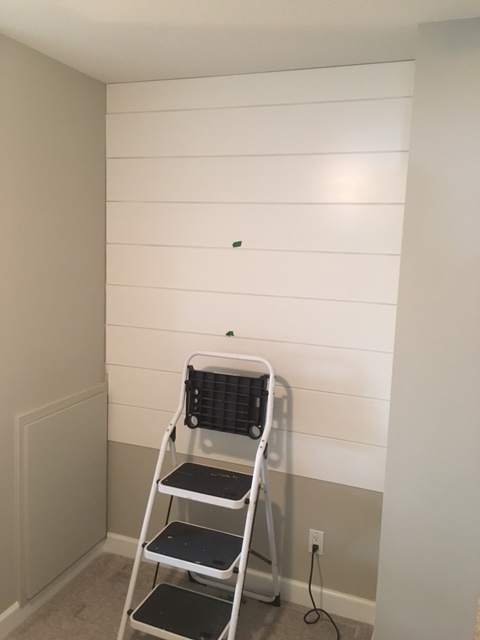
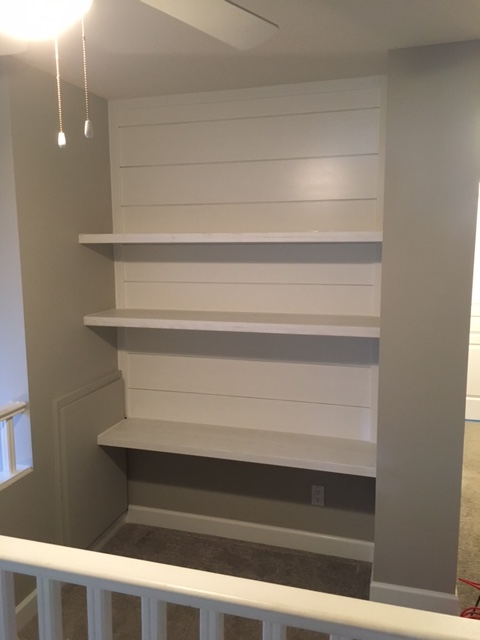
Joan and Tom hired me to change a drywall step that was kind of awkward. I flattened out the step and put a long, flat shelf in. (The wall needed patching in a couple of places.) Then I made “faux” shiplap out of 1/4″ MDF. Tom painted everything and then I tacked it up on 2 walls. There are also some shelves: they are hollow inside so they can slide into the wall alcove without support brackets.
Jobs Blog


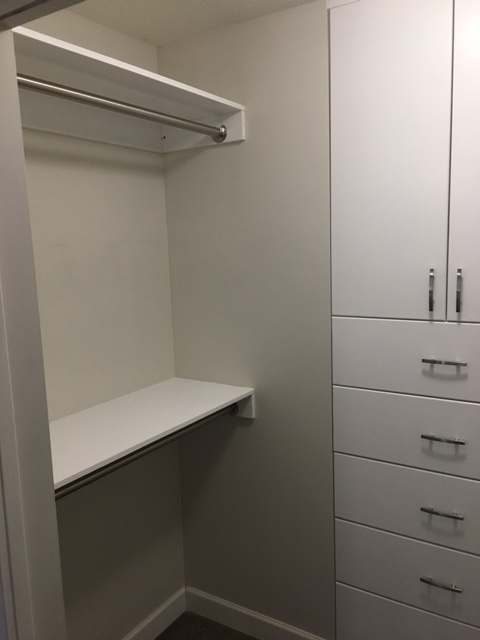
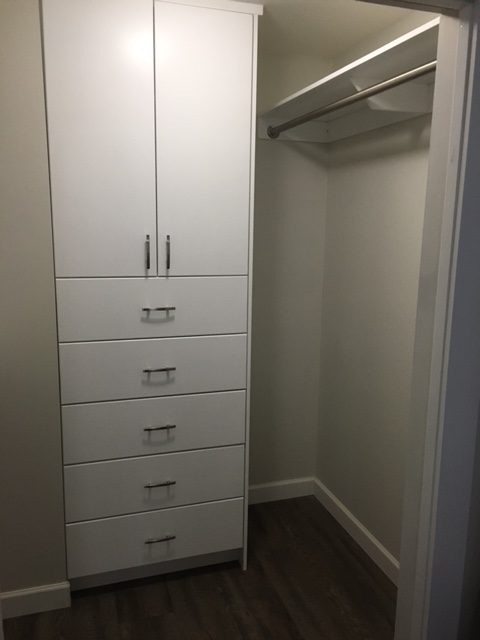
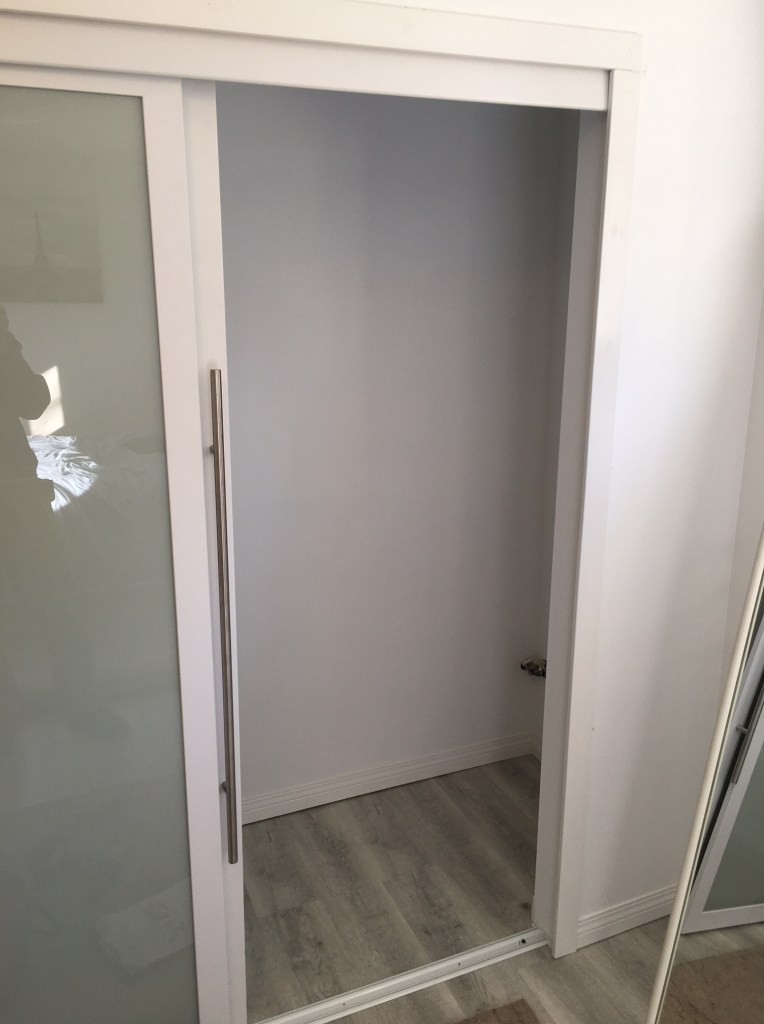
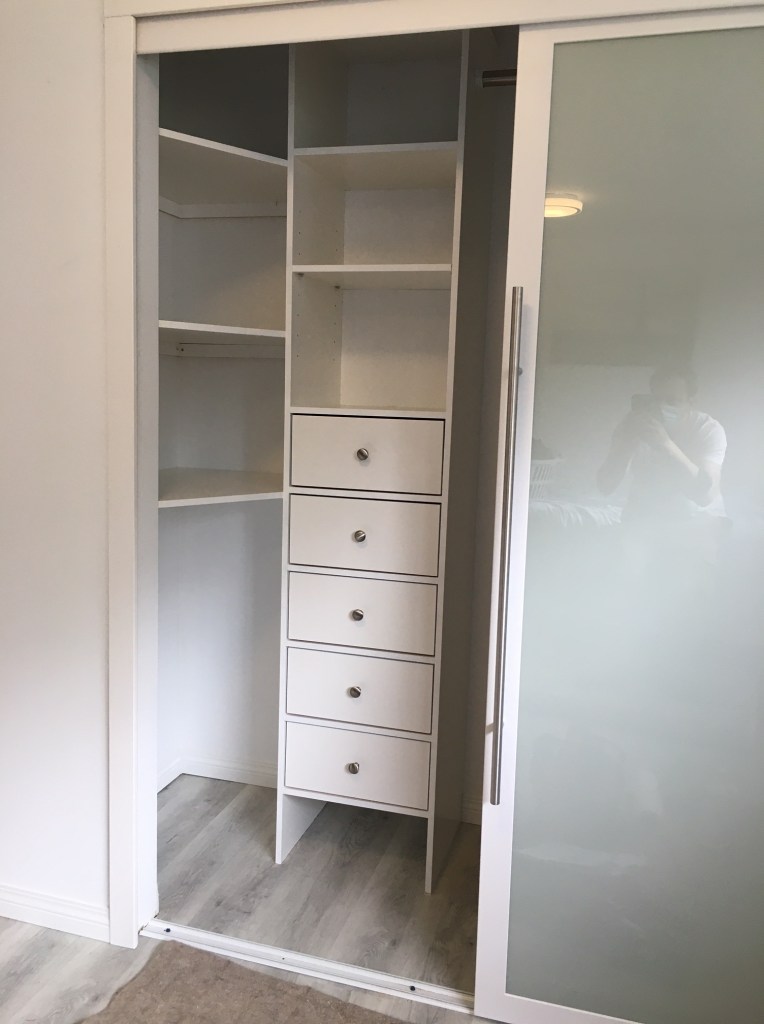
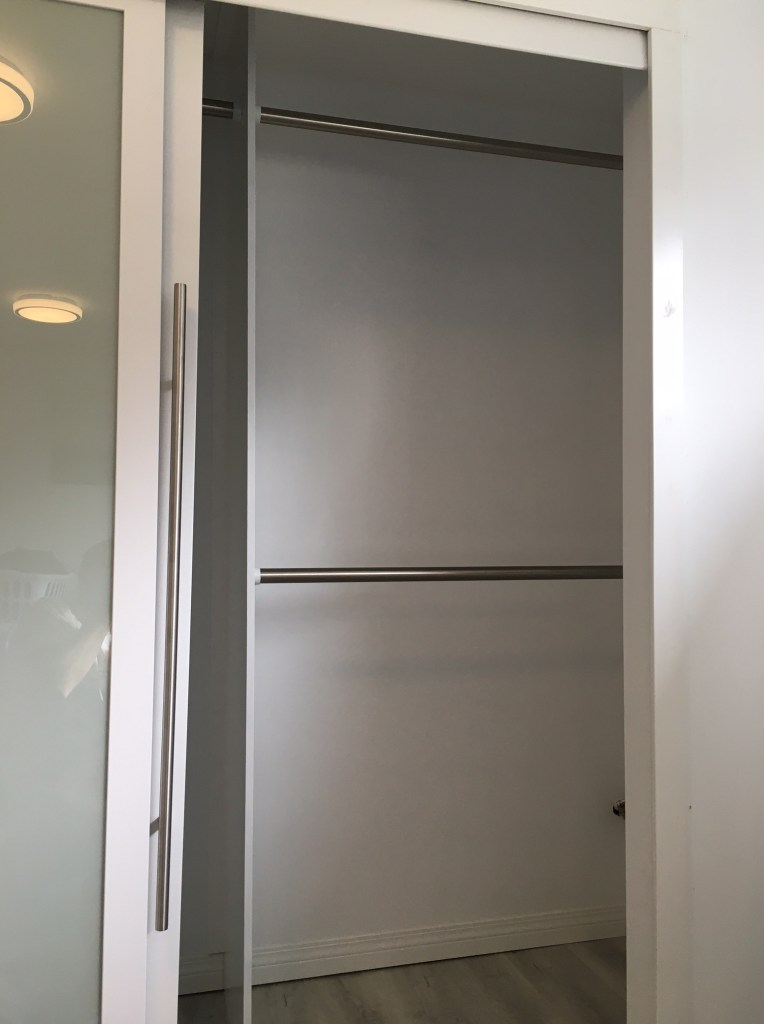
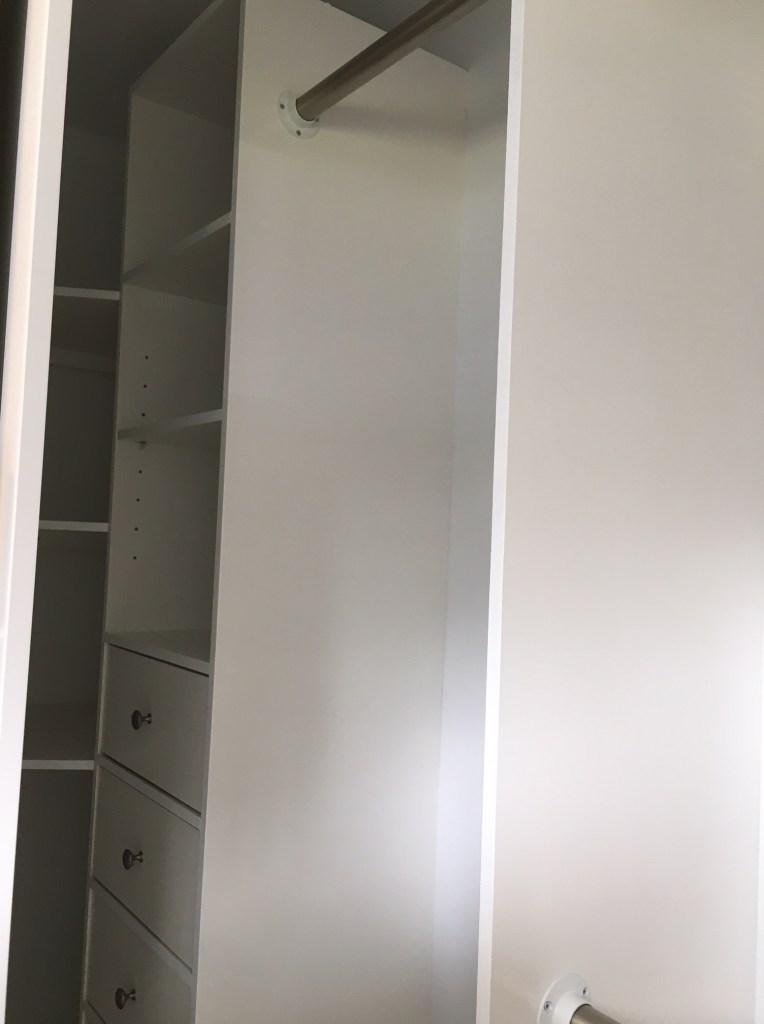
Another walk-in closet
I designed another walk in closet, this time for Joan and Tom. (They had wire shelves before, and took them out for me before I started)
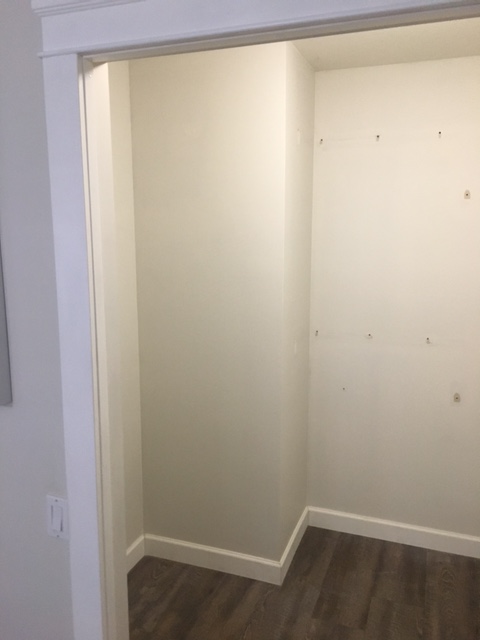
left side 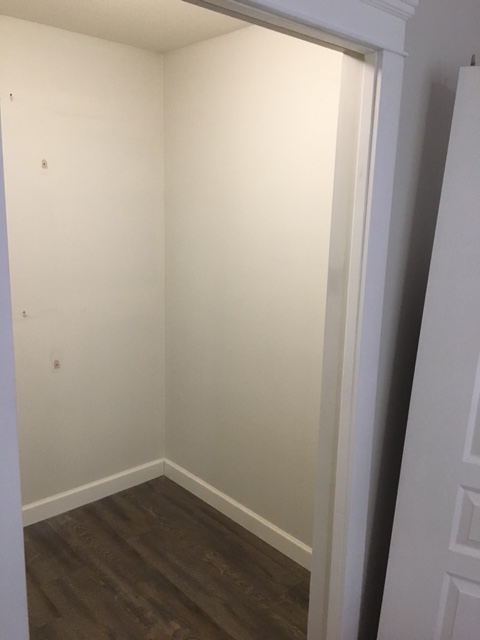
right side
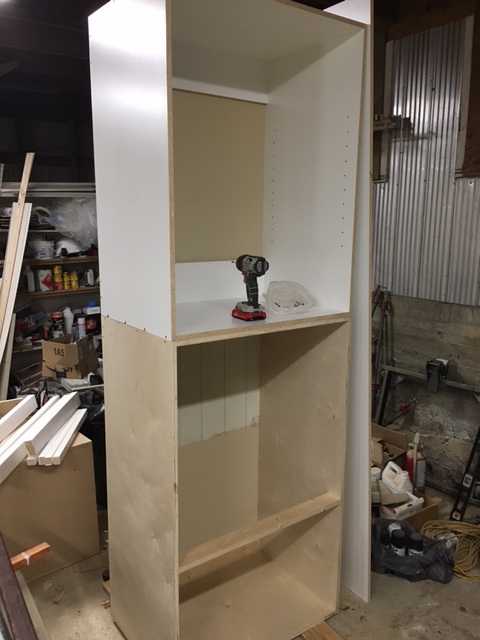
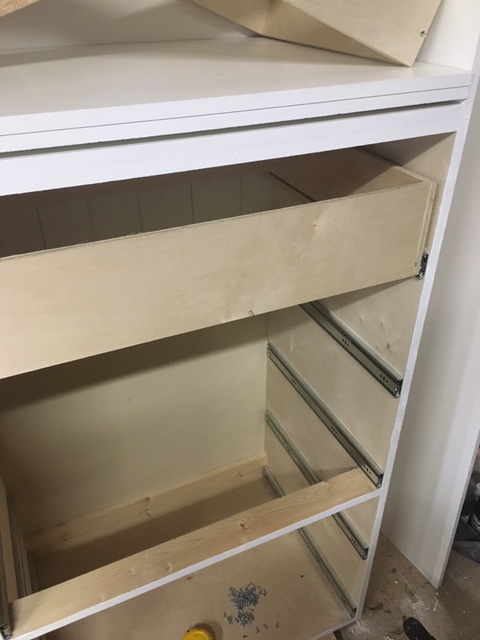
I built and painted the cabinets and shelves in my shop in about 2 days, and spent a few hours installing.
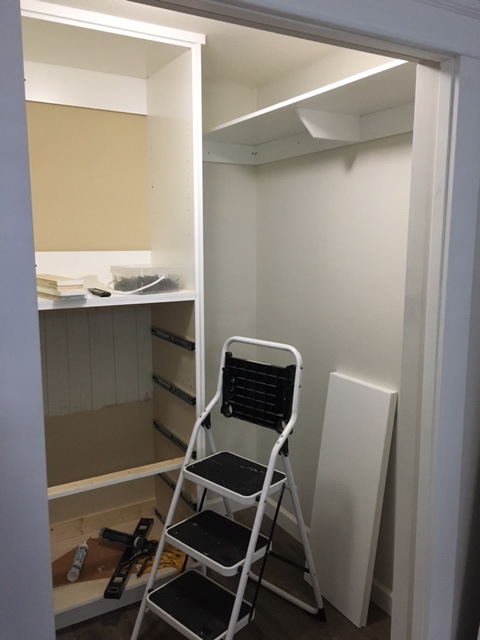

I also tacked together a shoe rack which stays in the right corner.
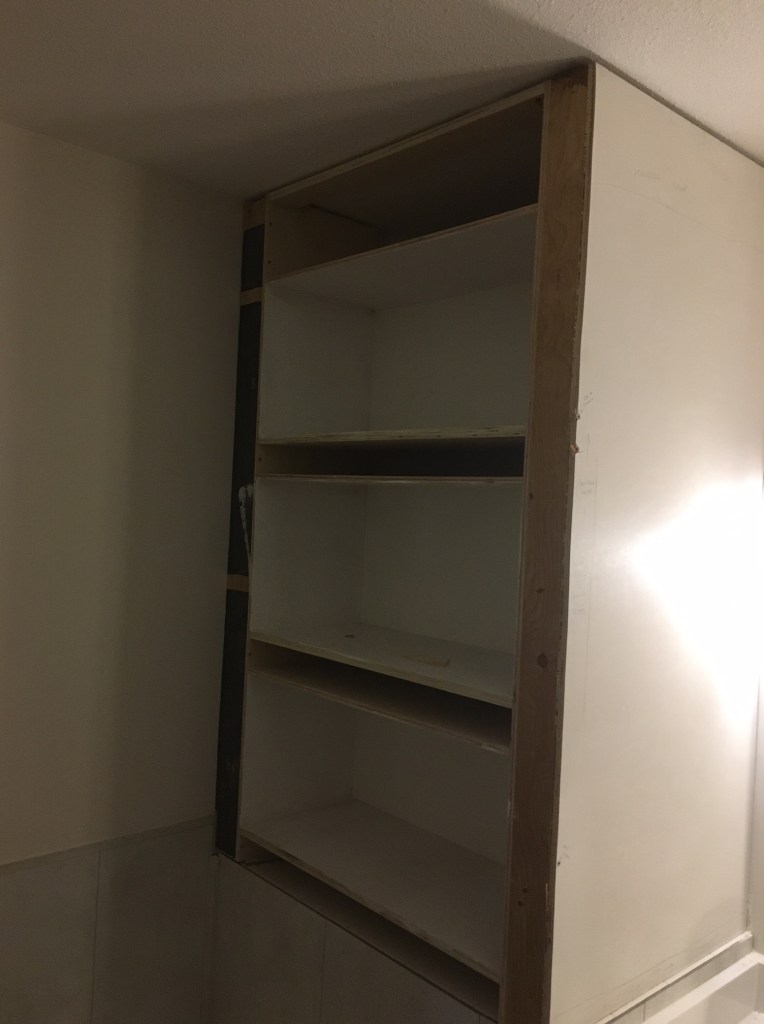
Add Upper Laundry Cabinets with struts
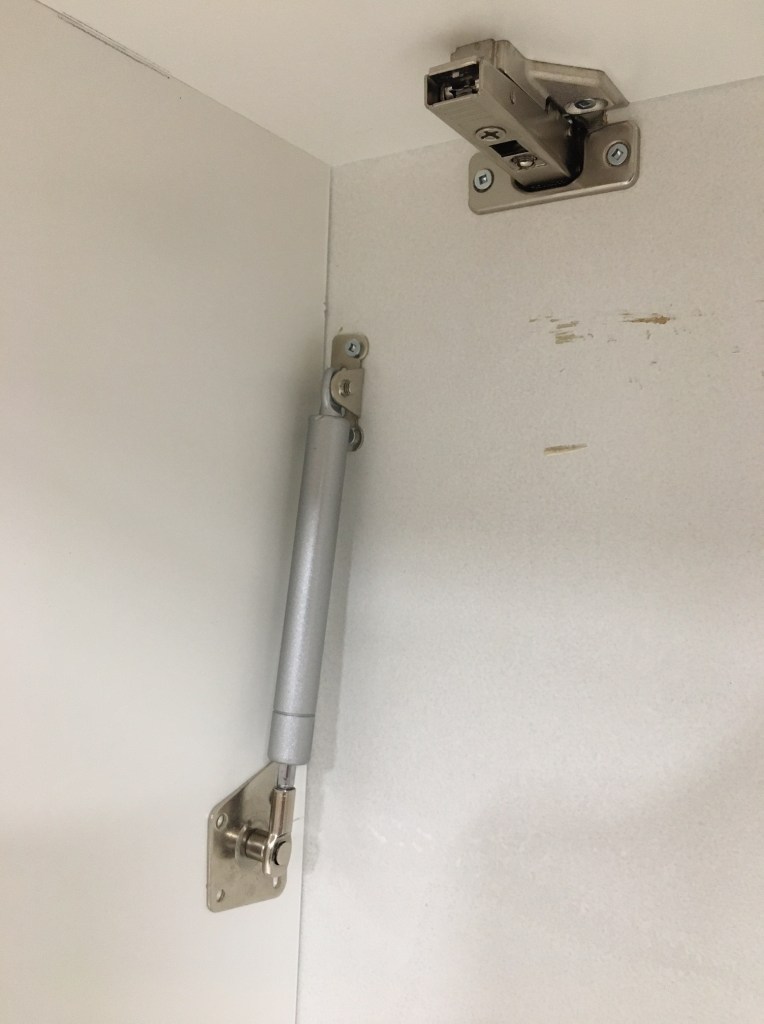
I had added a cabinet some time ago for Sandee–it’s the one on the left. The doors were ordered with thermofoil and almost matched… she wanted some more put above for extra storage.
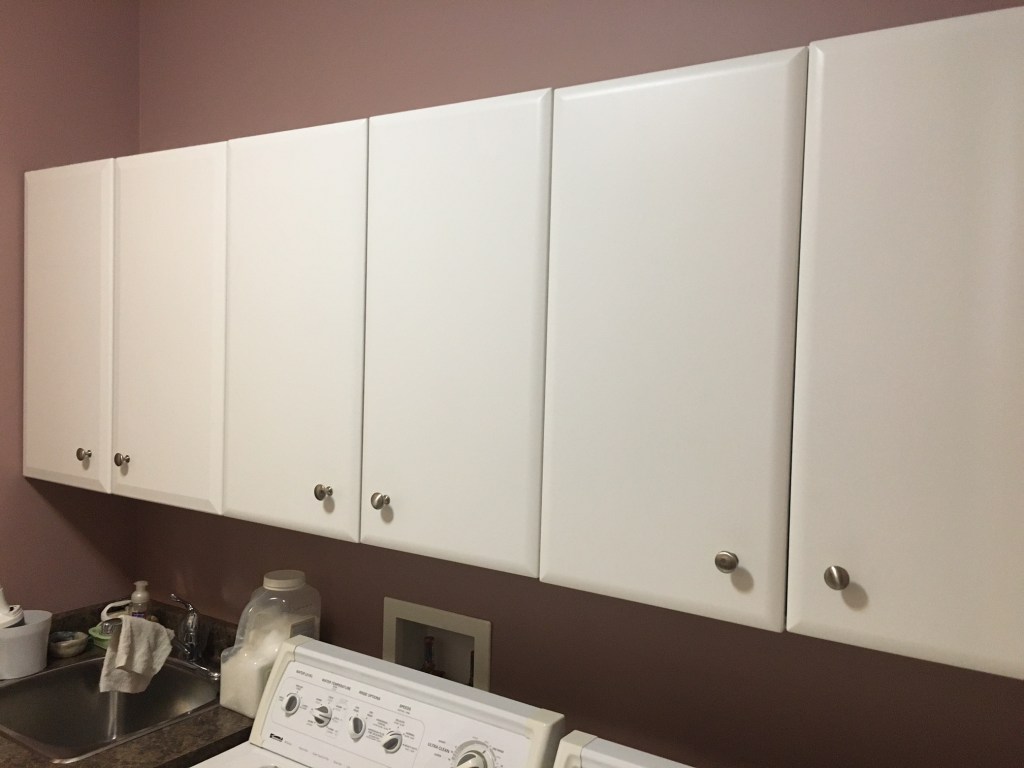
To save time and money, I asked if I could just make the doors myself and paint them this time – although it wouldn’t be a perfect match, once again. She was fine with that.
So I built the boxes, cut the edges of the doors on the tablesaw, and painted them with a roller like usual.
I also added gas struts to these, which was a little tricky to figure out, but it’s great because there is some lift/close assist for the heavy horizontal doors.


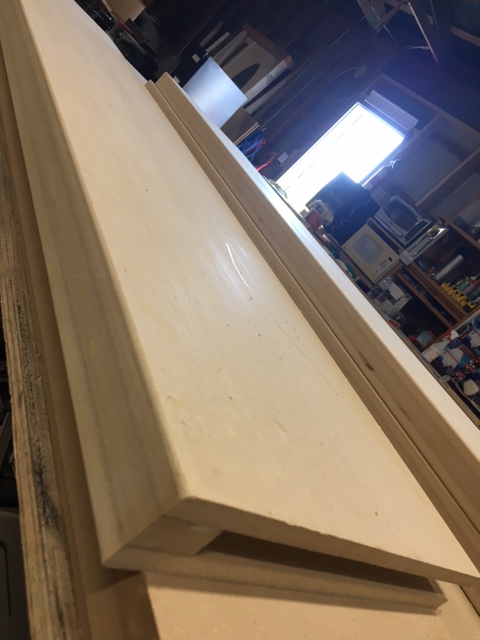
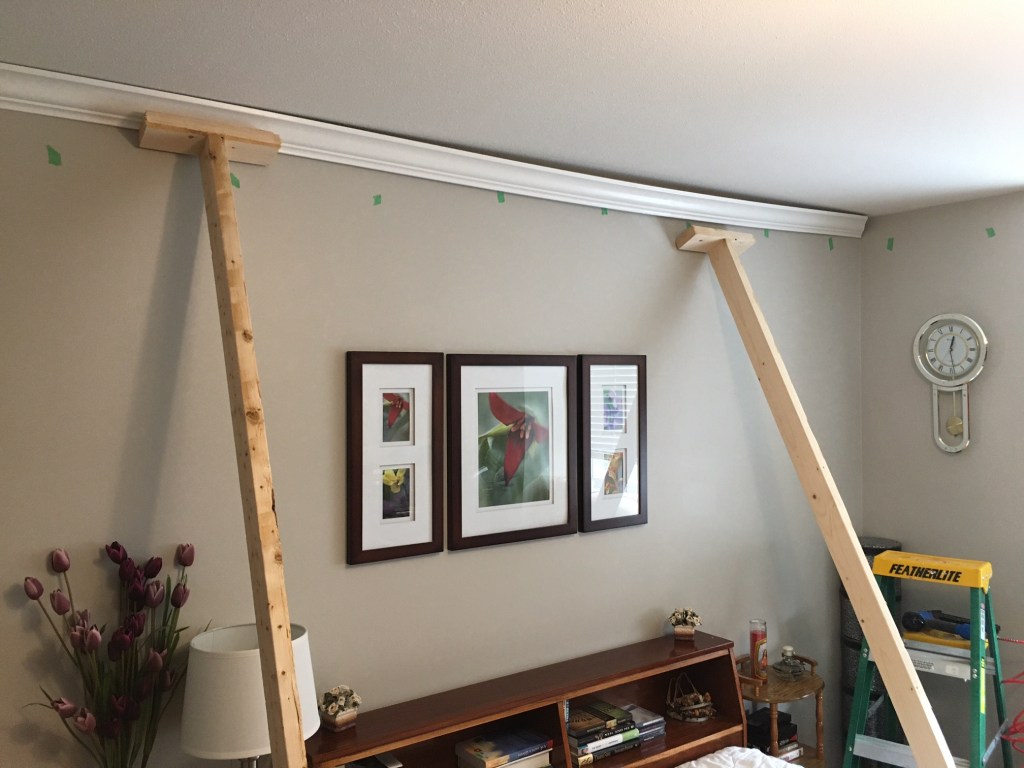
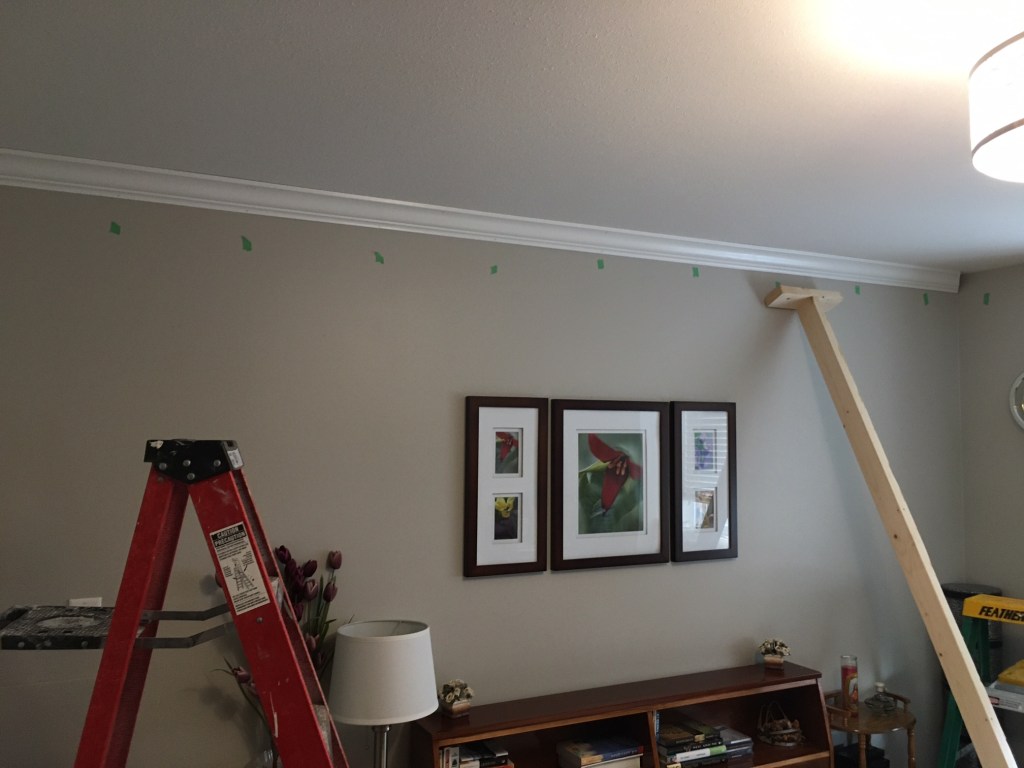
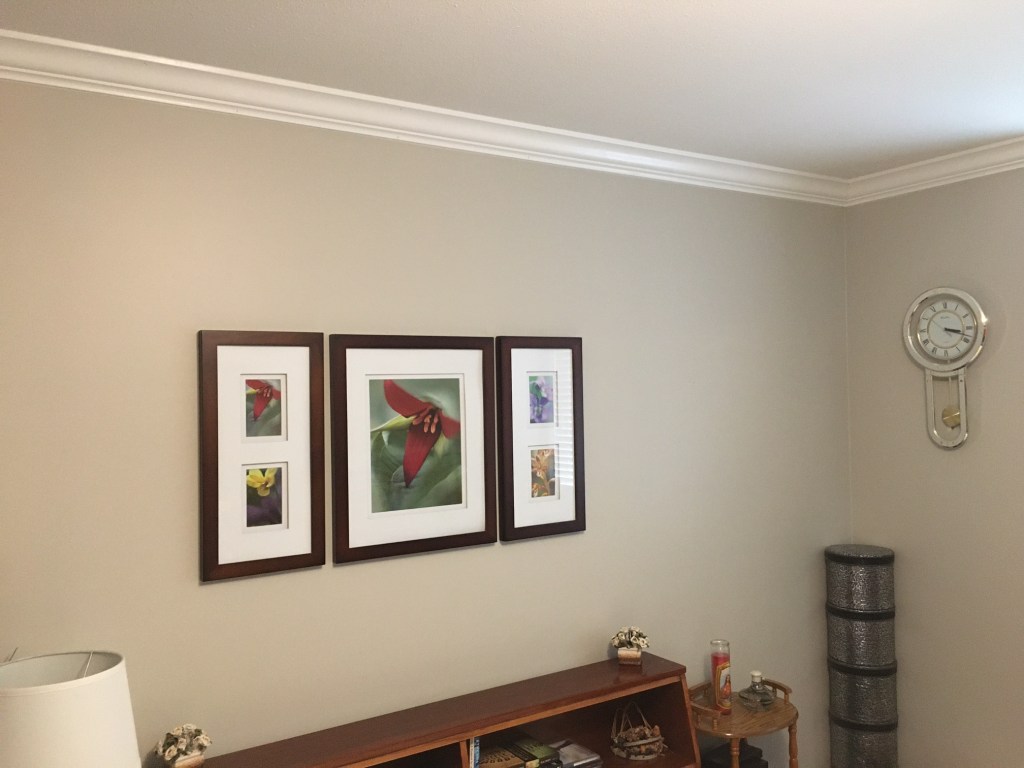
Homemade Crown Moulding Helper
I don’t do a lot of crown moulding, but when I do, there is inevitably a long piece that takes 2 people. Sometimes my customer helps me, and other times I muscle it up there. I had several 14 footers to put up recently so I made some helpers out of 2x4s. They worked quite well!
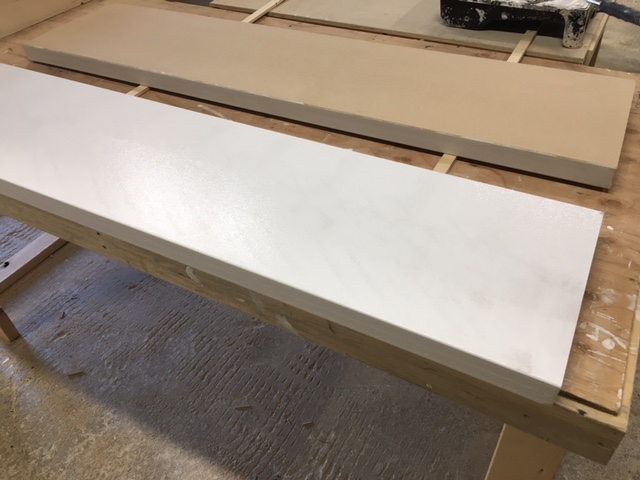
I also put some crown moulding over a shower…again…this time I pre-primed the pieces on the back, including the cuts. Hoping they stay nice and dry and don’t get wet!
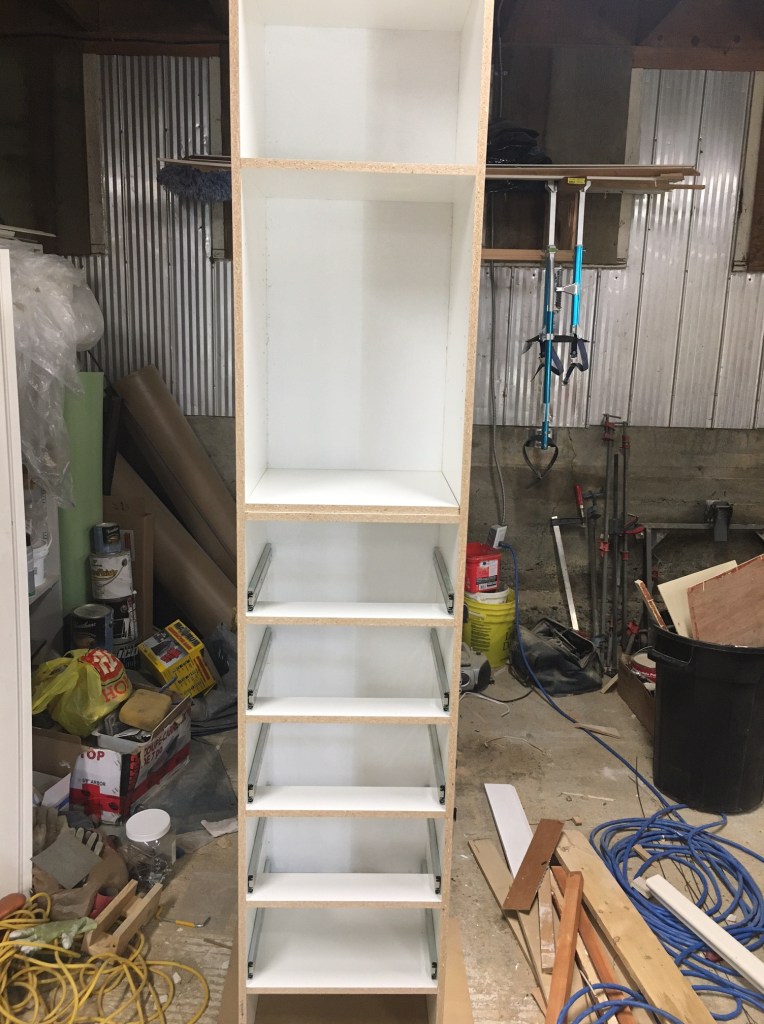
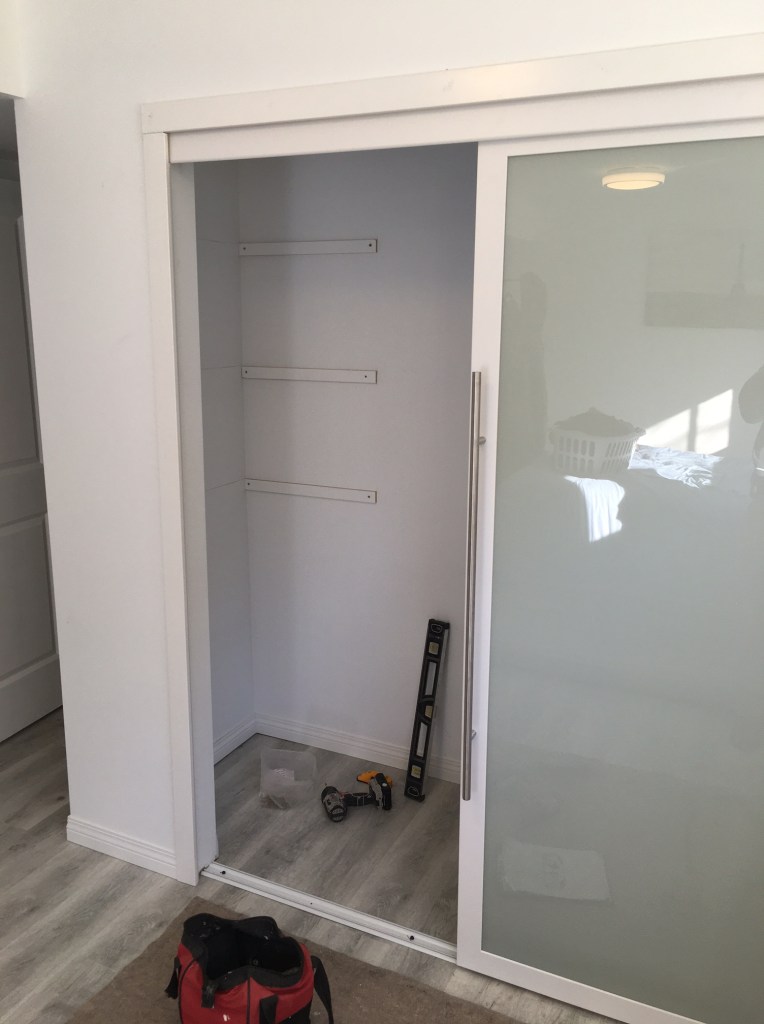
Custom Closet (inside part)
Darlene hired me to design and fill up her new closet space with shelves, cabinets, and rails. (The closet had already been built, but there was nowhere to hang clothes.)
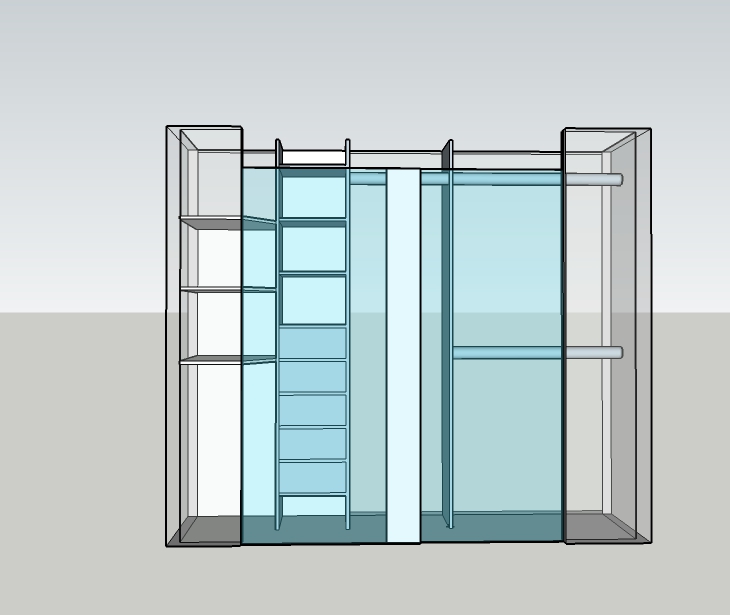
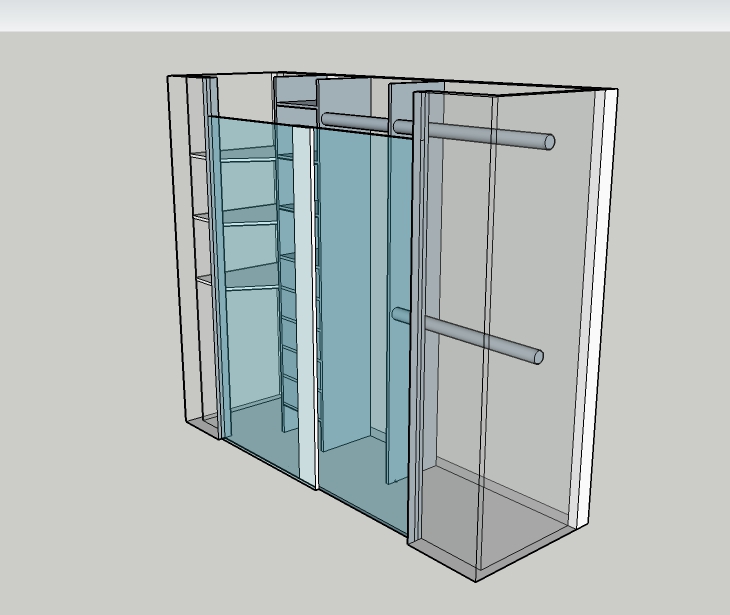
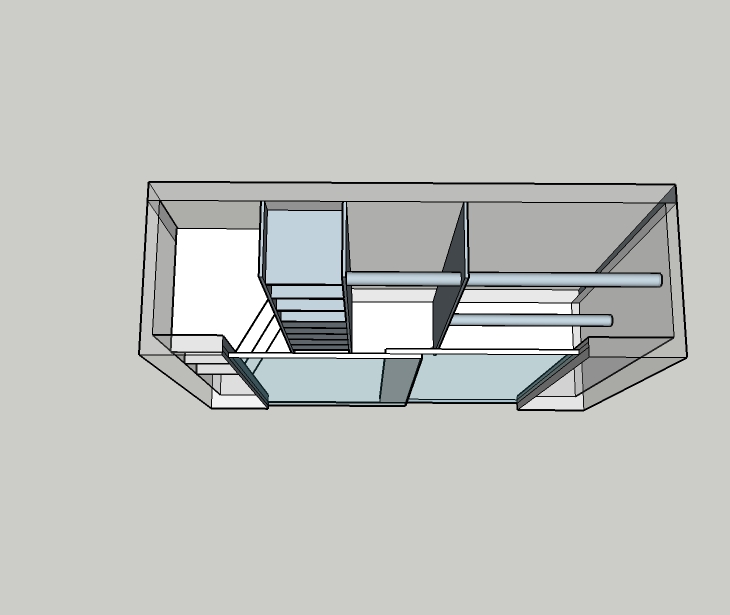
The double sliding doors are very. nice, but they do limit access a little bit. So in my design I put just one tall hanging rail right behind the middle where the doors overlap. That way everything else would be easily accessible from either the left or right side.
Building the cabinet in the shop…
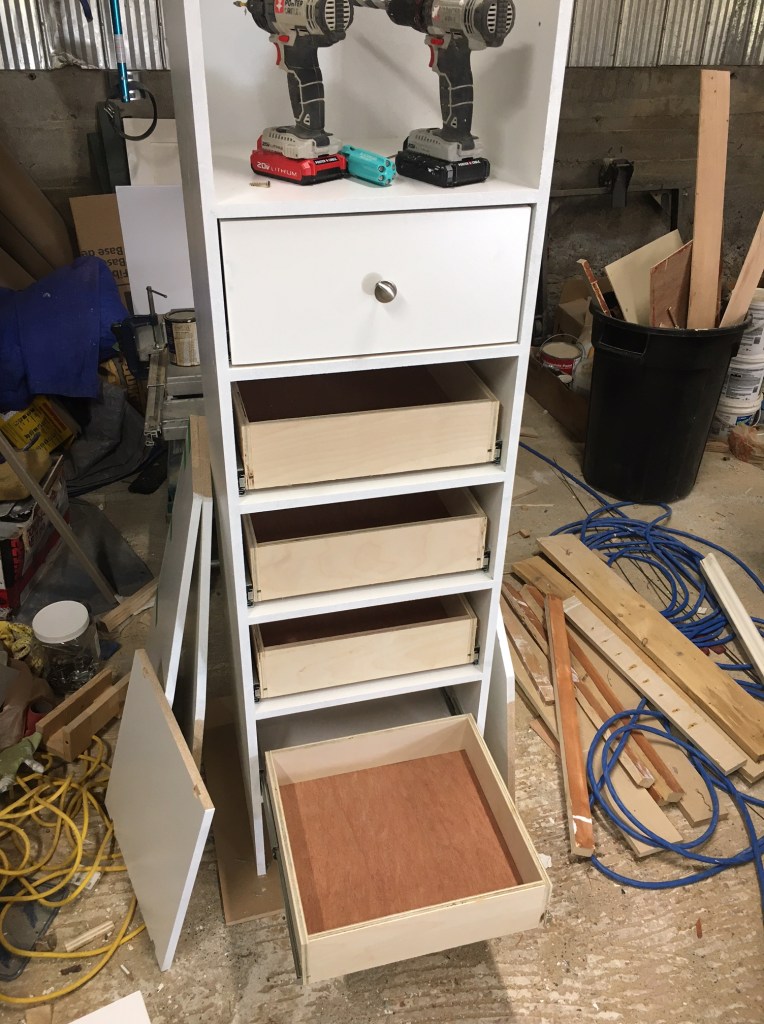
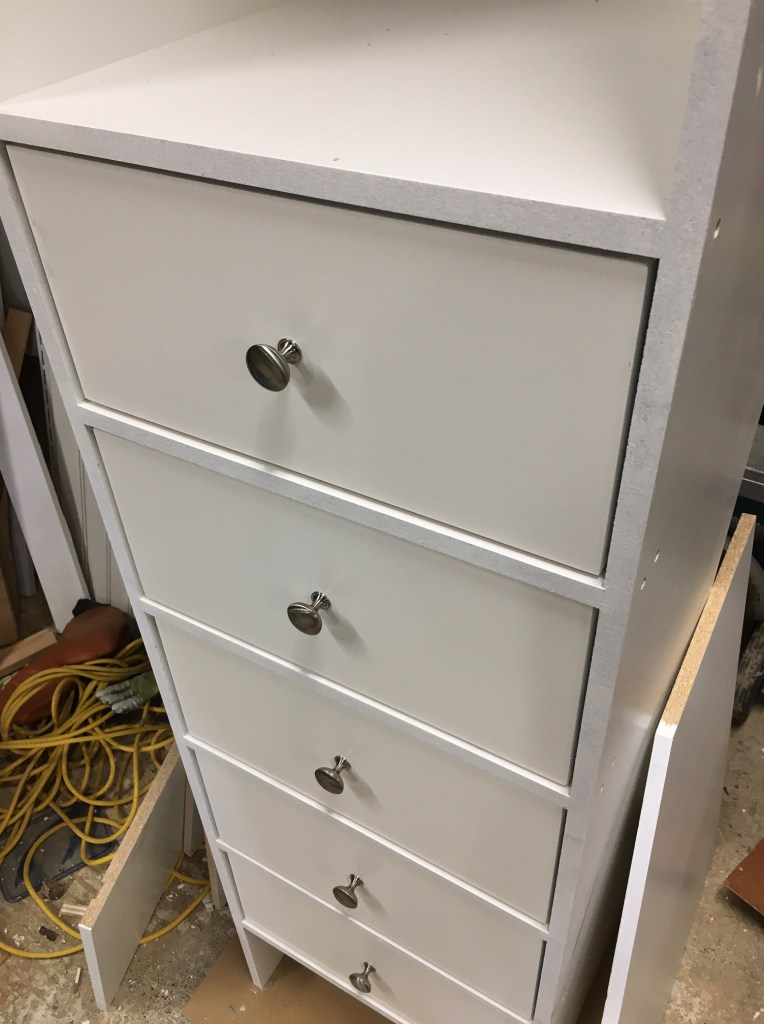
Drawers are always kind of fun to build…though time-consuming.
When Install Day came, I worked from left to right: shelves, cabinet, panel.

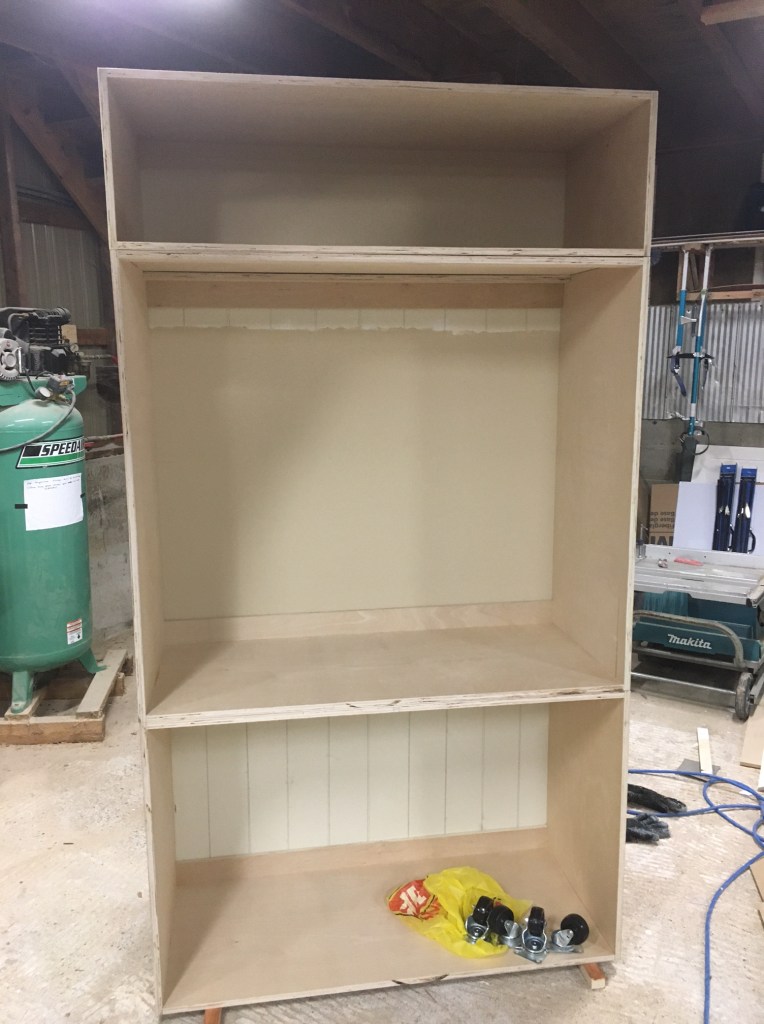
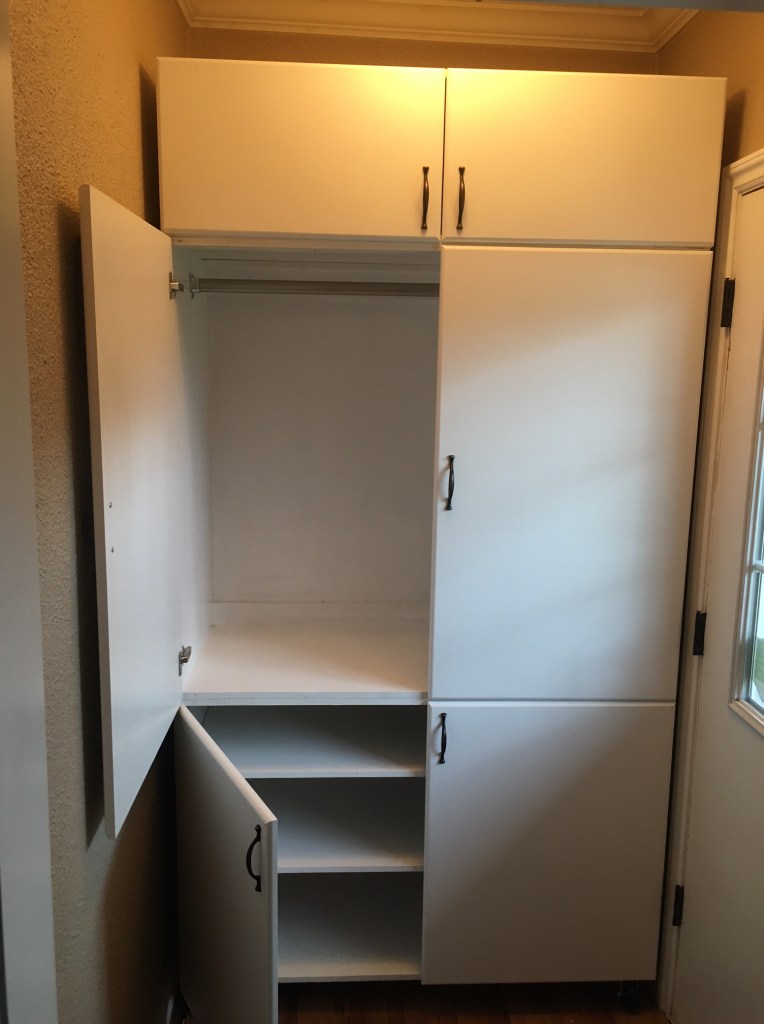
Wheeled Wardrobe
David and Debbie asked for a wardrobe to fit a custom space beside the front entrance. They wanted it on wheels for ease of cleaning behind it. I spent some cold days in my shop building and painting it. I stacked it in 3 levels for ease of installation.

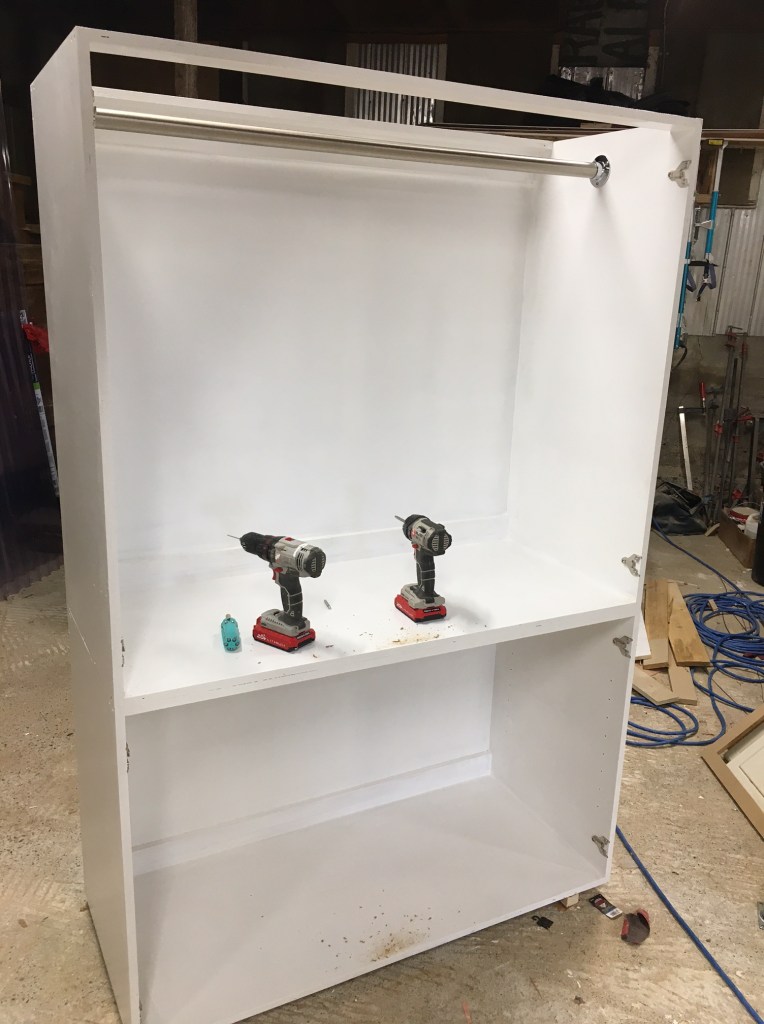
When I went to install it I realized I had misunderstood a very important aspect about the way that it needed to turn in the small space (hence the wheels etc.). As it was a rectangle shape in a small rectangle room, it wasn’t possible. So I took it back to the shop and cut off the back right corner. It took some time to put the sides back on, as well as the angled shelves and closet rail.

Once that was taken care of, it fit nicely and turns easily. It’s a little wobbly…being such a tall unit and not fixed to the wall… but should hold up just fine.

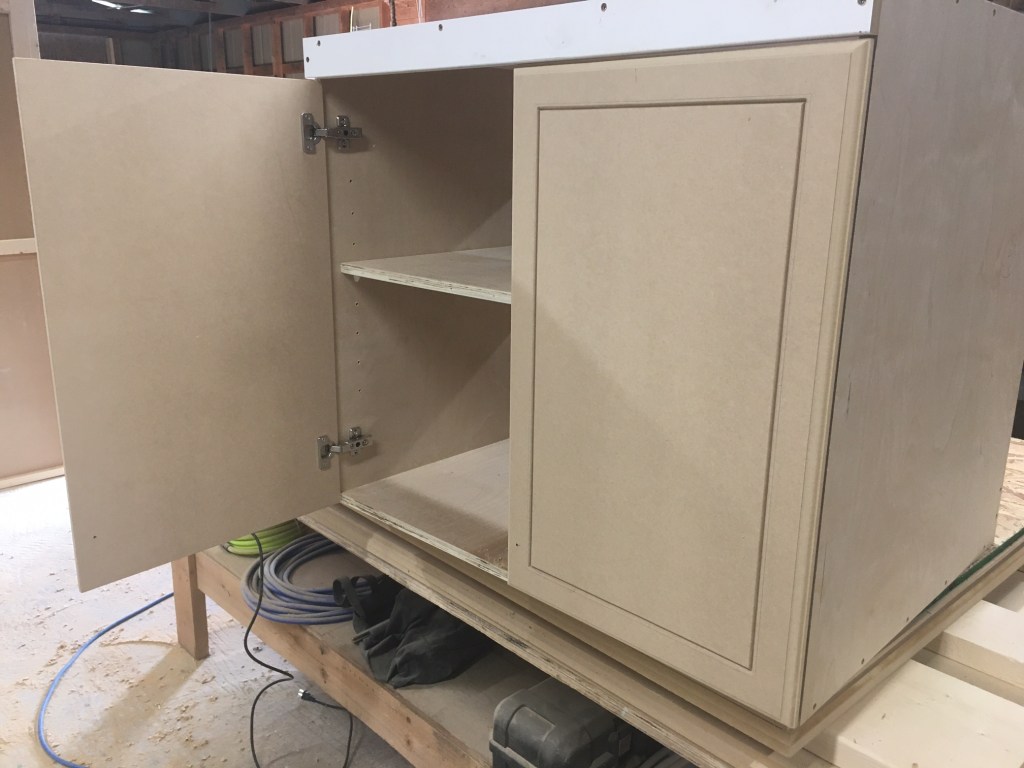
Custom over-fridge cabinet match
David and Debbie asked for a cabinet over their fridge for extra storage.
So I whipped one up 🙂
After I installed it I realized the paint colour was not quite right (wrong shade of white). So I took the doors back to the shop and painted them, and returned later with a few pieces of crown and painted the sides.
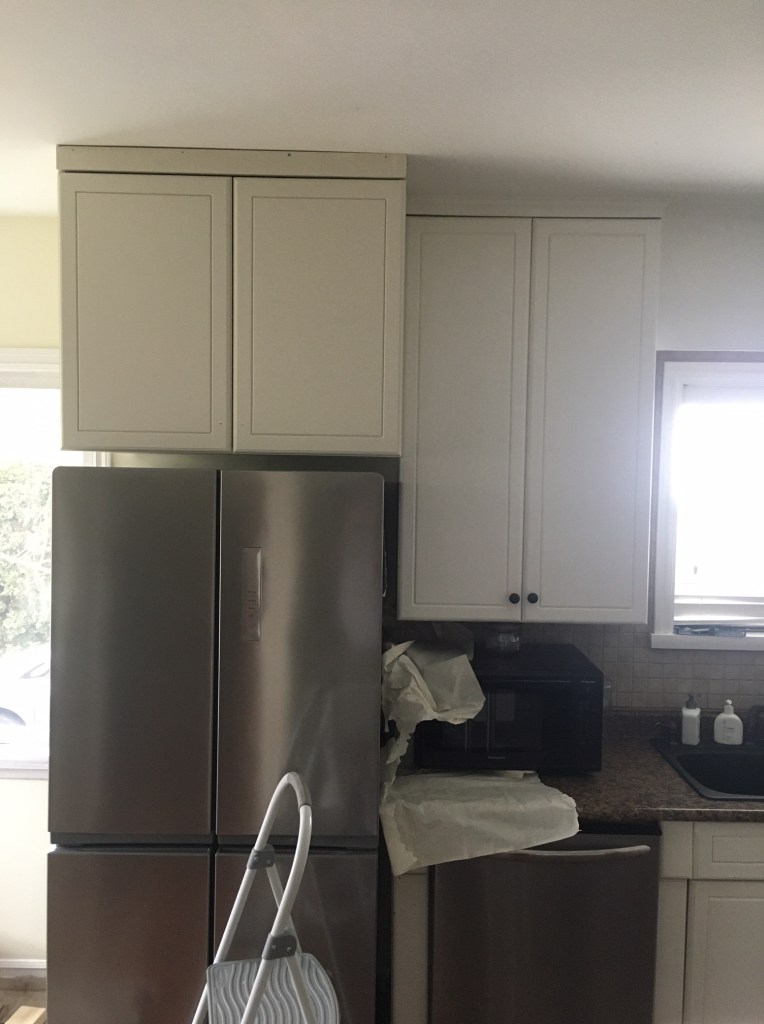
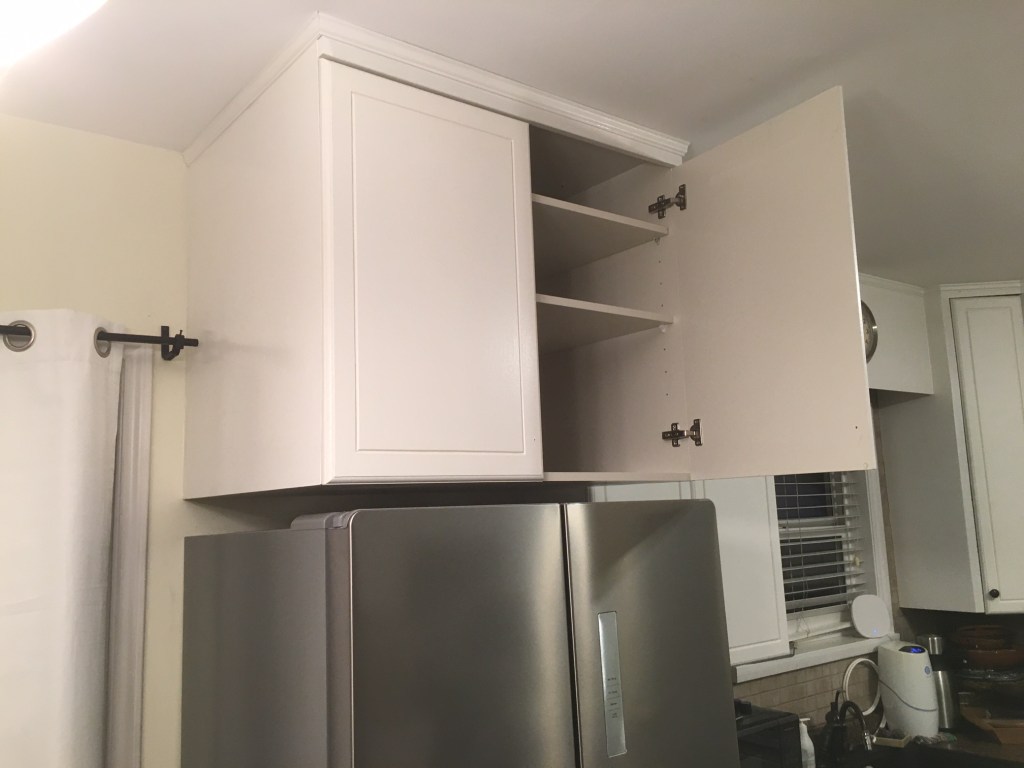
Knobs were added but took awhile to order from Home Depot.
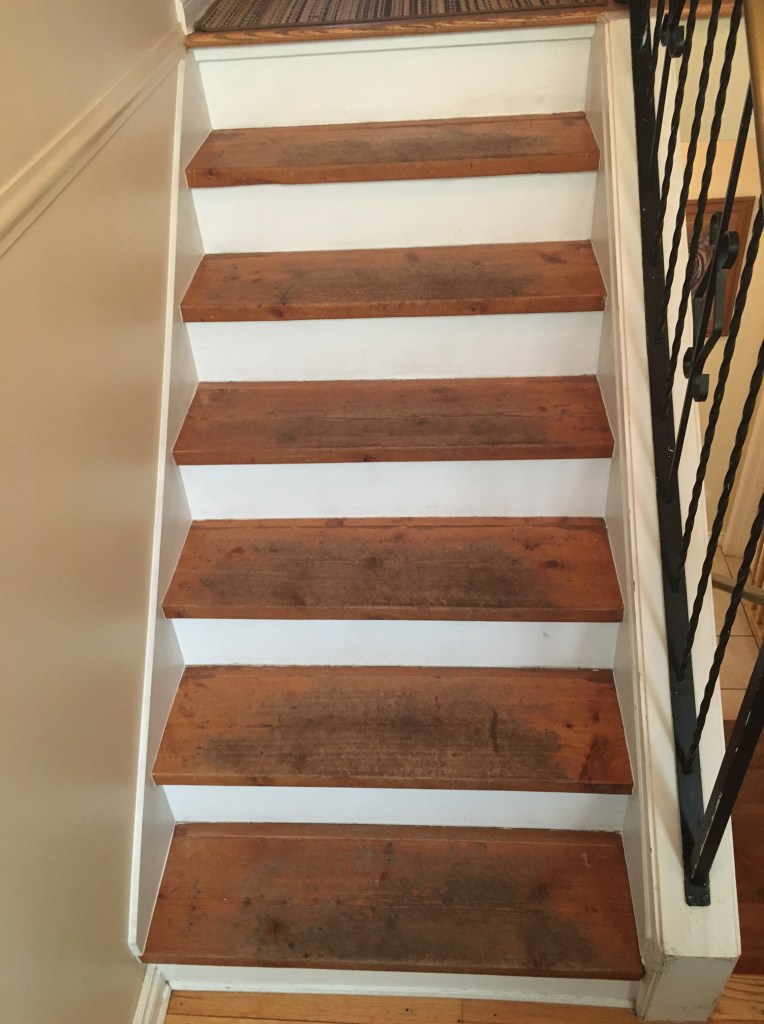
Stair Skirting
Sue had some small gaps between her steps and the walls:
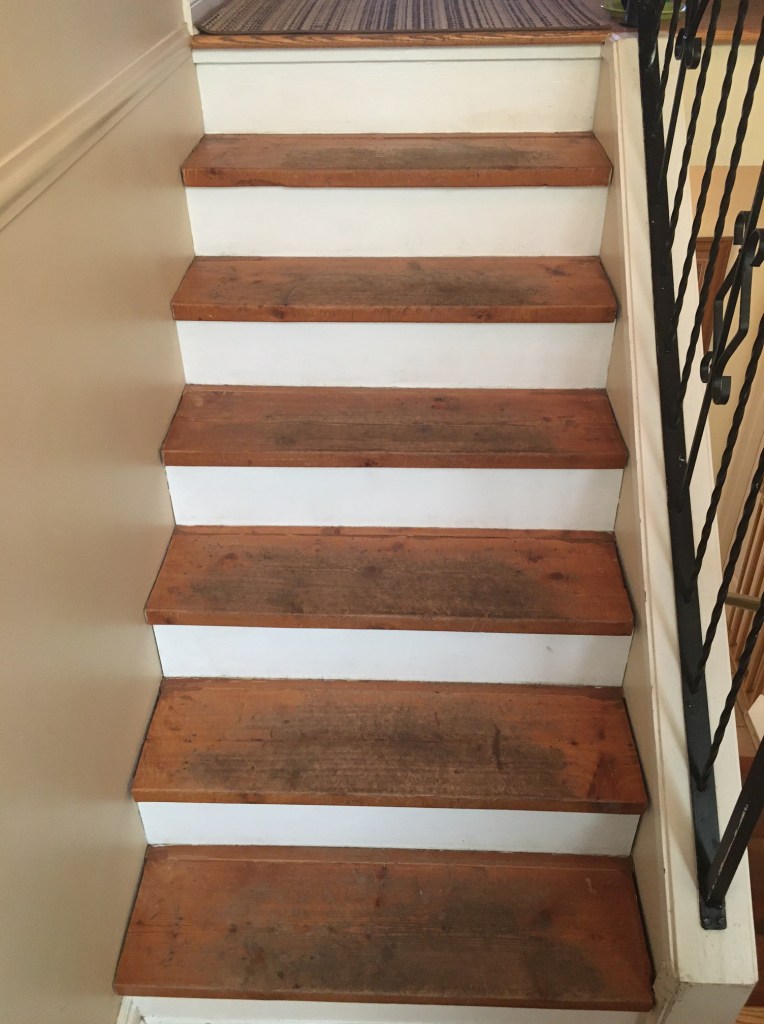
I suggested a small skirt. First I templated it with cardboard and paper and tape:
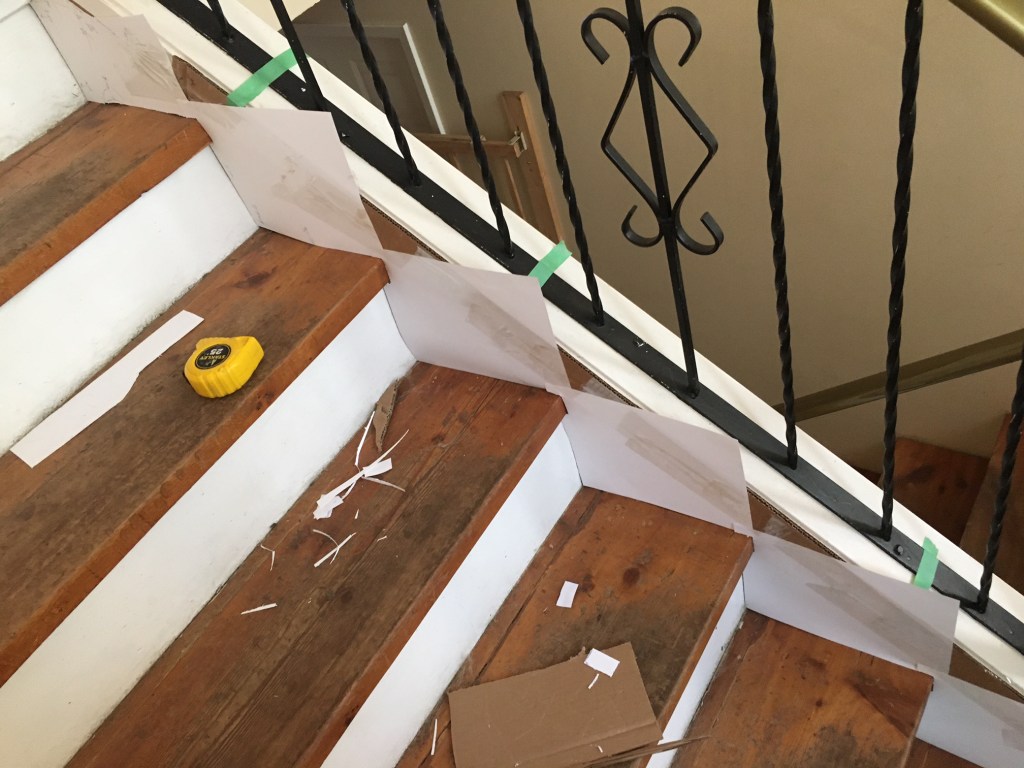
Next I bought a sheet of 1/2″ MDF and ripped it into 8″ strips. I only needed them to be about 6 feet long. I transferred the template onto the boards and cut them at my workshop with a sliding mitre saw and a jigsaw. I gave the top edge a small round and primed them white. Then I installed them (with a few adjustments), secured to the wall with brad nails, and caulked with white Dap.
Big Bad Bathroom Shelf
Pursuant to my previous post about PVC tiles, comes another update in the corner of the bathroom. There was a curved inside wall that my customer didn’t like; and the tiles needed to be covered up. So we put in a shelf. There is some dead space behind to account for the curve in the wall:
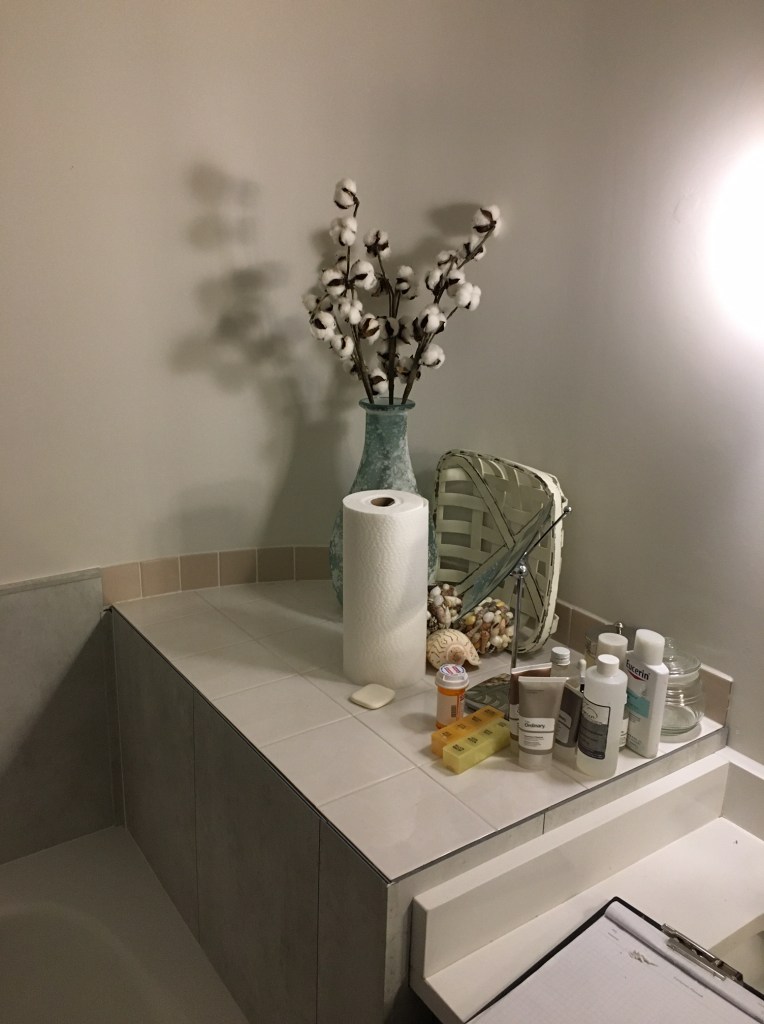
The panel, however, cut out some light so the bath area became darker. An electrician installed some pot lights in the shelf…it does help a bit. Finished off with more mouldings; and Tom will give it the final coat of paint!


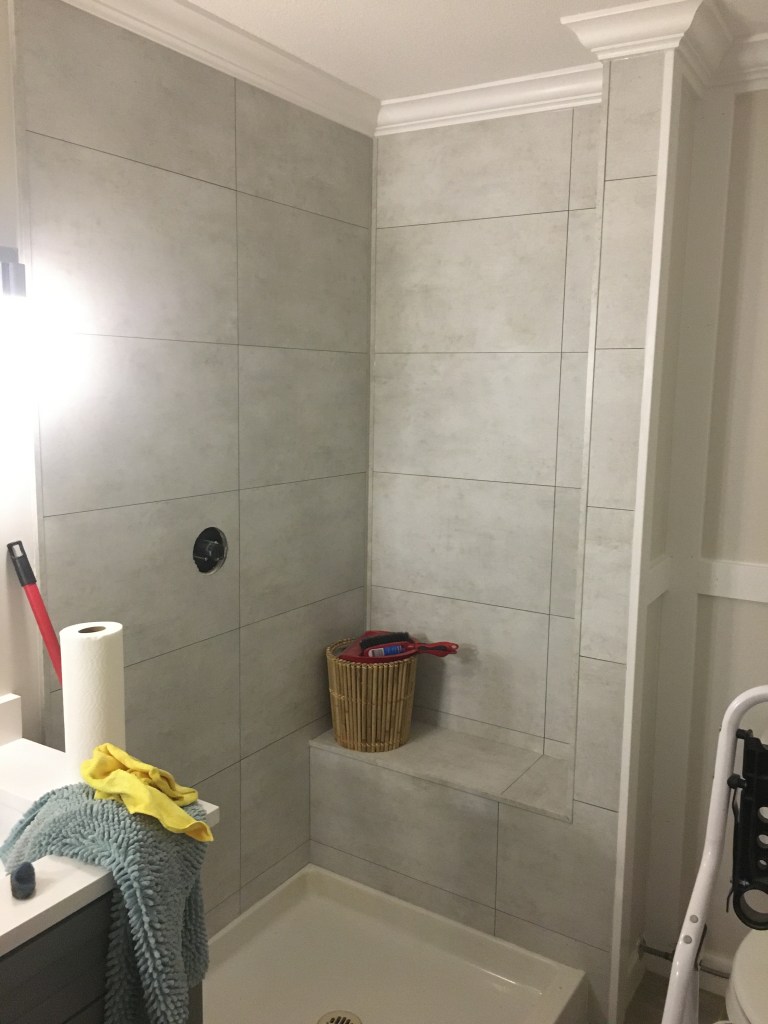
Dumawall tiles over existing tile in bath/shower
Joan wanted to update her bathroom, did some research and ordered a type of PVC tile from Dumawall. I installed them according to the instructions. It was such an easy product to work with – for the first project – the bathtub.

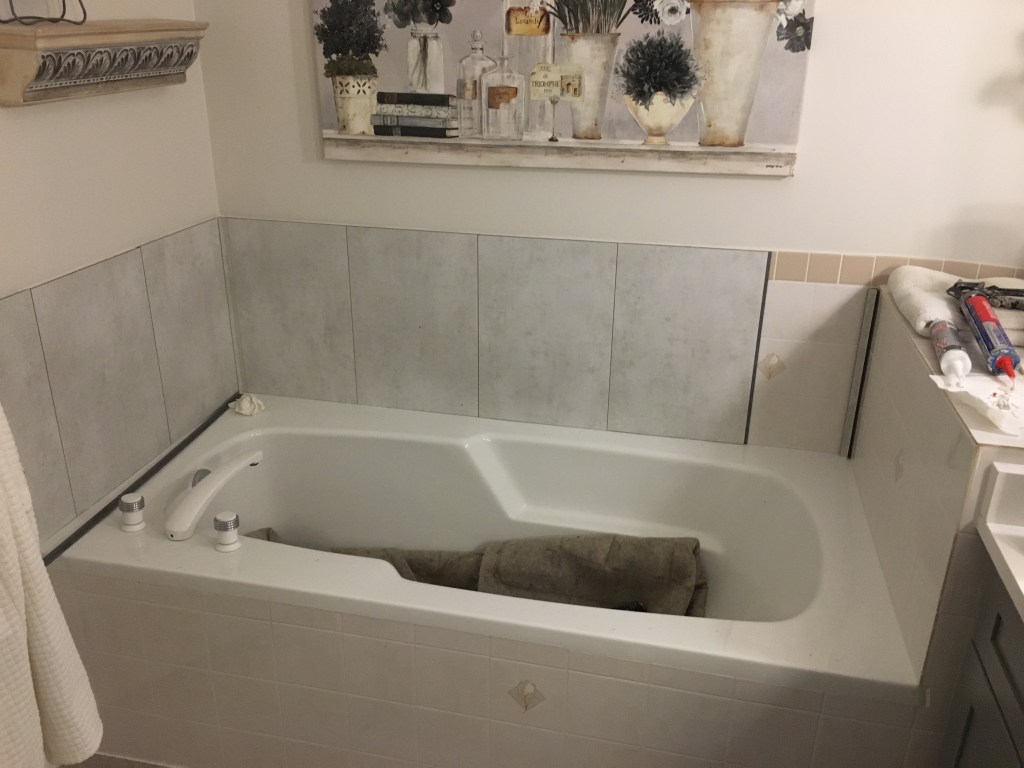
The reason they are so easy is because there is no prep other than to clean the existing tiles. They are glued on with Loctite. No grouting is needed as they interlock, similar to flooring. They provide a kit with inside and outside corners as well.
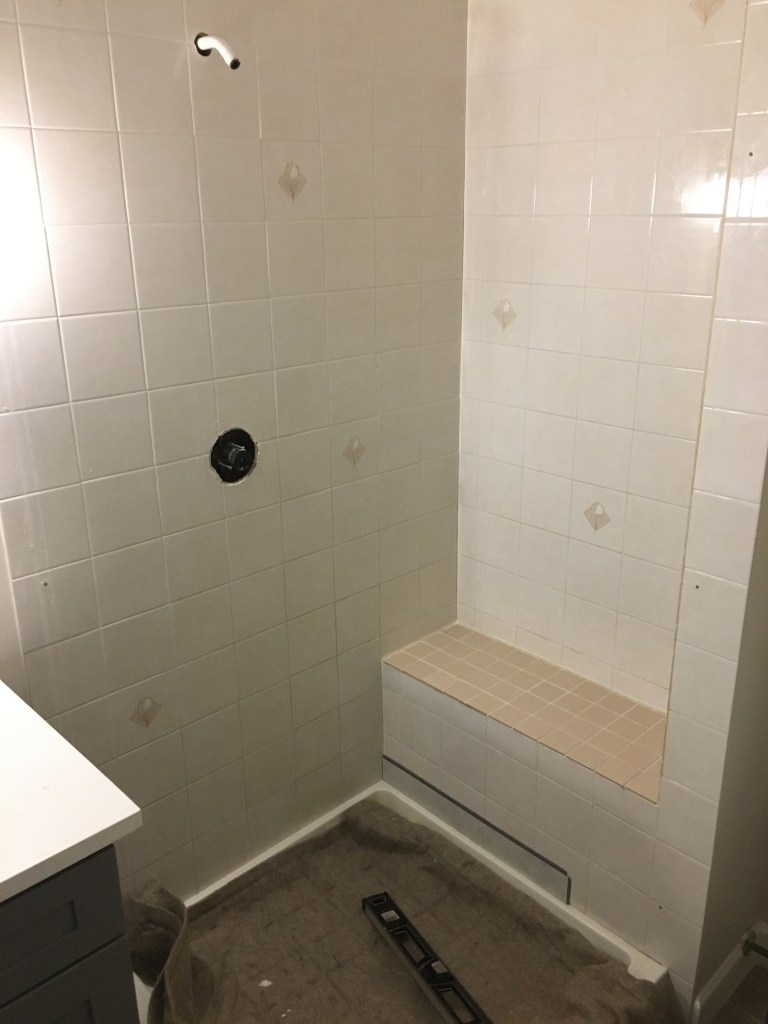
The shower was harder – but only because it had more corners (ie. the bench) and everything had to be levelled so carefully. That is the one issue I can see for DIYers–getting an area like this level. There is not much forgiveness with the 1/16″ gap between tiles–if you are out even an eighth of an inch, it will be very obvious by the time you get to the top of the shower! I put a bead of silicone behind the joints where there would be more water…and made sure to seal all the corners later as well.
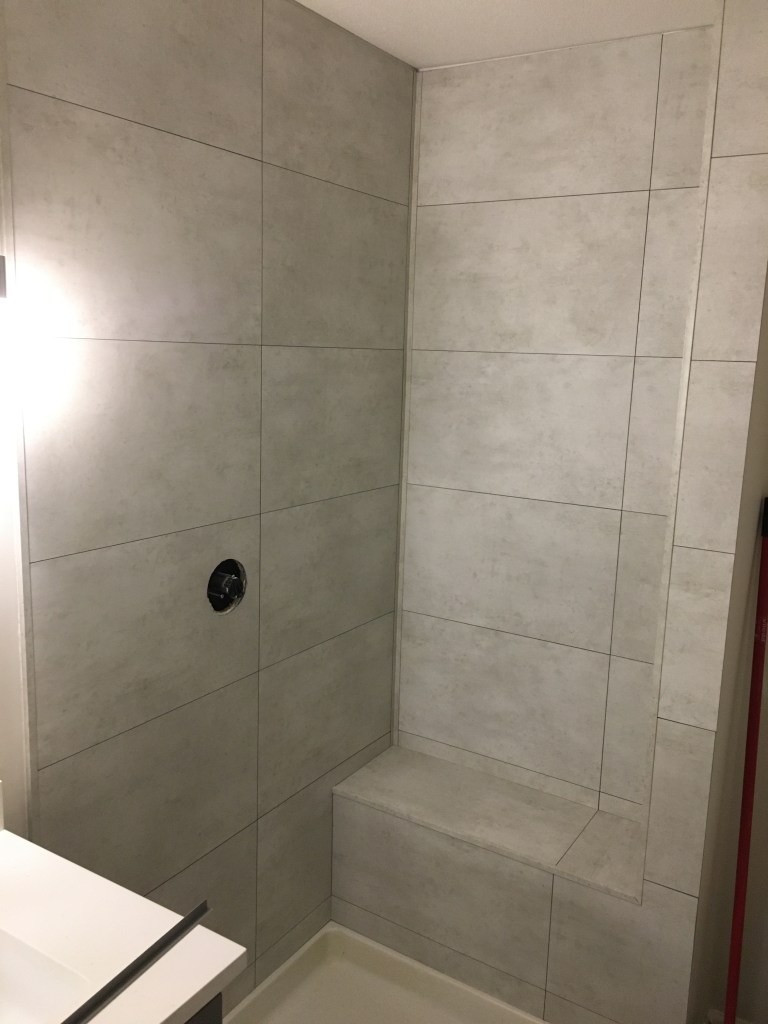
Lastly was some crown moulding 🙂 I don’t necessarily recommend putting it above a shower area, but have seen it done before with no issues, and with plenty of paint and caulking…should be just fine.